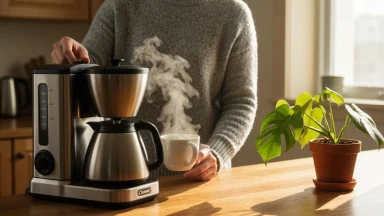
The dream of a perfect espresso at home is a powerful one. That rich, syrupy shot, crowned with a thick layer of golden-brown crema, seems like the ultimate morning luxury. Yet, for many aspiring home baristas, the reality is often a frustrating cup of something either shockingly sour or unpleasantly bitter. It’s easy to blame the machine or the beans, but what if the secret to café-quality espresso lies not in expensive equipment, but in understanding a few basic principles?
Making great espresso is less about owning a specific brand of machine and more about mastering a craft. It’s a delicate dance between science and sensory art, where variables like pressure, temperature, time, and grind size must work in harmony. At its heart, the process is about controlled extraction—using high pressure to pull the best flavors from finely-ground coffee in under 30 seconds. This guide is built on the idea that anyone can learn this skill, transforming a daily routine into a rewarding ritual.
This broad guide will demystify the entire process, from start to finish. We’ll begin by breaking down the required gear you actually need, explaining the critical difference between a burr and blade grinder, and helping you choose the right type of machine for your budget and lifestyle. From there, we’ll dive into the “golden rules” of selecting fresh beans, dialing in the perfect grind, and using the right water. Finally, we’ll walk you through a step-by-step method for pulling your first shot, complete with tips for diagnosing and fixing common problems. By the end, you’ll have the knowledge and confidence to pull consistently delicious espresso in your own kitchen.
Understanding Espresso: More Than Just Strong Coffee
Many people think of espresso as just a tiny, potent cup of coffee, but the difference goes much deeper than size or strength. It’s a common misconception, leading to many frequently made coffee mistakes. What most people miss is that the real secret isn’t the bean or the roast; it’s the entire method of preparation that sets espresso apart.
At its core, espresso is a unique brewing process. Unlike drip coffee, which relies on gravity, espresso is made by forcing a small amount of nearly boiling water through finely-ground coffee beans at high pressure. So what sets it apart? We’re talking about an intense 9 bars of atmospheric pressure or more—over 130 PSI. Think of it like this: drip coffee is a gentle rain, while espresso is a powerful, focused jet.
This method has a surprisingly long history, with Angelo Moriondo of Turin, Italy, patenting the first steam-driven coffee machine in 1884. His goal was to serve coffee faster to customers in his cafes—a very early version of the morning hacks we still value today.
That high-pressure, rapid extraction is what creates espresso’s signature bold flavor, syrupy body, and the iconic layer of rich crema on top. It’s a foundational technique that opens up a whole new world of coffee drinks.
Required Gear for Your Home Espresso Setup
Stepping into the world of home espresso can feel a bit like learning a new language, with all its strange gadgets and technical terms. The truth is, you don’t need a counter full of lab equipment to pull a great shot. What you do need is a few key pieces of hardware that work together. It’s less about having the most expensive setup and more about understanding the role each component plays in the extraction process.
Think of it like building a basic toolkit. You need a hammer, a screwdriver, and a wrench. For espresso, you need a machine, a grinder, and a few accessories. Get these three things right, and you’re 90% of the way to café-quality coffee in your own kitchen.
Choosing Your Espresso Machine: A Quick Comparison
The espresso machine is the heart of your setup, but “the best” one is entirely subjective. It depends on your budget, how much control you want, and how much effort you’re willing to put in each morning. The main differences come down to automation and the learning curve involved.
Manual vs. Semi-Automatic vs. Super-Automatic
Manual machines are for the hands-on purist. With these, you are responsible for everything, including generating the pressure by pulling a lever. This offers unparalleled control over every variable of the shot, but the learning curve is steep. It’s the coffee equivalent of driving a classic car with a manual transmission—difficult to master, but deeply rewarding when you do.
Semi-automatic machines represent the sweet spot for most home enthusiasts. An internal pump provides stable pressure at the touch of a button, but you still control the grind, the dose, and when to start and stop the shot. A survey by the Specialty Coffee Association found that nearly 68% of home espresso users prefer semi-automatic machines for this balance of control and consistency. This is where most people should start.
Super-automatic machines are all about convenience. These “bean-to-cup” wonders grind the beans, dose the coffee, tamp it, and pull the shot with a single command. For those who value speed as part of their daily routine, similar to employing kitchen meal prep secrets, this is a fantastic option. The trade-off is a near-total lack of control over the brewing process and typically a higher price tag.
Grinders: The Unsung Hero of Espresso
Here’s a secret that experienced baristas know: your grinder is more important than your espresso machine. This might sound backward, but a great grinder can make a budget machine perform well, while a poor grinder will ruin a shot from even a top-of-the-line machine. Why is it so vital? It all comes down to creating a uniform particle size to ensure an even extraction.
Burr vs. Blade Grinders
A blade grinder uses a spinning blade to randomly chop coffee beans into pieces of varying sizes. This inconsistency is a disaster for espresso, leading to a shot that is simultaneously sour and bitter. The underrated factor here is that using a blade grinder is one of the most frequent ways people sabotage their morning brew without even realizing it.
A burr grinder, uses two abrasive surfaces (the burrs) to crush beans into a uniform size. You can adjust the distance between the burrs to dial in the perfect fineness for espresso—a consistency where particle sizes vary by less than 100 microns. This non-negotiable step gives the water an even path through the coffee puck, leading to a balanced and flavorful shot.
Beyond the Machine: Must-Have Accessories
Once you have your machine and grinder, a few small tools will make a huge difference in your consistency and workflow. Organizing your station with these items is one of those simple morning hacks for a brighter day that makes the whole process smoother and more enjoyable.
- Digital Scale: Espresso is a game of precision. A scale that measures to at least 0.1 grams allows you to weigh your dose of coffee beans and the yield of liquid espresso, ensuring you can repeat your successful shots. Do not skip this.
- Tamper: This tool is used to compress the coffee grounds evenly in the portafilter basket. A good, heavy tamper that fits your portafilter snugly is primary for creating a level bed of coffee, which prevents water from channeling and causing an uneven extraction.
- Knock Box: This is essentially a reinforced bin for discarding used coffee grounds, or “pucks.” While you can just use your trash can, having a dedicated knock box on your counter is surprisingly satisfying and keeps your workspace clean.
- Milk Frothing Pitcher: If you plan on making lattes or cappuccinos, you’ll need a stainless steel pitcher with a spout. The design helps create the swirling vortex needed to produce silky microfoam.
With your gear selected and your station arranged, the focus now shifts from the hardware to the software. The next step is choosing the right coffee beans, a decision that begins to define the final taste in your cup.
A survey by the Specialty Coffee Association found that nearly 68% of home espresso users prefer semi-automatic machines for this balance of control and consistency.
— Specialty Coffee Association
| Variable | Target Range | Why It Matters |
|---|---|---|
| Dose (Dry Coffee) | 17-20 grams | The foundation of your recipe; consistency here is key to diagnosing other issues. |
| Yield (Liquid Espresso) | 34-40 grams (1:2 ratio) | Controls the strength and overall extraction level of the shot. |
| Extraction Time | 25-32 seconds | A primary indicator of correct grind size and tamping pressure. |
| Water Temperature | 195-205°F (90-96°C) | Too cool leads to sourness (under-extraction); too hot causes bitterness (over-extraction). |
| Grind Size | Fine (like table salt) | The most important variable for controlling the flow rate and extraction time. |
The Golden Rules of Espresso: Beans, Grind, and Water
With your equipment ready, the real artistry begins. Pulling a great shot of espresso is a delicate balance of three core elements: the coffee beans, the grind size, and the water. Getting just one of these wrong can turn a potentially rich and syrupy shot into a bitter or sour disappointment. It’s a bit like a three-legged stool; if one leg is off, the whole thing wobbles.
Surprisingly, many people focus intensely on the machine and overlook these fundamentals. But a $5,000 machine will still produce a terrible espresso if you feed it old beans or improperly filtered water. Your journey to the perfect cup is a practice in paying attention to the details.
Selecting the Right Beans: Freshness is Key
The single most impactful factor in your espresso’s flavor is the freshness of the beans. Look for bags with a “roasted on” date, not a “best by” date. Ideally, you should use beans within four to twenty days of their roast date. After roasting, beans begin to release CO2 and volatile aromatic compounds, which are primary for creating a beautiful crema and a complex flavor profile. Why does this matter so much? Research from the Specialty Coffee Association suggests that ground coffee can lose up to 60% of its aroma within just 15 minutes.
This is one of the most common coffee mistakes home baristas make.
To preserve that freshness, store your beans in an airtight, opaque container at room temperature. Avoid the refrigerator or freezer at all costs. The condensation created by temperature changes can introduce moisture and ruin the beans—a common myth that does more harm than good. A simple canister in a dark cupboard is your best bet.
The Art of the Grind: Finding Your Sweet Spot
Espresso requires a very fine, consistent grind to allow the hot, pressurized water to extract flavor evenly in about 25-30 seconds. If the grind is too coarse, the water will gush through, resulting in a weak, sour, and under-extracted shot. If it’s too fine, the water will struggle to pass through, leading to a bitter, burnt, and over-extracted shot. The goal is to find that perfect middle ground, often described as feeling slightly finer than table salt.
What most people miss is that this “sweet spot” changes with every new bag of coffee, the humidity in your kitchen, and even the age of the beans. Start with your grinder’s recommended espresso setting and be prepared to make tiny adjustments. This process of “dialing in” is a core ritual for any espresso lover, turning a simple routine into one of those simple morning hacks for a better day.
Finally, let’s talk about water. Your espresso shot is roughly 98% water, so its quality directly impacts the final taste. Tap water can contain high levels of chlorine or minerals that create scale buildup in your machine and introduce off-flavors. It’s one of those unbelievable everyday facts how much dissolved stuff is in the water from your faucet. For the best results, use filtered water with a total dissolved solids (TDS) level between 75-150 parts per million (PPM), which provides enough mineral content to enhance flavor without damaging your equipment.
Step-by-Step: Brewing Your First Perfect Shot
With your beans and water sorted, it’s time to pull the trigger. The process of pulling an espresso shot can seem intimidating, but it’s really a sequence of small, manageable steps. Think of it less like complex chemistry and more like following a simple recipe. Get these steps right, and you’ll be well on your way to café-quality coffee in your own kitchen.
This is where theory meets practice. Get ready to get your hands dirty.
Prepping Your Machine and Portafilter
Before you even think about grinding beans, your machine needs to be fully preheated. Most home espresso machines require at least 15-20 minutes to reach a stable temperature. Turning it on right before you brew is one of the most frequent common coffee mistakes to avoid, leading to a sour, disappointing shot. A cold machine simply cannot produce the hot, pressurized water needed for proper extraction.
During this warm-up, lock your empty portafilter into the group head. This ensures the metal heats up along with the machine, preventing the water temperature from dropping when it hits the cold basket. Running a “blank” shot of hot water through the portafilter just before dosing is also a great final step, clearing out old grounds and ensuring everything is at the perfect temperature. Making this part of your routine is one of those simple morning hacks for a brighter day that sets you up for success.
Grinding and Dosing: Precision Matters
Precision is not optional in espresso; it’s a requirement. You’ll need a digital scale that measures to at least a tenth of a gram. Grind your beans immediately before brewing and aim for a specific dose, which is the weight of the dry coffee grounds. For a standard double shot, a dose between 17 and 20 grams is typical.
Weigh the empty portafilter, tare the scale to zero, and then add your freshly ground coffee until you hit your target weight. A 2018 study from the Specialty Coffee Association found that a variance of just 0.5 grams in dose could significantly alter the shot’s taste profile. What most people miss is that consistency in your dose is the first variable you must control to diagnose any issues with your shots later on.
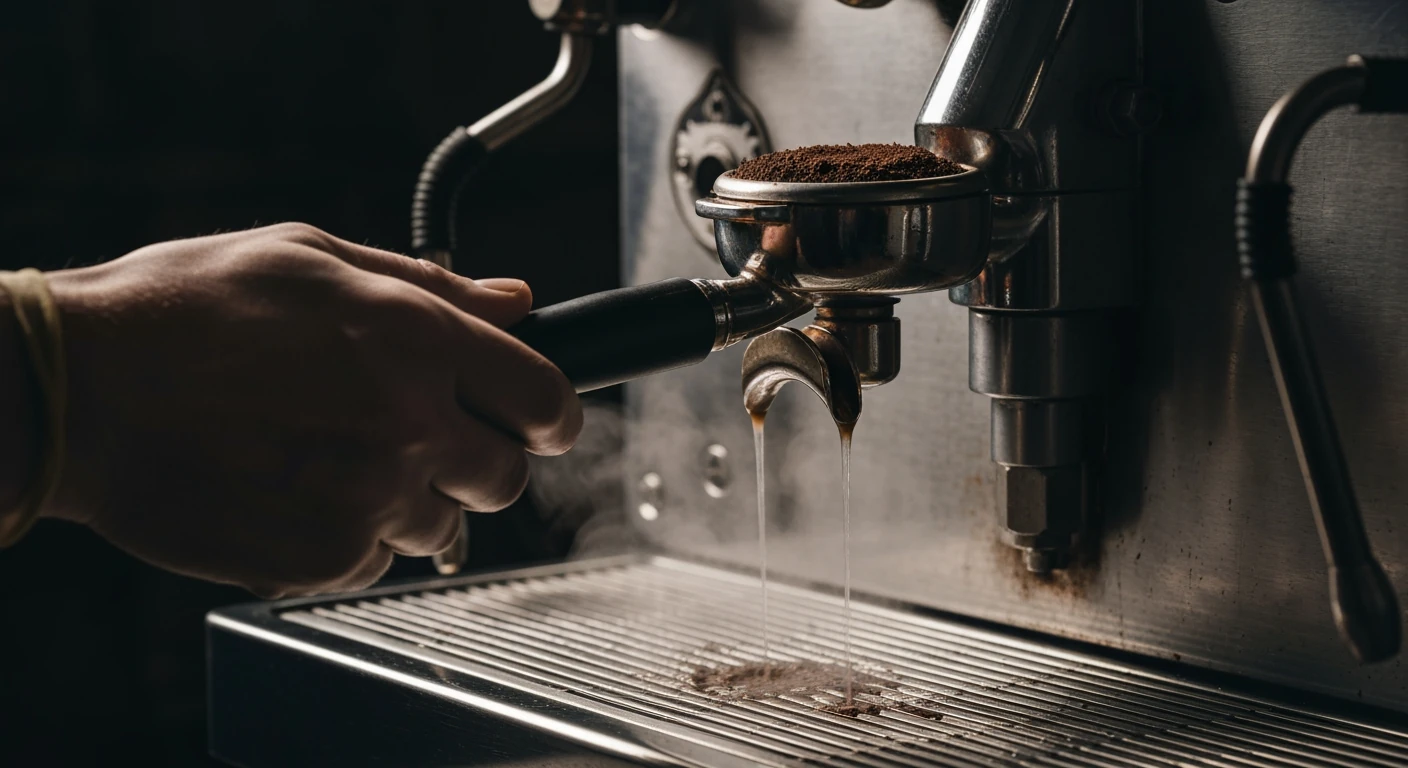
Tamping: The Foundation of a Good Shot
Once your portafilter is dosed, gently settle the grounds into a flat bed. Now comes the tamping. The goal is to create a compact and perfectly level puck of coffee that will provide uniform resistance to the water. An uneven tamp will cause the water to find the path of least resistance, creating a “channel” that results in a poorly extracted shot.
But how much pressure should you apply? The old advice was to press down with 30 pounds of force, but that’s surprisingly hard to judge. The underrated factor here is consistency. Focus on pressing down firmly until the coffee bed stops compressing, and ensure your tamp is perfectly level. It’s a bit like packing brown sugar into a measuring cup — you want it firm and even, not lopsided or loose.
The Extraction Process: What to Look For
With your portafilter locked in, place your cup (on a scale!) underneath and start the shot immediately. The first few seconds will show nothing, then dark, syrupy droplets will appear. These should coalesce into a steady, thin stream that looks like a “mouse tail.” As the shot progresses, the stream will become lighter in color, shifting from a dark reddish-brown to a more golden caramel hue.
Your target is a specific brew ratio, most commonly 1:2. This means for an 18-gram dose of dry coffee, you’re aiming for a 36-gram liquid espresso yield in the cup. The whole process, from pushing the button to hitting your target yield, should ideally take between 25 and 32 seconds. This window is your sweet spot for a balanced extraction.
Recognizing a Perfect Shot vs. Under/Over Extraction
The final taste is the ultimate judge, but you can spot issues visually. If the shot gushes out quickly (under 20 seconds) and the crema is thin and pale, it’s likely under-extracted and will taste sour. This is a sign your grind is too coarse.
Conversely, if the shot drips out slowly (over 35 seconds), looks dark and splotchy, and the final crema is thin and dark brown, it’s over-extracted. The taste will be harsh, bitter, and astringent, a sign your grind is too fine. A perfect shot has a thick, lasting crema the color of hazelnut and a balanced flavor profile that blends sweetness, acidity, and just a hint of bitterness.
Achieving this balance consistently is the real art of the home barista, and it’s a skill that develops with every shot you pull.
Troubleshooting Common Espresso Challenges
You followed every step, but the shot tastes sharp, weak, or just plain wrong. It’s a frustrating moment for any home barista, but these issues are almost always fixable. The culprit is usually extraction, which is the process of water dissolving flavors from your coffee grounds. Getting it just right is one of the most common challenges, but understanding a few brewing mistakes can turn a bad cup into a great one.
Think of it like toasting a slice of bread. Too little time and it’s pale and doughy; too much, and it becomes a piece of charcoal. Your coffee is similar. The key is finding that perfect golden-brown middle ground.
Sour or Under-Extracted Espresso Fixes
A puckering, sour taste is the classic sign of under-extraction. This means the water passed through the coffee grounds too quickly, without enough time to pull out the sweet, desirable flavors. The result is an acidic, thin-bodied shot that lacks depth. Surprisingly, a sour shot can also taste salty.
If your espresso is consistently sour, the water is running through the puck too fast. Here’s how to slow it down:
- Grind Finer: This is the most effective adjustment. A finer grind creates more resistance, forcing the water to spend more time interacting with the coffee.
- Increase Your Dose: Adding slightly more coffee to your portafilter (perhaps 0.5 to 1 gram) can also slow the shot down.
- Check for Channeling: Uneven tamping can create little rivers—or channels—for water to rush through, avoiding proper extraction. Ensure your puck is level and evenly compressed.
Bitter or Over-Extracted Espresso Solutions
On the flip side, an espresso that tastes harsh, bitter, or hollow is likely over-extracted. This happens when the water spends too much time with the coffee, pulling out unpleasant, astringent compounds. According to baristas at the London Coffee Festival, this often occurs when a shot runs for more than 35 seconds, although this isn’t a rigid rule.
This is a sign your shot is running too slowly. You’ve essentially “burnt” the coffee with water. But what’s the fix? You just need to do the opposite of what you’d do for a sour shot.
- Grind Coarser: The most common solution is to make your grind a little coarser. This reduces resistance and allows the water to flow through more quickly.
- Decrease Your Dose: Using slightly less coffee can also speed up your shot time.
- Lower Water Temperature: If your machine allows it, slightly lowering the brew temperature can reduce the extraction of bitter compounds.
Learning to diagnose your shots is a skill that develops with practice. It transforms your morning routine from a chore into a rewarding ritual, setting you up for success with other simple morning hacks. Keep tasting, keep tweaking, and you’ll soon be pulling consistently delicious espresso.
Beyond the Shot: Milk Frothing and Espresso Drinks
Pulling a great espresso shot is just the beginning. The real artistry—and a key part of many uplifting morning routines—begins when you introduce steamed milk. Creating that velvety microfoam is like learning to ride a bike; it feels awkward at first, but soon becomes second nature.
The secret is temperature and technique. You want to introduce air into the milk just until it reaches the temperature of your hand, then submerge the steam wand to create a swirling vortex. This gently heats the milk while breaking down large bubbles into a silky foam. According to the Specialty Coffee Association, the ideal final temperature is between 131-149°F. Overheat it, and you lose that natural sweetness. This is one of the most common pitfalls, so it pays to review tips for avoiding brewing mistakes to get it right.
This skill opens up a world of classic drinks. A Latte is mostly steamed milk with a thin layer of foam over a shot of espresso, while a Cappuccino has equal parts espresso, steamed milk, and a thick cap of airy foam. For those who prefer their coffee without milk, an Americano is simply a shot of espresso diluted with hot water, creating a drink similar in strength to drip coffee but with a different flavor profile.
Once you are comfortable with frothing, you can even attempt some basic latte art. It’s a fun challenge. Just focus on pouring a simple heart or dot to start. It’s all about adding a personal touch to your perfect cup.
Your Espresso Journey Has Just Begun
Mastering the basic espresso shot isn’t the end of the road; it’s the beginning of a much larger, more flavorful journey. Now that you can consistently pull a balanced shot, what’s next? Perhaps you’ll start exploring the subtle flavor differences between single-origin beans from Ethiopia versus Colombia. Maybe you’ll dedicate yourself to the art of steaming milk, chasing that elusive, glossy microfoam required for perfect latte art. You could even begin experimenting with advanced techniques like pressure profiling or different brew ratios to see how they transform the taste in your cup. The perfect espresso is not a fixed destination, but a moving target that makes every morning an opportunity for delicious discovery.
Frequently Asked Questions
What’s the ideal temperature for brewing espresso?
The ideal brewing temperature for espresso is between 195-205°F (90-96°C). This range is notable for properly extracting desirable flavor compounds without scorching the grounds. Water that is too hot will result in a bitter, over-extracted shot, while water that is too cool will produce a sour, weak one.
How often should I clean my home espresso machine?
For optimal performance and taste, you should perform daily, weekly, and monthly cleaning. Flush the group head after each use and wipe the steam wand. Once a week, backflush with a machine-specific detergent to remove coffee oils, and descale your machine every 1-3 months depending on your water hardness.
Can I use pre-ground coffee for espresso?
It is strongly recommended to avoid pre-ground coffee for espresso. Ground coffee loses its volatile aromatic compounds within minutes, leading to a flat, lifeless shot with poor crema. The ability to make micro-adjustments to the grind size is also primary for dialing in a perfect shot.
What’s the difference between a single and double shot of espresso?
The main difference is the amount of dry coffee used, which dictates the final volume and strength. A traditional single shot uses about 7-10 grams of coffee, while a double shot, which is the standard in most cafes today, uses 17-20 grams. This results in a more concentrated and flavorful beverage.
How long does an open bag of espresso beans stay fresh?
For espresso, beans are at their absolute peak between four and twenty days after their roast date. Before this window, they have too much CO2, and after, they begin to taste stale and produce less crema. Store them in an airtight, opaque container away from light and heat to preserve them as long as possible.