That first sip of morning coffee should be a moment of pure satisfaction, a warm and flavorful start to the day. Yet, how often does it fall short, tasting disappointingly bitter, sour, or just blandly ‘off’? You’ve invested in a decent coffee maker, maybe even splurged on beans from a local roaster, but the results are consistently underwhelming. This gap between expectation and reality is a common frustration, leaving many to wonder where they’re going wrong in what should be a simple daily ritual.
The truth is, a perfect cup of coffee is less about owning a single expensive piece of equipment and more about mastering a sequence of small, key steps. Think of it as a four-part harmony: the quality of your beans, the purity of your water, the precision of your grind, and the balance of your brewing ratio. When one of these elements is out of tune, the entire composition suffers. Many of the most common coffee problems don’t stem from a lack of effort, but from following outdated advice or overlooking the simple science behind extraction.
Is storing beans in the freezer really a good idea? Does tap water affect the taste? This guide will demystify the process by systematically tackling the most frequent mistakes that stand between you and coffee perfection. We will break down each critical stage of brewing, from bean selection to final clean-up, providing clear, actionable tips. By the end, you’ll not only understand why your coffee might be failing but also possess the knowledge to consistently brew a cup that rivals your favorite café, right in your own kitchen.
The Foundation: Why Your Beans Matter More Than You Think
We often obsess over grinders, machines, and water temperature, but the simple truth is that you can’t make great coffee from bad beans. It’s like trying to follow a gourmet recipe with subpar ingredients; even the best techniques can’t hide a poor foundation. The journey to a better cup starts long before the water heats up, beginning with the coffee beans themselves. Choosing the right ones is one of the most impactful hacks for a brighter day.
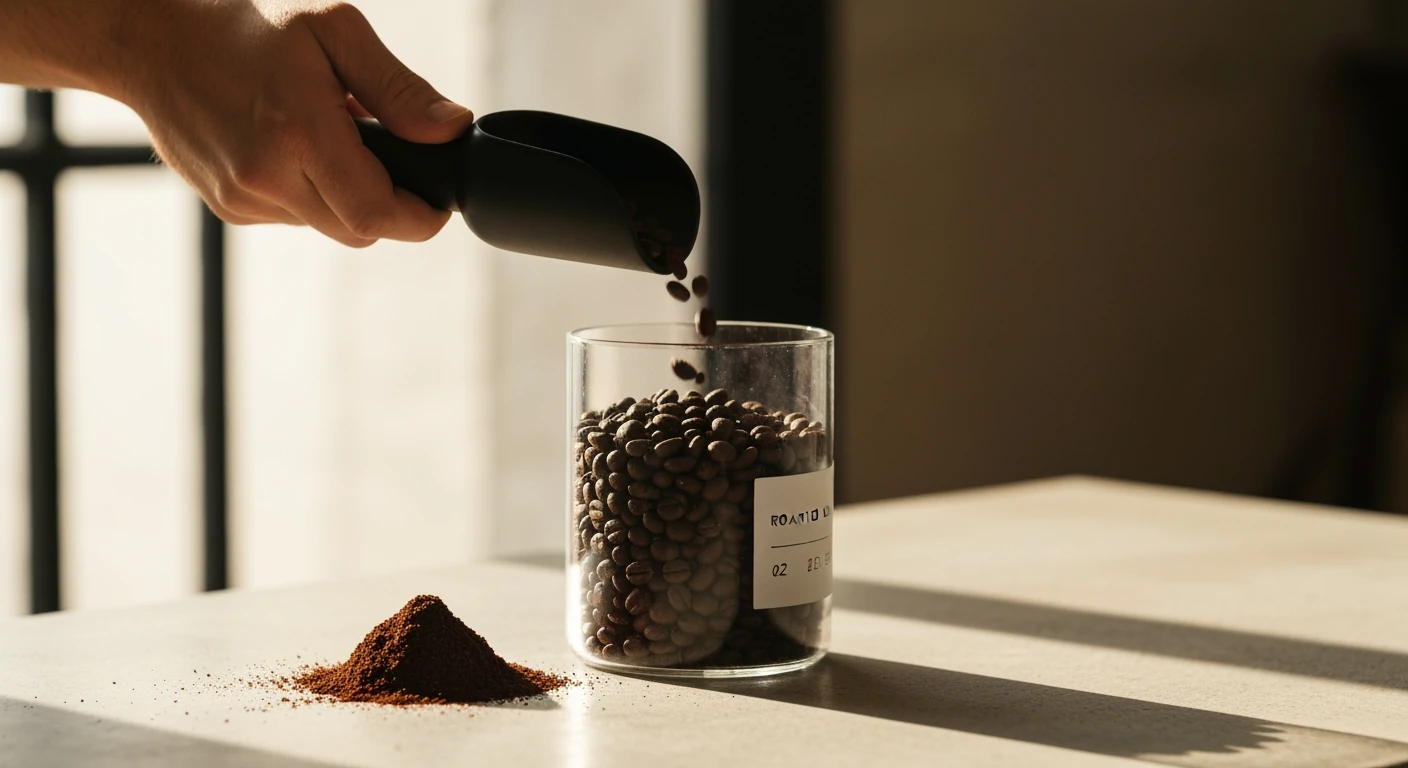
The single most overlooked factor is freshness. Think of coffee beans as produce. They have a peak flavor window. According to coffee experts, whole beans begin to lose significant flavor and aroma just two to three weeks after their roast date. For pre-ground coffee, that timeline shrinks dramatically. One of those unbelievable everyday facts is that ground coffee can lose a majority of its aromatic compounds in under an hour. So, how can you ensure you’re getting fresh beans? Always look for a “roasted on” date, not just a “best by” date, and buy in smaller quantities you’ll use within a couple of weeks.
Your beans are stale.
Beyond freshness, the roast level dictates the core flavor profile of your brew. Light roasts are typically more acidic and retain more of the bean’s original, nuanced flavors—often fruity or floral. Medium roasts offer a balanced flavor and aroma with a fuller body. Dark roasts, feature bold, rich flavors from the roasting process itself, like chocolate and nuts, but with much less of the bean’s original character (and surprisingly, often less caffeine).
Once you bring those perfect beans home, proper storage is required to protect your investment. The biggest enemies of coffee are air, moisture, heat, and light. Your best bet is an opaque, airtight container kept in a cool, dark place like a pantry. This follows the same logic as many other kitchen storage secrets. Please, avoid the refrigerator or freezer—the condensation can ruin the beans faster than you can say “espresso.”
Water Wisdom: The Unsung Hero of Your Coffee Cup
After carefully selecting the perfect beans, many people unknowingly sabotage their brew with the one ingredient that makes up over 98% of the final drink: water. That’s not a typo. Your coffee is almost entirely water, a fact that belongs in a list of unbelievable everyday facts. Thinking of water as just a wet, hot liquid is like thinking of flour as just a white powder for baking; its specific character defines the end result.
Using straight tap water can be a gamble. Depending on your location, it might contain high levels of chlorine or minerals that clash with the delicate flavors of your coffee, resulting in a harsh or chalky taste. On the opposite end of the spectrum is distilled or reverse osmosis water, which has been stripped of all minerals. While it sounds pure, it’s a terrible choice for brewing because it lacks the necessary minerals (like magnesium and calcium) to properly extract flavor, leaving your coffee tasting disappointingly flat.
The sweet spot is filtered water. A simple carbon filter pitcher can work wonders by removing chlorine and balancing mineral content, providing a clean base that allows the coffee’s true character to shine. This simple step is one of those simple morning hacks that can drastically improve your daily routine.
The Right Temperature Range
Water temperature is another critical factor that is often overlooked. Using water that is too hot or too cold can completely ruin an otherwise perfect setup. The Specialty Coffee Association (SCA) sets the gold standard for brewing temperature between 195°F and 205°F (90°C to 96°C). This isn’t just a random suggestion; there’s real chemistry at play here.
Water heated above 205°F will over-extract the coffee grounds, scalding them and pulling out bitter, astringent compounds. The result is a harsh, unpleasant cup. Conversely, water below 195°F is not hot enough to effectively dissolve the desirable flavor solids, leading to under-extraction. An under-extracted coffee often tastes sour, weak, and underdeveloped. Ever had a coffee that just tasted kind of… empty? Low temperature is a likely culprit.
The easiest way to control this is with an electric kettle that has variable temperature settings. If you don’t have one, just bring your water to a boil and let it sit for about 30 to 45 seconds before you pour. It’s a small pause for a much better outcome.
Filtering for Flavor: What to Look For
So, what makes a “good” filter? For most home brewers, the goal is not to create perfectly engineered water but simply to remove the bad stuff while leaving the good. A basic activated carbon filter—like the ones found in popular pitcher systems—is excellent at removing chlorine and other organic compounds that create off-flavors.
For those wanting to get more precise, the key is managing Total Dissolved Solids (TDS), which refers to the mineral content. The SCA recommends a TDS of around 150 parts per million (ppm). Most tap water sits between 200 and 400 ppm, while some hard water can be much higher. A simple filter brings that number down closer to the ideal range. These small adjustments are similar to the secrets of home cooking, where tiny changes in seasoning can make a huge difference.
You don’t need a laboratory to test your water. You can often find your city’s water quality report online, which will give you a good starting point. From there, your taste buds are the best guide. If your coffee tastes consistently great with your filtered water, you’re on the right track.
The gold standard for brewing temperature [is] between 195°F and 205°F (90°C to 96°C). This isn’t just a random suggestion; there’s real chemistry at play here.
— Specialty Coffee Association (SCA)
| Common Mistake | Quick Fix |
|---|---|
| Using Stale, Pre-Ground Beans | Buy fresh, whole beans with a recent “roasted on” date and grind them just before brewing. |
| Incorrect Water Temperature or Quality | Use filtered water heated to between 195-205°F (90-96°C). Let boiling water sit for 30-45 seconds. |
| Wrong Grind Size for Brew Method | Match your grind to your brewer: coarse for French press, medium for drip, fine for espresso. |
| Inconsistent Coffee-to-Water Ratio | Use a kitchen scale to measure. Start with a 1:16 ratio (1 gram of coffee to 16 grams of water). |
| Dirty Brewing Equipment | Rinse equipment after each use and perform a deep clean with a descaling solution regularly. |
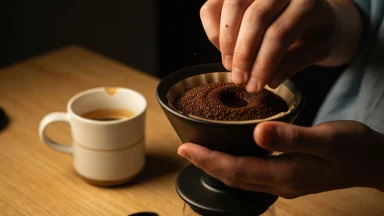
Grind Control: The Secret to Extraction Perfection
After getting your water just right, the next step is arguably the most influential factor in your daily brew: the coffee grind. Think of coffee grounds like spices in a recipe. A whole peppercorn offers a different flavor impact than finely ground pepper, and the same principle applies here. The size of your coffee grounds directly controls extraction—the process of water dissolving flavors from the coffee—and getting it wrong is a fast track to a disappointing cup.
The goal is to achieve an even extraction, where water pulls out the sweet, desirable compounds without grabbing the bitter ones that come later. Grind size is all about managing surface area and contact time. A finer grind means more surface area, leading to a faster extraction. A coarser grind has less surface area, slowing things down. It’s a delicate balance.
Matching Grind to Brew Method: A Quick Reference
There is no single “perfect” grind size; it’s entirely dependent on your brewing device. Using an espresso grind in a French press, for instance, would be a recipe for a muddy, bitter disaster. The key is matching the particle size to the time the water will be in contact with the coffee.
Here’s a simple breakdown:
- Coarse Grind (like coarse sea salt): Best for immersion methods like French press, percolators, and cold brew.
- Medium Grind (like granulated sugar): The go-to for most automatic drip coffee makers, pour-overs like the V60, and siphon brewers.
- Fine Grind (slightly finer than sugar): Used for espresso, Moka pots, and some AeroPress recipes where brew time is very short.
For French Press: Coarse and Consistent
With a French press, the coffee grounds are fully submerged in water for several minutes. According to research from the UC Davis Coffee Center, the typical steep time is around 4 minutes. This long contact period requires a coarse grind. If the grind is too fine, the coffee will over-extract, turning intensely bitter. You’ll also end up with a significant amount of unpleasant silt at the bottom of your cup because the fine particles pass right through the metal mesh filter.
For Drip Coffee: Medium and Uniform
For standard automatic drip machines, a medium grind is the sweet spot. Water passes through the grounds relatively quickly, aided by gravity. A grind that is too coarse will lead to under-extraction, as the water flows through too fast to pick up enough flavor—resulting in a weak, sour brew. Conversely, a grind that’s too fine can clog the filter and cause the water to back up, leading to over-extraction and a bitter taste. Consistency is incredibly important here for a balanced cup, which is why a good grinder is one of the best upgrades for your morning routine.
Burr vs. Blade: Why Your Grinder Matters
Now, let’s talk about the hardware. Not all grinders are created equal, and the difference usually comes down to burrs versus blades. A blade grinder works like a small propeller, randomly chopping and shattering the coffee beans. This method is notoriously inconsistent, creating a chaotic mix of large chunks and fine powder.
A burr grinder, uses two revolving abrasive surfaces (the burrs) to crush beans into a uniform size. It’s more like a pepper mill than a blender. This consistency is what you’re paying for. A quality burr grinder allows you to dial in the precise grind size for your brew method and get repeatable results every single time. While a blade grinder might cost $20, a decent entry-level burr grinder often starts around $100, but the improvement in taste is immediately noticeable.
The Impact of Uneven Grinds
So what really happens when your grind is uneven from a blade grinder? You get the worst of both worlds. The tiny, powdery grounds (often called “fines”) extract very quickly and release bitter, harsh flavors. At the same time, the large, boulder-like chunks under-extract, contributing a sour, undeveloped taste to the cup. The final product is a confusing, muddled brew that is somehow both harsh and weak.
It’s one of those surprising everyday facts that a single batch of grounds can produce opposing flavors simultaneously.
This is why coffee professionals obsess over grind uniformity. According to the Coffee Quality Institute, blade grinders can produce a particle distribution where over 30% of the grounds are the wrong size. In contrast, even basic burr grinders keep that deviation below 15%. This single factor—consistency—separates a great cup of coffee from a merely tolerable one and has more impact than almost any other variable in your brewing process, much like how good knife skills are required for quick and effective home cooking.
Investing in a decent burr grinder is the single most significant step up you can take for your home coffee game, ensuring that the flavors you extract are the ones you actually want.
Brewing Ratios & Time: Finding Your Sweet Spot
After dialing in the perfect grind, the next step involves two variables that work hand-in-hand: the amount of coffee you use and how long it steeps in water. Getting this balance right is like following a recipe; small adjustments can completely change the final dish. Too many people just eyeball the amount of coffee grounds, which is a guaranteed way to get an inconsistent cup day after day.
This is where precision makes a world of difference. Establishing a consistent routine for your measurements is one of the most effective morning hacks for a brighter day. It removes the guesswork and gives you a reliable foundation to build upon.
The Golden Ratio: A Starting Point
Baristas often talk about a “golden ratio” as a universal starting point for brewing. Generally, this falls somewhere between a 1:15 and 1:18 ratio of coffee to water. That means for every one gram of coffee, you would use 15 to 18 grams (or milliliters) of water. Think of this not as a strict rule, but as a trusted baseline from which you can explore.
Using a simple kitchen scale is the best way to achieve this. If you don’t have one, a tablespoon of ground coffee is roughly 5-7 grams. For a standard 12-ounce mug (about 340 grams of water), you’d start with around 20 grams of coffee. This measured approach is similar to the secrets of successful meal prep—consistency is key to getting delicious results every time.
Decoding Over and Under-Extraction
When your coffee tastes “off,” it’s almost always due to incorrect extraction. This happens when the water pulls either too much or too little flavor from the coffee grounds. The time your coffee and water are in contact—the brew time—directly influences this. But how do you know which problem you have?
Under-extraction occurs when the brew is too fast or the water isn’t hot enough. It fails to pull out the sweet, complex compounds, leaving you with a cup that tastes:
- Sour: A sharp, acidic, and sometimes salty taste.
- Weak: Lacking body and feeling thin or watery.
- Undeveloped: The flavor disappears almost instantly.
Conversely, over-extraction happens when the brew time is too long, the water is too hot, or the grind is too fine. The water strips everything from the grounds, including unwanted bitter compounds. A study from the Coffee Quality Institute found that improper brew time is a factor in over 68% of disappointing home-brewed coffee. The result is a cup that tastes overwhelmingly bitter and harsh—and nobody wants that.
The solution is simple adjustment. If your coffee is sour (under-extracted), try a finer grind or a longer brew time. If it’s bitter (over-extracted), use a coarser grind or shorten your brew time. This simple cause-and-effect is one of those unbelievable everyday facts that can completely change your coffee game. Small, intentional changes are the secret to finding your personal “sweet spot.”
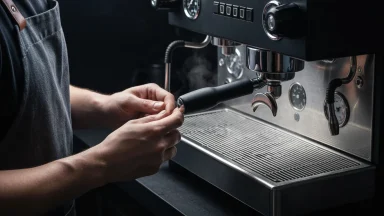
Beyond the Brew: Cleaning and Maintenance for Lasting Flavor
You can perfect your grind size and weigh your beans with scientific precision, but if your coffee maker is dirty, you’re still going to get a disappointing cup. Old coffee grounds and mineral buildup can sabotage flavor faster than anything else. Integrating a simple cleaning schedule is one of the easiest hacks for a brighter morning, ensuring your first sip is always a great one.
What most people don’t realize is just how grimy a brewer can get. A study by public health organization NSF International found that roughly 50% of the tested household coffee reservoirs contained yeast and mold. It’s one of those unbelievable everyday facts that the machine making your fresh coffee might be dirtier than some bathroom fixtures.
This isn’t just about hygiene; it directly affects the taste. Leftover coffee oils turn rancid, introducing a bitter, acrid flavor to an otherwise smooth brew. Hard water minerals also create scale buildup, which can clog the machine and even prevent it from reaching the optimal brewing temperature. Is your coffee suddenly tasting flat or sour? Your machine might need a deep clean.
Keeping your equipment in top shape is just as important as any of our kitchen prep secrets for a happy home. It’s not complicated—in fact, it boils down to a simple routine you can follow without much thought.
- Daily: After you brew, give all removable parts—like the carafe, filter basket, and lid—a quick rinse with hot water. This prevents fresh oils from building up. It takes less than a minute.
- Weekly: Wash those same removable parts more thoroughly with warm, soapy water. This tackles any residue that a simple rinse might miss. If your parts are dishwasher-safe, even better!
- Monthly: It’s time to descale. Run a cycle with a solution of equal parts water and white vinegar (or a commercial descaling solution) to dissolve mineral buildup inside the machine. Follow this with two cycles of fresh water to rinse it all out completely.
Treating your coffee maker with this basic care is like changing the oil in your car; it’s a small act of maintenance that guarantees consistent performance. This final step protects your investment in quality beans and ensures every single cup you brew is as delicious as the last.
From Chore to Craft: Your New Morning Ritual
Ultimately, mastering your coffee isn’t about chasing an elusive, technically perfect cup defined by others. It’s about transforming a mundane routine into a moment of intentional craft. Rather than just pressing a button and hoping for the best, you now have the tools to engage with the process, making small adjustments and tasting the results. What will you do with this knowledge tomorrow morning? Perhaps you’ll finally time your French press, or maybe you’ll simply take a moment to appreciate the aroma of freshly ground beans. The real takeaway is that the five minutes you spend crafting your coffee can become a meditative practice that sets a more mindful and satisfying tone for the rest of your day.
Frequently Asked Questions
How often should I clean my coffee maker?
You should rinse carafes and filter baskets daily. Perform a deeper clean weekly by washing all removable parts with soap and water. To remove mineral buildup, descale your machine with a specialized solution or a vinegar-water mix every 1-3 months, depending on your water hardness.
Does storing coffee in the fridge keep it fresher?
No, this is a common myth that actually harms your coffee. The refrigerator creates condensation, which degrades the beans’ oils. coffee is porous and will absorb the aromas of other foods, so your brew might end up tasting like last night’s leftovers.
What’s the best type of water for brewing coffee?
Filtered water is the ideal choice for brewing coffee. It removes chlorine and other impurities that can create off-flavors, while retaining the necessary minerals like magnesium and calcium that are necessary for proper flavor extraction. Avoid distilled water, as it will produce a flat-tasting cup.
Can I use pre-ground coffee for all brewing methods?
While you can, it’s not recommended for optimal flavor. Different brewing methods require different grind sizes to control extraction time. Pre-ground coffee is typically a medium grind suited for drip machines, which will be too fine for a French press (causing bitterness) or too coarse for espresso (causing a weak shot).
How do I know if my coffee is over or under-extracted?
Taste is your best guide. If your coffee tastes overwhelmingly bitter, harsh, and astringent, it’s likely over-extracted (the water was in contact with the grounds for too long). If it tastes sour, weak, and thin, it’s under-extracted (contact time was too short).