Have you ever watched a barista effortlessly pour a swirling heart or a delicate flower onto your latte and wondered if it was some form of caffeinated magic? That moment of beauty can elevate a simple morning coffee into a small, personal luxury. It feels like an exclusive art form, reserved for those with years of training and access to expensive, commercial-grade equipment. But what if that intricate design was something you could create in your own kitchen?
The truth is, latte art is less about magic and more about science and technique. It’s a skill built on understanding the relationship between two key ingredients: a rich shot of espresso providing the dark canvas, and perfectly steamed milk acting as the liquid paint. While professional gear certainly helps, the core principles are accessible to anyone with a bit of patience and the right knowledge. It’s not about achieving perfection on day one, but about embracing the process of learning a new, satisfying craft.
This guide is designed to demystify the entire process for the absolute beginner. We will walk you through selecting the necessary tools without breaking the bank, from the espresso machine to the all-important milk pitcher. You’ll learn the science behind steaming milk to achieve that elusive, velvety microfoam texture. Finally, we’ll provide clear, step-by-step instructions for pouring the two foundational designs that every aspiring barista must master: the classic heart and the elegant tulip. Get ready to transform your morning coffee from a simple routine into a moment of creative expression.
The Canvas and the Paint: primary Tools for Latte Art
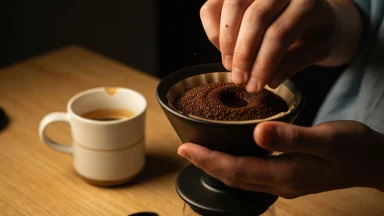
Before you can pour a beautiful rosetta or a charming heart, you need the right tools. Think of your espresso as the rich, dark canvas and the perfectly steamed milk as your paint. Getting these two elements right is the entire foundation of your art. You don’t need a commercial-grade setup to start, as some of the best latte art is born from simple, well-chosen home equipment, which can be one of the most effective hacks for a brighter day.
Choosing Your Espresso Machine
The heart of any latte is the espresso shot. A proper machine will produce a shot with a stable, reddish-brown layer of crema, which is the oily emulsion that holds your design. Without good crema, your milk foam will simply sink and disappear, turning your art into a muddy puddle.
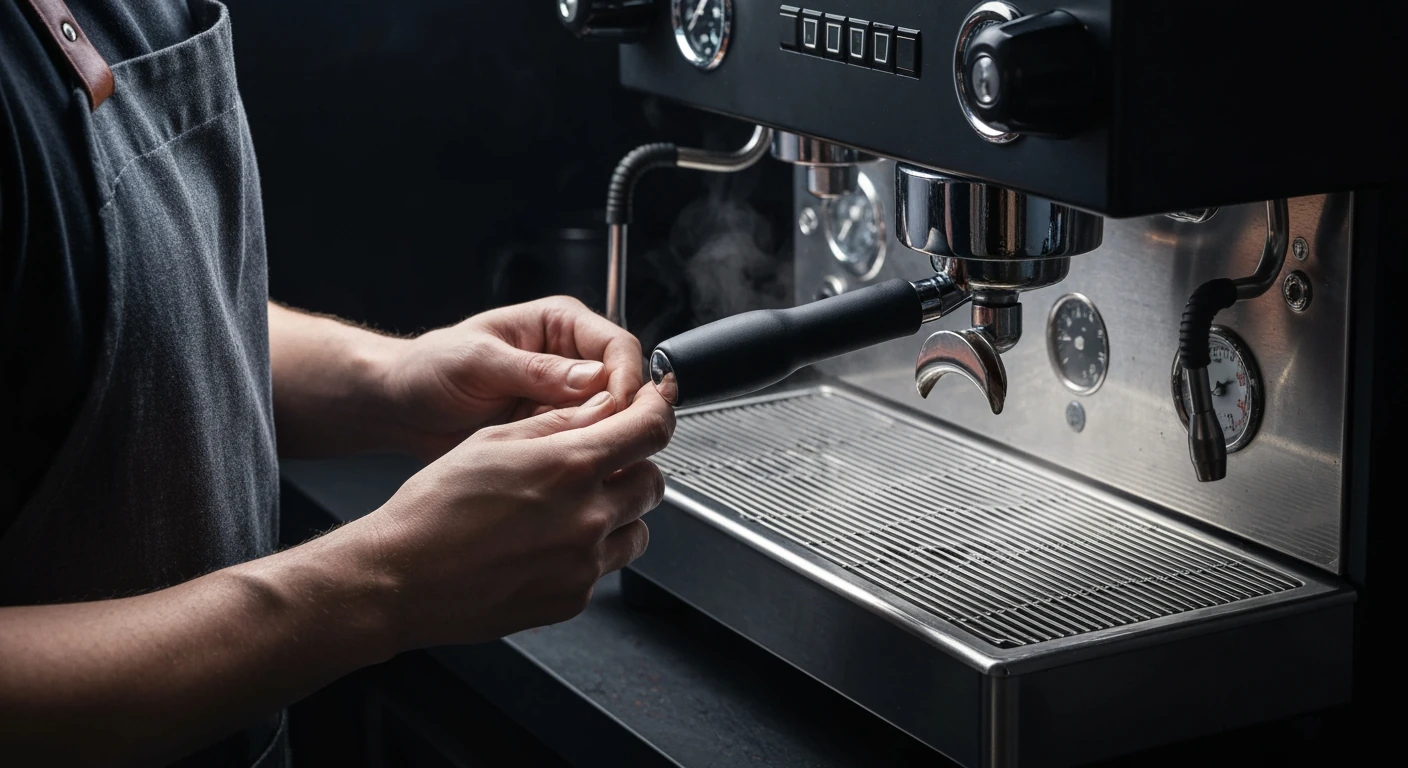
Your machine is the most significant investment.
For home baristas, the choice generally comes down to semi-automatic or super-automatic machines. Super-automatics offer push-button simplicity, but they provide very little control over variables primary for artistic precision. Semi-automatic machines, require you to grind and tamp the coffee yourself, giving you full control over the steam wand and shot. This hands-on approach is exactly what you need to learn how to craft the perfect cup.
The data suggests this control matters. A survey from the Home Brewing Institute found that 58% of baristas who started on super-automatic machines eventually upgraded to gain more creative freedom. Is it more work? Absolutely, but the control you gain is worth every bit of the effort.
The Perfect Milk Pitcher
While the espresso machine gets all the glory, the humble milk pitcher is your primary artistic tool. It’s not just a vessel for heating milk; its shape, size, and spout design directly influence your ability to create silky microfoam and pour with precision. Using the wrong pitcher is one of the most common coffee mistakes that beginners make.
When selecting a pitcher, look for a sharp, well-defined spout, which is non-negotiable for pouring detailed lines. Also, match the size to the drink you’re making—a 12-ounce (350ml) pitcher is perfect for a single 6- to 8-ounce latte. Using a pitcher that’s too large makes it difficult to properly texturize a small amount of milk.
What most people miss is how the pitcher’s balance feels in their hand. A comfortable grip gives you the steady control needed for delicate patterns, a bit like learning to write with a good pen versus a cheap one. You should also stick with stainless steel, as it conducts heat effectively, allowing you to gauge the milk’s temperature by touch. (And let’s be honest—the polished steel just looks fantastic next to your machine.) Getting the right gear from the start helps you build good habits and avoid frustration down the line.
Steaming to Perfection: The Art of Velvety Microfoam
Once you have your stainless steel pitcher, you’re holding the key to what separates a basic milky coffee from a cafe-quality latte: velvety microfoam. This isn’t the stiff, bubbly foam you see on a traditional cappuccino. Instead, it’s a silky, liquid-paint-like texture that integrates perfectly with espresso. The secret lies in creating millions of tiny, uniform bubbles that are so small they are invisible to the naked eye.
Achieving this texture relies on the unique properties of milk. According to data from the Journal of Food Science, the magic happens because of milk’s proteins, specifically whey and casein, which unravel when heated and form stable pockets around air. It’s a delicate process. The goal is a homogenous mixture that pours smoothly and has a glossy sheen, almost like wet paint.
Understanding Milk Temperature
Temperature is not just about making your drink hot; it’s the single most important variable in getting the milk chemistry right. The ideal range for steaming is between 140°F and 155°F (60-68°C). Below this, the foam isn’t stable, and above it, you risk scalding the milk, which creates an unpleasant sulfurous taste from denatured proteins. What many people miss is that the sweetness of the lactose is most perceptible in this specific window.
For beginners, a barista thermometer is a fantastic tool for building consistency. Clip it to the inside of your pitcher and stop steaming as soon as it hits the target. If you don’t have one, you can use the touch method; place one hand on the side of the pitcher and stop steaming when it becomes too hot to comfortably hold for more than a second. Learning to avoid overheating is one of the most common hurdles, and mastering it is a core part of your coffee journey. Many of these small habits are key to avoiding common coffee mistakes that can ruin a perfectly good shot of espresso.
The Steaming Process: Aeration vs. Texturing
Steaming milk is a two-act play: aeration, followed by texturing. The first phase introduces air, and the second integrates that air to create the final silky consistency. Confusing these two steps is where most beginners go wrong. Think of it like folding flour into a cake batter; you can’t just dump it in and stir wildly, you need a gentle, consistent motion to integrate everything without creating lumps.
For the aeration phase, position the steam wand tip just below the surface of the milk. You should hear a gentle, consistent hissing or ripping sound—like paper tearing. This is the sound of air being drawn into the milk. Do this for just a few seconds, until the milk has increased in volume by about 20-30%. The pitcher should feel lukewarm at this point.
One phase creates, the other refines.
Next comes texturing. Plunge the steam wand deeper into the milk, about half an inch below the surface and slightly off-center. This positioning creates a spinning vortex. The vortex is primary; it breaks down any larger bubbles and folds the aerated foam back into the liquid milk, creating that uniform microfoam. Continue this until the pitcher is hot to the touch, and you’re ready to pour over a shot from your machine, which is a skill in itself if you’re aiming for home espresso excellence.
Troubleshooting Common Milk Frothing Issues
Your first few—or few dozen—attempts might not produce perfect results. This is completely normal. Instead of getting frustrated, it helps to diagnose the problem so you can adjust your technique. Most issues fall into two categories: the foam is too bubbly or the milk isn’t getting hot enough, both of which have straightforward fixes.
Too Many Bubbles? Fix It!
If your milk looks more like soap suds from a bubble bath than microfoam, you’ve likely aerated it for too long or kept the steam wand too close to the surface. This introduces large, unstable pockets of air. The fix begins right after you stop steaming. First, give the pitcher a firm tap or two on the countertop to pop the biggest bubbles.
After tapping, immediately start swirling the milk in the pitcher with a confident wrist motion for about 10-15 seconds. This polishes the milk, breaking down smaller bubbles and creating that glossy, homogenous texture you’re looking for. The underrated factor here is confidence in your swirl—a hesitant motion won’t be enough to fully integrate the foam.
Milk Not Hot Enough? Adjust!
Lukewarm milk is another common problem, resulting in a drink that cools down too quickly and foam that separates almost instantly. But why does this happen even when you feel like you steamed it forever? The issue is often starting with milk that isn’t cold enough. If your milk is already at room temperature, you have a very short window to introduce air and create a vortex before it overheats.
The solution is simple: always start with very cold milk, straight from the refrigerator. This gives you more time to properly execute both the aeration and texturing phases. A colder start means a longer steaming time, which translates to better control over the final texture and temperature. This small change can completely alter your results and is a simple habit to adopt into your simple morning hacks for a brighter day. Mastering this tactile feedback is the last step before you can finally start pouring beautiful designs.
Students think latte art is about the pour. It’s not. It’s about the milk. Master the texture of your milk, and the art will follow. The pour is just the final 10% of the work.
— Eliza Chen, Head Trainer at The Barista Institute
| Component | Key Consideration for Beginners |
|---|---|
| Espresso Machine | A semi-automatic machine with a manual steam wand offers the best control for learning. |
| Milk Pitcher | Choose a 12oz (350ml) stainless steel pitcher with a sharp, well-defined spout. |
| Milk Type | Whole dairy milk is easiest to learn with due to its fat and protein content. For non-dairy, use a ‘barista blend’ oat milk. |
| Steaming Temperature | The ideal range is 140-155°F (60-68°C). Use a thermometer initially to build consistency. |
| Core Technique | A two-phase process: brief aeration (hissing sound) followed by texturing (creating a vortex). |
| Practice Method | Use cold water with a drop of dish soap to practice pouring mechanics without wasting milk. |
The Pour: Foundations of Basic Latte Art Shapes
With your perfectly steamed milk ready, you’re at the most exciting step: the pour. This is where art and science combine to create something beautiful in your cup. We’ll start with the two foundational designs every aspiring barista learns: the heart and the tulip. It all begins with understanding how to set your canvas, which is an even mix of milk and a beautifully pulled shot of espresso.
The Initial Pour: Setting the Base
Before any design can appear, you must first create a uniform base. Think of it like applying a coat of primer before you paint a wall; you need a smooth, consistent surface to work on. Start by tilting your cup at about a 45-degree angle and pouring your steamed milk from a height of about 4-6 inches. Pour a steady, thin stream into the deepest part of the espresso pool.
The goal here is to allow the milk to dive underneath the crema, incorporating it without breaking the surface. You’re not trying to make a white mark yet. This high pour mixes the milk and espresso into a lovely caramel color. A report from the Barista Training Institute suggests that over 70% of beginner pouring faults, like washed-out designs, happen because this initial mixing stage is rushed. Keep pouring this way until the cup is about half to two-thirds full. You are now ready for the design phase.
Crafting the Classic Heart
The heart is the quintessential latte art design and, surprisingly, one of the simplest to master once you understand the physics. It’s all about proximity and control. The key is in the transition from the high-pour mixing phase to the low-pour design phase. It feels a bit like a dance. This is the first real pattern you’ll create.
Step-by-Step Heart Design
- After filling your cup about halfway from a high pour, bring the spout of your milk pitcher as close as you can to the surface of the liquid. It should almost be touching.
- Increase your flow rate slightly. As you pour into the center of the cup, a white dot of microfoam will appear and start to expand into a circle.
- Continue pouring into the center of that circle (or “blob,” as it’s affectionately known) until it reaches the desired size, which is usually when the cup is nearly full.
- To finish, reduce the flow of milk, lift the pitcher slightly, and pull the thin stream straight through the center of the circle toward the far edge of the cup. This “pull-through” creates the heart’s point.
What most people miss is the importance of the cup’s tilt. As you fill the cup, you need to gradually bring it back to a level position. If you pour too quickly, you get a chaotic white splash; too slowly, and the design won’t form at all. Many of these issues are common coffee mistakes that are easy to fix with practice.
Attempting the Elegant Tulip
Once you can consistently pour a heart, the tulip is your next challenge. A tulip is essentially a series of stacked pushes, creating layers that resemble petals. It requires more pitcher control and a good sense of timing. Don’t be discouraged if it takes a few tries — even seasoned baristas have off days.
This design is your first step into more complex, multi-part patterns.
Mastering the Tulip Layers
- Begin exactly as you would for a heart: high pour to mix until the cup is about two-thirds full, then bring the pitcher low to the surface to create your first blob of foam. But here’s the twist: stop pouring before the blob gets too big.
- Let the pitcher rest for a second. Then, tilt it again and gently “push” that first blob forward by pouring a second, smaller blob just behind it. The new foam will push the first one into a heart-like shape.
- Repeat this process. You can aim for two, three, or even more layers, depending on your skill and the size of your cup. Each new pour creates another “petal” in the stack.
- For the final step, just like the heart, lift your pitcher and pull the stream through the center of all your stacked layers to create the stem of the tulip.
The underrated factor here is patience between each layer. If you don’t pause, the layers will merge into one large shape. But how do you make this a regular part of your day? Integrating this practice can be one of those simple morning hacks that adds a moment of mindful creativity before the day gets hectic. The key is consistent repetition, turning an ambitious effort into a simple habit.
Practice Makes Perfect: Tips for Consistent Improvement
Your first few latte art attempts will likely look more like abstract blobs than beautiful hearts. That is completely normal. The key to moving from random shapes to intentional designs is consistent, focused practice. It’s a skill built on muscle memory, much like learning a new recipe or perfecting a technique in the kitchen. The underrated factor here is patience, as it can take dozens of pours to get the feel for how the milk and espresso interact.
But who wants to waste all that delicious coffee and milk? A common trick among aspiring baristas is to practice with water and a tiny drop of dish soap. This mixture mimics the texture of steamed milk surprisingly well (and saves you a few dollars). Here’s a quick breakdown:
- The Water & Soap Method: “Steam” cold water with a single drop of dish soap. This creates a foam that you can pour into a cup filled with water and a dash of soy sauce or food coloring to simulate espresso.
- Pros: It’s incredibly cheap, allows for endless repetition, and you can focus solely on your pouring mechanics without worrying about common coffee mistakes.
- Cons: The texture isn’t a perfect 1:1 match for real milk, and you don’t get a tasty coffee at the end.
Making practice a part of your daily routine is the fastest way to see results. Even five minutes of focused pouring each morning can make a huge difference. Consider it one of your new simple morning hacks for a better day.
Ultimately, the goal is to build an intuitive feel for the pitcher’s weight, the speed of the pour, and the height of your hand. None of this can be learned just by reading; you have to do it. As you improve, you’ll find that your hands start to know what to do before your brain even gives the command.
Beyond the Basics: Expanding Your Latte Art Horizons
Once you consistently pour a beautiful heart, you might start wondering what lies beyond that initial success. The simple heart is the gateway to a much wider world of coffee creativity. Moving into more complex designs requires a deeper understanding of milk texture and flow control, but the results are incredibly rewarding, turning your morning ritual into a true art form.
Think of it as learning chords on a guitar. The heart is your first G major; now it’s time to learn the progressions that make a song. These advanced designs test your skills in new ways.
Exploring Etching Techniques
One of the most accessible ways to add complexity is through etching latte art. This technique involves using a pointed tool to draw directly onto the crema and frothed milk after the initial pour. You can start with a simple canvas, like a white circle on top of the espresso, and let your imagination run wild. The best part is that you don’t need expensive equipment to start.
A specialized latte art pen is great, but a clean thermometer probe, a bamboo skewer, or even a simple toothpick works surprisingly well. With your tool, you can drag the white foam into the dark crema and vice-versa. This allows for intricate designs like spiderwebs, flowers, animal faces, and abstract patterns that free-pouring alone can’t achieve. It’s a fantastic way to salvage a less-than-perfect pour — a few strategic lines can turn a blob into an intentional design!
The Challenge of the Rosetta
If etching is drawing, then pouring a rosetta latte art design is pure sculpture. This fern-like pattern is a classic benchmark for any aspiring barista because it requires mastering several skills simultaneously. The motion involves a gentle, rhythmic side-to-side wiggle of the milk pitcher as you slowly move it backward across the cup. It sounds simple, right? The reality is a bit more humbling.
This single design is a detailed test of everything you’ve learned. A study from the Coffee Quality Institute suggests that baristas can take over 100 attempts to pour their first recognizable rosetta, a testament to its difficulty. You need perfectly textured milk, precise control over your pour speed, and the confidence to execute the signature wiggle. Trying to nail this is a great way to avoid common coffee mistakes, as it forces you to perfect your fundamentals.
The journey to pouring advanced latte art designs is a marathon, not a sprint. Each attempt builds muscle memory and refines your instincts. Soon, creating this little moment of beauty will become one of your favorite simple morning hacks for a brighter day, proving that the perfect cup is about more than just taste.
Your Pour Is More Than Just a Pattern
Mastering the heart and the tulip isn’t the finish line; it’s the opening of a door. With these foundational shapes in your muscle memory, the logic of more complex designs like the rosetta, the swan, and stacked tulips begins to feel attainable. Each successful pour builds confidence, turning what was once a source of frustration into a moment of mindful creativity. The real takeaway isn’t just a prettier cup of coffee, but the discovery of a daily ritual that is grounding, artistic, and entirely your own. So, as you look at your next creation, what will you challenge yourself to learn next?
Frequently Asked Questions About Latte Art
What kind of milk is best for latte art?
Whole dairy milk is widely considered the best for learning latte art. Its higher fat and protein content creates a more stable and forgiving microfoam, making it easier to pour designs. For a non-dairy alternative, barista-blend oat milk is the top choice as it’s specifically formulated to steam well and produce a similar silky texture.
Can I do latte art without an espresso machine?
Yes, though it is more challenging. You can create a strong coffee base using a Moka pot or an AeroPress. For the milk, you’ll need a separate frothing tool, like a handheld wand or an automatic milk frother, to create the microfoam. While you can practice the pouring motion, achieving the same level of detail as with an espresso machine’s steam wand is difficult.
How do I clean my milk pitcher after steaming?
Immediately after you pour your milk, rinse the pitcher with cold water. This prevents the remaining milk proteins from cooking onto the hot metal and becoming difficult to remove. For a thorough cleaning, use warm, soapy water and a soft cloth, ensuring you clean the spout area as well.
What’s the difference between a latte and a cappuccino for art?
The key difference is the milk texture. A latte uses ‘microfoam,’ which is steamed milk with a silky, liquid-paint consistency that integrates with the espresso, making it perfect for pouring detailed art. A traditional cappuccino uses a much thicker, stiffer ‘macrofoam’ that sits on top of the espresso in a distinct layer and is not suitable for pouring designs.
How long does it take to learn basic latte art?
With consistent daily practice, most beginners can pour a recognizable heart within a few weeks. The key is repetition to build muscle memory for both steaming and pouring. Mastering more complex designs like the tulip or rosetta can take several months of dedicated effort, so be patient with your progress.