Does the coffee you brew at home ever leave you feeling… underwhelmed? You buy good beans and follow the directions, yet the result is a cup that tastes flat, bitter, or just plain boring compared to your favorite café. It’s a common frustration, but the truth is that a exceptional cup of coffee isn’t the result of a single grand gesture, but the sum of several small, precise details done correctly. The gap between a mediocre brew and a memorable one is often just a few common, easily correctable blunders.
The art and science of coffee brewing revolve around one core principle: extraction. This is the delicate process of using water to dissolve the right flavor compounds from the coffee grounds. Too little extraction and your coffee is sour and weak; too much, and it becomes harsh and bitter. Every variable—from the freshness of your beans and the size of your grind to the temperature of your water and the time it spends in contact with the grounds—plays a critical role in achieving this perfect balance.
Think of it less as a rigid recipe and more as a system of levers you can learn to control. What if you could finally understand why your coffee tastes different every day and gain the power to make it consistently delicious? This guide will demystify the process by uncovering the most frequent mistakes that stand between you and a perfect cup. We’ll walk through each critical step, providing the knowledge and techniques you need to transform your morning ritual from a game of chance into a craft you’ve mastered.
The Foundation of Flavor: Starting with the Right Beans
An amazing cup of coffee begins long before you even think about grinding. The single most important factor is the bean itself. Using old, low-quality beans to make coffee is like trying to bake a prize-winning cake with expired flour; the final product is doomed from the start. Taking the first steps to delicious home cooking always begins with quality ingredients, and coffee is no different.
The two most common players on the global stage are Arabica and Robusta beans. Arabica is prized for its complex, aromatic, and slightly acidic notes, while Robusta packs a heavier punch with nearly double the caffeine and a bolder, earthier flavor. The data suggests an interesting detail — while specialty shops champion 100% Arabica, many traditional Italian espresso blends include a touch of Robusta for a richer crema and a more potent kick.
Freshness, is non-negotiable. What most people miss is how quickly roasted coffee loses its character. According to the National Coffee Association, coffee’s peak flavor is fleeting, starting to degrade just days after roasting. That giant bag of pre-ground coffee you bought two months ago? It’s a shadow of its former self. This is one of those details that’s hard to separate from popular belief, much like other culinary facts and fictions.
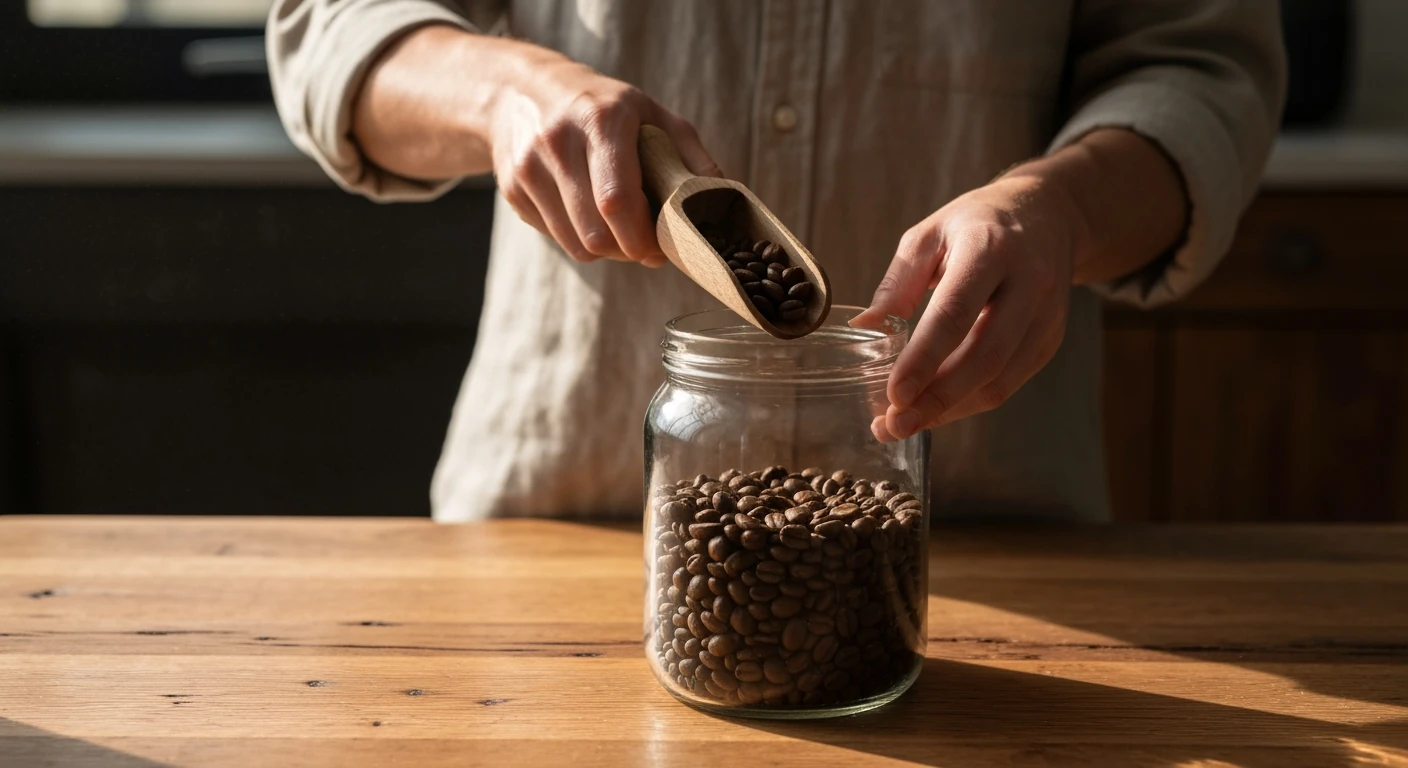
Proper storage is your best tool for preserving that flavor. The enemies are air, moisture, heat, and light. Store your beans in an opaque, airtight container at room temperature—and please, resist the urge to put them in the freezer. Condensation is the fastest way to ruin the delicate oils that carry all that wonderful taste and aroma.
Grind Control: The Unsung Hero of Coffee Extraction
You’ve sourced beautiful, fresh beans, storing them perfectly to protect their delicate flavors. That’s a huge step. But all that effort can be wasted in the final seconds before brewing if you get the grind wrong. The size of your coffee grounds is arguably one of the most critical—and frequently overlooked—variables for a delicious cup.
Why Grind Size Matters So Much
Brewing coffee is all about extraction, the process of dissolving coffee’s soluble flavors into water. The grind size determines the total surface area of the coffee that the water can interact with. Think of it like dissolving sugar in iced tea. A large sugar cube dissolves slowly, while granulated sugar dissolves much faster. Coffee works the same way.
If the grind is too coarse for your brew method, the water passes through too quickly, leading to a sour, weak, and underdeveloped taste known as under-extraction. Conversely, if the grind is too fine, the water takes too long to filter through, resulting in a bitter, harsh flavor from over-extraction. The goal is that perfect middle ground where you extract the sweet, complex notes without the unpleasant ones.
It’s all about consistency.
What most people miss is that a uniform grind size allows for an even extraction across all the coffee particles. A study from the Coffee Quality Institute suggests that inconsistent particle size can increase extraction variability by up to 22%, creating a muddled cup where some grounds are over-extracted and others are under-extracted simultaneously. This creates that confusing flavor you just can’t put your finger on.
Matching Grind to Method: A Quick Reference
Different brewing methods have different contact times between water and coffee, so they require different grind sizes to achieve balanced extraction. Getting this pairing right is core to success. Here’s a general guide to get you started on the right path.
Coarse Grinds for Immersion
For brewing methods where coffee grounds are fully submerged in water for an extended period, a coarse grind is required. This includes the popular French press and cold brew methods. The grind should resemble coarse sea salt or breadcrumbs. The larger particles slow down the extraction process, which is necessary for the long steep times (often 4 minutes for a French press and 12-24 hours for cold brew). Using a finer grind here would result in a muddy, bitter brew that’s difficult to press or filter. It’s a common misconception that finer is always stronger, a topic that reminds me of some common myths in the kitchen we often need to debunk, similar to those discussed in separating culinary fact from fiction.
Medium Grinds for Drip Brewers
This is the workhorse grind for most households. A medium grind, with a consistency similar to table salt, is ideal for automatic drip coffee makers and many manual pour-over brewers like the V60 or Kalita Wave. This size provides the right amount of resistance for water to flow through at a steady pace, extracting flavor evenly without clogging the filter. Ever wonder why your home coffee sometimes tastes watery or weak? An inconsistent or overly coarse medium grind is often the culprit.
Fine Grinds for Espresso and Turkish
When you use pressure or short contact times, you need a very fine grind to compensate. For espresso, the grind needs to be almost like powdered sugar, creating a tightly packed puck that provides resistance against the high-pressure water forced through it. This is what allows for the creation of a concentrated shot with rich crema. For Turkish coffee, the grounds are even finer—like flour—as they are consumed with the coffee itself.
Burr vs. Blade Grinders: Making the Right Choice
So, how do you achieve that consistent grind? The type of grinder you use makes a significant difference. A blade grinder works like a propeller, randomly chopping the beans into a mix of boulders and dust. It’s inexpensive but creates the very inconsistency we want to avoid.
A burr grinder, crushes beans between two revolving abrasive surfaces (burrs) set to a specific distance apart. This method produces a much more uniform particle size. While an entry-level blade grinder can be found for under $25, a quality conical burr grinder often starts closer to $85. I suspect that for many people, this seems like a steep investment just for coffee, but it makes more of a difference than the coffee maker itself. Investing in the right tools is a key first step for any craft, much like learning the basics of delicious home cooking starts with a good knife.
The difference is night and day — not to mention the high-pitched whine of a blade grinder is a rough way to start any morning. Once you get the grind right, you’ll find that controlling the next key variable becomes much easier: the water itself.
For most brewing methods, the sweet spot for water temperature is between 195°F and 205°F (90°C to 96°C).
— National Coffee Association
| Common Mistake | Why It’s a Problem | The Simple Fix |
|---|---|---|
| Using Old or Pre-Ground Beans | Flavor degrades rapidly after roasting and grinding, resulting in a flat, lifeless taste. | Buy freshly roasted, whole beans and grind them just before brewing. |
| Incorrect Grind Size | Causes under-extraction (sour) if too coarse or over-extraction (bitter) if too fine for the brew method. | Use a burr grinder to match particle size to your brewer (e.g., coarse for French press, medium for drip). |
| Wrong Water Temperature | Water that’s too hot (boiling) scorches the grounds, creating bitterness. Water that’s too cool fails to extract flavor, leaving it sour. | Brew with water between 195-205°F (90-96°C). Let boiling water rest for 30-45 seconds. |
| Inconsistent Coffee-to-Water Ratio | Guessing measurements leads to coffee that is unpredictably weak or overwhelmingly strong. | Use a digital scale. A great starting point is a 1:15 to 1:18 ratio (1g coffee to 15-18g water). |
| Skipping the “Bloom” | Trapped CO2 in fresh grounds repels water, leading to uneven saturation and a sour taste. | Pour just enough hot water to wet the grounds, and let them bubble and release gas for 30-45 seconds before the main pour. |
Temperature Tango: Why Water Heat is Key to Taste
After dialing in your grind size, the next variable to master is water temperature. Many people simply use boiling water straight from the kettle, but what most don’t realize is that this can ruin a perfectly good batch of coffee. The brewing process is a chemical extraction, and temperature acts as the catalyst, dictating which flavor compounds are pulled from the grounds and into your cup.
Think of it like making a simple syrup. Cold water won’t dissolve sugar very well, while hot water does it quickly. Coffee is far more complex, with hundreds of compounds that dissolve at different rates and temperatures.
The Golden Range: What’s Ideal?
For most brewing methods, the sweet spot for water temperature is between 195°F and 205°F (90°C to 96°C). This is the official recommendation from the National Coffee Association, based on extensive research into optimal extraction. This range is hot enough to effectively extract the desirable acids, sugars, and oils but just below boiling, which prevents scorching the delicate grounds.
Achieving this temperature is simpler than it sounds. A variable-temperature kettle is a fantastic tool, but a basic kitchen thermometer works just as well. Simply bring your water to a boil, then let it sit for about 30 to 45 seconds before pouring. This brief cooling period typically drops the temperature right into the ideal zone, a great first step in your journey to mastering delicious home cooking skills.
Signs of Temperature Trouble
Your taste buds are the ultimate judge. How do you know if your temperature is off? If your coffee tastes consistently sour, weak, or strangely vegetal, your water is likely too cold. This is a sign of under-extraction, where the water wasn’t hot enough to dissolve the sweeter, more complex flavor compounds, leaving only the fast-extracting sour acids behind.
This is a key point in separating culinary fact from fiction; many assume sourness means the beans are bad, when temperature is often the culprit.
Water that is too hot—especially at a full boil (212°F or 100°C)—causes over-extraction. This results in a bitter, hollow, and often astringent taste, as the intense heat pulls out unwanted bitter compounds from the coffee grounds’ woody structure. The goal is a balanced extraction, and controlling your water temperature is the most direct way to get there. Getting the heat right sets the stage for the next critical factor: how long you let it brew.
Precision in Pouring: Mastering Your Brewing Technique
Once you have perfect water temperature, the next variable to conquer is the physical act of brewing. Much like baking, coffee making is a science where precision pays off in flavor. Simply dumping hot water over grounds is a recipe for a disappointing cup. The way you pour, how much you use, and the timing of each step directly influence whether you get a rich, balanced brew or something weak and sour.
This is where patience becomes your most valuable tool. Rushing the process is a common mistake that leads to under-extraction. It’s not just about getting the coffee wet; it’s about controlling how the water interacts with the grounds over a specific period. Getting this right is what separates an average home coffee from a cafe-quality one.
The Magic Ratio: Coffee to Water Balance
One of the most frequent errors in home brewing is guessing the coffee-to-water ratio. Using a random scoop of coffee with a mug full of water creates wild inconsistency from day to day. For a reliable starting point, the Specialty Coffee Association (SCA) recommends a “golden ratio” of 1:18, meaning one gram of coffee for every 18 grams (or milliliters) of water. For a stronger cup, many prefer a ratio closer to 1:15.
Think of it like a recipe. You wouldn’t just guess the amount of flour for a cake, would you? A digital kitchen scale is an required tool here. Measuring your beans and water by weight removes all the guesswork and ensures you can replicate that perfect cup every single time. This kind of precision is a key first step in many delicious home cooking adventures, and coffee is no different.
It sounds small, but the data suggests this makes a huge impact. A study from the UC Davis Coffee Center found that extraction efficiency can swing by as much as 27% based on ratio alone. That’s the difference between a flavorful brew and watery brown liquid.
The Art of the Bloom: Don’t Skip It!
Freshly roasted coffee beans contain trapped carbon dioxide (CO2). When hot water first hits the grounds, this gas is rapidly released, causing the coffee bed to swell and bubble. This initial phase is called the bloom, and what most people miss is that it’s a critical preparatory step for even extraction.
Skipping it is a huge mistake.
If you start your main pour immediately, the escaping CO2 pushes water away from the grounds, preventing it from properly saturating the coffee. This leads to an uneven, sour-tasting extraction. Allowing the coffee to bloom for 30-45 seconds first ensures the gas has escaped, clearing the way for the water to do its job effectively. It’s a bit like letting bread dough proof before baking — you’re giving the ingredients a moment to prepare for the main event.
Step-by-Step: Perfecting Your Pour-Over
The pour-over method is fantastic for highlighting the subtle flavor notes in coffee, but it demands a steady hand and a bit of practice. Follow these steps to build a consistent and repeatable technique. It’s a process that often requires separating culinary fact from fiction, especially with so many opinions online.
Prepare Your Setup
Before you begin, gather your equipment. You will need a pour-over dripper (like a V60 or Kalita Wave), a paper filter, a gooseneck kettle for controlled pouring, a digital scale, a mug or carafe, and your whole-bean coffee. Place the filter in the dripper and rinse it thoroughly with hot water to remove any paper taste and preheat the vessel. Don’t forget to discard this rinse water!
Initiate the Bloom
Place the dripper and carafe on your scale and add your ground coffee, then tare the scale to zero. Start a timer and pour just enough hot water (typically twice the weight of the coffee grounds) to wet all the grounds evenly. For 20 grams of coffee, you would use 40 grams of water. You should see the coffee bed rise and bubble. Let it sit and “bloom” for about 30-45 seconds.
Steady Pouring Technique
After the bloom, begin the main pour. The underrated factor here is a slow, consistent stream. Using your gooseneck kettle, pour the water in slow, concentric circles, starting from the center and moving outward, then back in. Avoid pouring directly onto the filter paper itself. The goal is to keep the coffee bed level and submerged. Add water in pulses, maintaining a consistent water level until you’ve reached your target water weight—for example, 300 grams of water for 20 grams of coffee (a 1:15 ratio).
The entire brewing process, from the first pour to the final drip, should take between 2.5 and 4 minutes. Adjusting your grind size (finer for slower, coarser for faster) is the primary way to control this brew time. This controlled approach ensures you extract the sweet, desirable flavors without pulling in the bitterness that comes from over-extraction.
Cleanliness Counts: The Hidden Impact of Dirty Equipment
You’ve meticulously sourced your beans, dialed in your grinder, and perfected your water temperature. Yet, your morning cup tastes inexplicably bitter or sour. The culprit is often hiding in plain sight: your coffee maker. This is the single most underrated factor in brewing a consistently great cup.
Failing to clean your equipment is like trying to cook a gourmet meal in a dirty skillet from last night’s dinner. It just doesn’t work. The results will always be compromised, regardless of how good your ingredients are.
Why Residue Ruins Your Brew
Coffee beans are packed with natural oils, which are necessary for creating a rich flavor and aroma. During brewing, these oils, along with microscopic coffee particles, stick to every surface they touch—the carafe, the filter basket, and the internal plumbing of your machine. Over time, this buildup does more than just look gross. Those old oils turn rancid, imparting a harsh, stale flavor to every new batch you brew.
Simultaneously, the leftover coffee grounds will re-extract, introducing an unpleasant bitterness that can overpower even the highest quality beans. How quickly does this happen? A study from the Journal of Food Science suggests that coffee oils can show signs of rancidity in as little as 48 hours. This is one of those surprising kitchen truths that often gets dismissed, but it’s important for understanding flavor—a topic we explore further when we separate culinary fact from fiction in the kitchen.
Your Equipment Cleaning Checklist
Maintaining your gear doesn’t require a huge time commitment, just consistency. Think of it as a small ritual that pays big dividends in taste. Here is a simple schedule you can follow for most common brewers, from automatic drip machines to French presses.
- Daily Tasks: Immediately after brewing, discard the used grounds and rinse the filter basket, carafe, and any other removable parts with hot water. For a French press, make sure to completely disassemble the plunger and screen to rinse away all trapped grounds. This five-minute task prevents the most immediate residue buildup.
- Weekly Tasks: Give all removable components a more thorough wash with warm, soapy water. Run a full cycle with just plain water in your automatic drip machine to flush out any lingering particles from the internal parts you can’t see (a surprisingly effective little trick).
- Monthly Tasks: This is the time to descale your machine. Mineral deposits from your water, known as scale, can build up inside, affecting both temperature stability and water flow. You can run a cycle with a 50/50 solution of white vinegar and water, followed by two full cycles of plain water to rinse thoroughly. These simple habits are foundational, much like the ones in our guide to delicious home cooking for beginners.
This cleaning routine isn’t just about hygiene. It’s the final step that ensures the money you spent on excellent coffee beans isn’t wasted by a dirty brewing environment.
Beyond the Recipe: Developing Your Coffee Palate
Mastering the fundamentals of brewing—bean freshness, grind size, water temperature, and technique—is the foundation for a great cup of coffee. But once you can consistently avoid these common mistakes, where do you go from here? The true journey begins when you move past simply following a recipe and start brewing with intention. The next step isn’t to find the one “perfect” method, but to start experimenting consciously.
Try adjusting one variable at a time. Use the same beans but change the grind size slightly—what happens to the taste? Brew the same coffee at 195°F and then at 205°F. Can you detect the difference in acidity and body? This process of deliberate tinkering is how you develop your palate and learn to dial in a recipe not just for a specific bean, but for your specific taste. The ultimate goal, after all, is not just to make technically correct coffee, but to make coffee that you love.
Frequently Asked Questions About Coffee Brewing
How often should I clean my coffee maker?
For the best taste, you should rinse the carafe, filter basket, and water reservoir after each use. A deeper clean to descale mineral buildup should be performed monthly using a dedicated solution or a vinegar-water mix to prevent clogs and off-flavors.
Does the type of water I use affect my coffee’s taste?
Absolutely. Since coffee is over 98% water, its mineral content has a huge impact. Very hard water can mute delicate flavors, while distilled water can make coffee taste flat. For most people, standard filtered tap water provides the best balance for a clean, flavorful extraction.
What’s the best way to store coffee beans to keep them fresh?
The best method is to store whole beans in an opaque, airtight container at room temperature. Avoid the refrigerator or freezer, as moisture and condensation can quickly degrade the beans’ fragile oils and ruin their complex aromas and flavors.
Can I reuse coffee grounds for a second brew?
It is strongly discouraged. The first brew extracts the vast majority of the desirable flavor compounds, oils, and caffeine. Attempting a second brew will only result in a thin, bitter, and unsatisfying cup that lacks any of the coffee’s original character.
Is it better to grind coffee just before brewing?
Yes, this is one of the most significant upgrades you can make to your coffee routine. Coffee’s aromatic compounds are volatile and begin to dissipate immediately after grinding. Grinding fresh ensures you capture the maximum amount of flavor in your cup.