That first sip of morning coffee can define the entire day. It’s a deeply personal ritual, a moment of quiet focus before the world rushes in. Yet, how often does that carefully prepared cup taste… just okay? You’ve bought the specialty beans and followed the steps, but the result is flat, bitter, or disappointingly weak. The frustration is real, and it often leads coffee lovers down a rabbit hole of expensive new gadgets, believing the next machine will be the one to solve the puzzle.
But what if the secret to a brilliant brew isn’t about buying more, but about understanding more? The path from a raw coffee cherry to the liquid in your cup is a delicate chain of events where small, seemingly insignificant variables have an outsized impact on the final flavor. Most of the common pitfalls that plague home brewing don’t stem from a lack of technical equipment, but from overlooking the basic science of extraction. These are the subtle habits and ingrained myths that quietly sabotage your coffee’s potential.
This guide pulls back the curtain on those very mistakes. We will move beyond generic advice and dive into the five critical areas where most home baristas go wrong: bean freshness, grind consistency, water chemistry, brewing ratios, and timing. By understanding the ‘why’ behind each principle and applying simple, expert-backed fixes, you can transform your daily coffee from a game of chance into a consistent and deeply rewarding craft. Prepare to unlock the flavor you’ve been missing.
The Foundation: Why Freshness Matters More Than You Think
We’ve all had that one cup of coffee that stands out — vibrant, flavorful, and deeply satisfying. The secret behind that memorable brew often isn’t a complex machine or an exotic origin, but something much more basic: bean freshness. What most people miss is that coffee beans are a perishable food product, much like fresh bread or produce. Their peak flavor is fleeting, and preserving it is the first step toward a better morning cup.
This isn’t just coffee snobbery; it’s food science. Once roasted, coffee beans begin a rapid process of degradation, and buying pre-ground coffee only accelerates this decline. The real difference is often found in the simple act of choosing and storing your beans correctly, an area where many common brewing blunders begin.
The Science of Stale: Oxidation Explained
The primary enemy of a fresh coffee bean is oxygen. Through a process called oxidation, oxygen interacts with the delicate oils and soluble compounds within the bean, causing them to break down. This chemical reaction slowly erases the nuanced flavors—the bright citrus notes, the deep chocolate undertones, the floral aromas—and replaces them with a generic, flat, and sometimes rancid taste. Think of it like a cut apple turning brown on the counter; the same basic principle is at play.
How fast does this happen? Surprisingly quickly. Research published in the Journal of Food Science suggests that whole bean coffee can lose as much as 60% of its aromatic compounds within 15 days of roasting. Buying beans roasted weeks or even months ago is like trying to cook an amazing meal with expired ingredients. It just won’t work.
Optimal Storage: Expert Recommendations
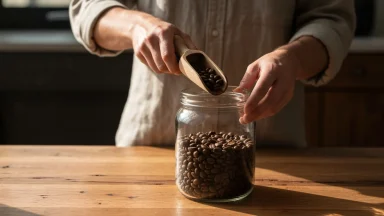
Proper storage is your best defense against the flavor-killing effects of oxygen, light, heat, and moisture. Many well-intentioned coffee drinkers make simple mistakes that sabotage their beans before they even reach the grinder. Some of the most common missteps include storing beans in the freezer (which can damage the oils and introduce moisture), keeping them in a clear glass jar on the counter (exposing them to light), or simply leaving them in the original paper bag after it’s been opened.
According to coffee roasters, the solution is straightforward. “Your goal is to create a stable, dark, and airtight environment,” explains Daniela Valerio, a certified Q Grader. She advises transferring your beans from their original bag into a dedicated container. The ideal storage solution has these key features:
- Opaque Material: Choose a container made of ceramic, stainless steel, or another non-transparent material to block out light completely.
- Airtight Seal: A vacuum-sealed canister or one with a tight-fitting gasket is best for minimizing oxygen exposure. Some even have one-way valves to let CO2 out without letting O2 in.
- Cool, Dry Location: Store the container in a pantry or cupboard away from the oven, dishwasher, or direct sunlight. Consistency is key, much like other culinary facts sometimes get distorted over time.
By treating your coffee beans with the care they deserve, you’re not just storing them—you’re preserving the potential for a brilliant cup. With this foundation in place, the next variable to master is the grind itself.
Grind Control: The Unsung Hero of Flavor Extraction
After you’ve sourced and stored the perfect beans, the next critical step happens just moments before you brew. The size of your coffee grounds directly controls the flavor in your cup. It is the single most powerful variable you can adjust. Think of it like this: grinding coffee is about creating surface area for water to interact with. The finer the grind, the more surface area, and the faster the flavor is extracted.
Getting this wrong leads to disappointment. A grind that’s too coarse for your brew time results in under-extraction, creating sour, weak, and acidic coffee. Conversely, a grind that’s too fine leads to over-extraction, which pulls out bitter, harsh, and astringent flavors. The goal is a balanced extraction, and your grinder is the tool to achieve it.
Matching Grind to Method: A Descriptive Guide
Not all coffee makers are created equal, and they each demand a different grind size for optimal results. It’s a frequent topic when discussing common coffee brewing blunders because the fix is so straightforward once you understand the principle. The amount of time the water is in contact with the coffee determines the ideal grind size. Short contact time requires a fine grind; long contact time needs a coarse one.
Espresso: Fine and Consistent
For an espresso machine, you need a very fine, consistent grind that feels like powdered sugar or fine table salt. Because the brewing process is incredibly fast—typically 25-30 seconds—the hot, pressurized water needs maximum surface area to extract all the delicious solids and oils from the coffee. An inconsistent or slightly-too-coarse grind here will cause the water to rush through, creating a thin, sour shot. It’s a demanding process with little room for error.
French Press: Coarse and Even
The French press operates on the opposite end of the spectrum. Here, the coffee grounds are fully immersed in hot water for several minutes (usually around four). For this method, you need a coarse grind, similar in texture to rough sea salt or breadcrumbs. Why so coarse? A fine grind would over-extract in that amount of time, resulting in a muddy, bitter cup. The coarse grind slows down extraction and also prevents fine particles from passing through the metal filter into your final drink.
The Grinder Debate: Burr vs. Blade
Achieving the right consistency depends entirely on your grinder. The two main types are blade and burr grinders, and what most people miss is that they are fundamentally different tools. A blade grinder works like a propeller, smashing beans into uneven pieces with a spinning blade. This method creates a mix of fine dust and large chunks, making a balanced extraction nearly impossible.
A burr grinder, crushes beans between two revolving abrasive surfaces, or “burrs.” The distance between the burrs can be adjusted to produce a specific, consistent grind size. According to research from the Barista Institute, a quality burr grinder can produce a particle distribution where over 80% of grounds are within the target size range, compared to less than 40% for a typical blade grinder. It’s an investment, but it’s the most significant upgrade you can make to your coffee setup—even more than the brewer itself.
Common Grinding Pitfalls and Solutions
Even with the best equipment, small mistakes can compromise your coffee’s flavor. Many of these issues are similar to other kitchen facts that get twisted over time, becoming ingrained habits that are hard to break. Fortunately, the solutions are simple.
- Grinding Too Far in Advance: Coffee begins to lose its volatile aromatic compounds within minutes of being ground. For the freshest taste, grind your beans immediately before brewing. Grinding the night before might save you 60 seconds in the morning, but it costs you a significant amount of flavor.
- Not Using a Scale: Measuring coffee with a scoop is inconsistent. Different beans have different densities and sizes. Using a simple digital scale to measure your beans before grinding ensures you are using the same amount of coffee every time, making your results repeatable.
- Ignoring a Dirty Grinder: Old coffee grounds and oils can accumulate in your grinder, turning rancid and imparting stale flavors to your fresh beans. Clean your grinder regularly—at least once a month—by either using specialized grinder cleaning tablets or by grinding a small amount of uncooked rice (check your manufacturer’s instructions first!) to absorb old oils.
Mastering your grind is less about finding a single “perfect” setting and more about learning how to adjust it for different beans and methods. It’s the path from simply making coffee to crafting it.
Coffee beans vary in density and size. A scoop of dark roast, which is less dense, will weigh significantly less than a scoop of light roast.
— Marco Bellini, Lead Trainer, San Francisco Barista Academy
| Common Mistake | Why It Ruins Your Coffee | The Expert Fix |
|---|---|---|
| Using Old or Pre-Ground Beans | Volatile flavor and aroma compounds degrade rapidly after roasting and grinding, leading to a flat, stale taste. | Buy whole beans with a recent “roasted on” date. Store in an opaque, airtight container away from heat and light. |
| Incorrect Grind Size | A grind that’s too coarse leads to sour, under-extracted coffee. Too fine, and it becomes bitter and over-extracted. | Match your grind size to your brew method (e.g., coarse for French Press, fine for Espresso). Use a quality burr grinder for consistency. |
| Ignoring Water Quality & Temperature | Tap water with chlorine can spoil flavor. Water that’s too hot (boiling) scorches the grounds, causing bitterness. | Use filtered water heated to between 195-205°F (90-96°C). Let a boiling kettle sit for 30-60 seconds before pouring. |
| Inconsistent Ratios (Eyeballing) | Measuring by scoops is inaccurate due to varying bean densities, leading to brews that are either weak or overpowering. | Use a digital kitchen scale to measure a consistent coffee-to-water ratio by weight. A good starting point is 1:17 (1g coffee to 17g water). |
| Grinding Beans in Advance | Ground coffee loses a significant amount of its aromatic compounds within minutes, drastically reducing flavor. | Grind your beans immediately before you start the brewing process for the most vibrant and flavorful cup possible. |
Water Wisdom: The Overlooked Ingredient
We obsess over beans and grind size, but what component makes up over 98% of your final cup? It’s water. Using straight tap water is one of the most frequent common coffee brewing blunders, as its chlorine and other contaminants can easily spoil the taste of premium beans. You don’t need fancy bottled water; a simple carbon filter pitcher often does the trick.
Temperature is just as vital. The Specialty Coffee Association recommends a water temperature between 195°F and 205°F (90°C to 96°C) for optimal extraction. Using water that’s boiling hot will scorch the coffee grounds, resulting in a bitter, unpleasant flavor. Never pour straight from a boiling kettle.
The underrated factor here is water hardness, which refers to its mineral content. Water that is too “hard”—with high levels of calcium and magnesium—can mute the coffee’s delicate acidic notes. using distilled water with no minerals at all (a surprisingly common mistake) can lead to a flat, sour brew. It’s a bit like seasoning a dish; you need just the right amount to enhance the main ingredients, a concept that separates culinary fact from fiction.
Achieving that perfect balance of minerals allows the coffee’s true character to shine through, turning a good cup into a great one.
The Golden Ratio: Mastering Coffee-to-Water Proportions
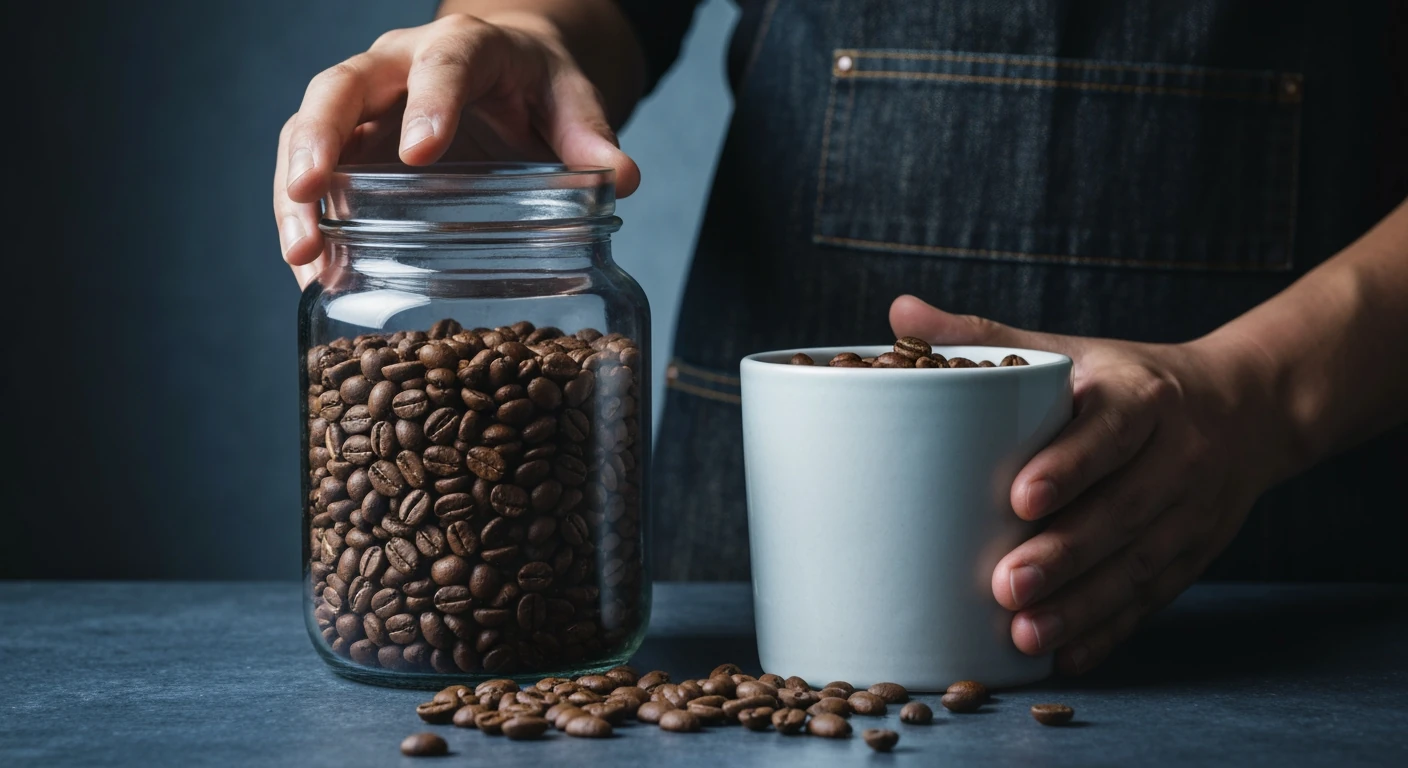
If you’ve ever wondered why your home-brewed coffee sometimes tastes amazing and other times falls flat, the answer often lies in simple math. The secret weapon of every great barista is a consistent coffee-to-water ratio. This isn’t about complex chemistry; it’s about balance. Think of it like baking a cake—too much flour or not enough sugar throws the entire recipe off. Coffee works the exact same way.
Getting this balance right ensures proper extraction, the process of dissolving coffee solids into water. Too little water (a “tight” ratio) can lead to a sour, under-extracted cup. Too much water (a “loose” ratio) results in a weak, watery brew. The sweet spot is what the coffee community calls the “golden ratio.”
Understanding the Standard Brew Ratios
The Specialty Coffee Association (SCA) suggests a common starting point, often referred to as the golden ratio coffee standard, which is approximately 1:18. This means for every 1 gram of coffee, you use 18 grams (or milliliters) of water. the acceptable range is quite broad, typically falling between 1:15 and 1:18 depending on the brewing method and personal preference. It’s one of those culinary facts that sounds rigid but actually has a lot of flexibility.
Why such a specific range? A study published in the Journal of Food Science found that extraction yields between 18% and 22% are perceived as ideal by most tasters. Ratios within the 1:15 to 1:18 zone are the most reliable path to hitting that target. This is your baseline for delicious coffee.
By Weight: The Barista’s Preference
Ask any professional barista and they will tell you to measure your coffee and water by weight using a digital scale. This method is superior for one simple reason: consistency. Marco Bellini, a lead trainer at the San Francisco Barista Academy, explains, “Coffee beans vary in density and size. A scoop of dark roast, which is less dense, will weigh significantly less than a scoop of light roast.” Using a scale removes that guesswork entirely.
Measuring by weight ensures that 20 grams of coffee is always 20 grams of coffee, regardless of the roast level or grind size. It’s the single most effective change you can make to improve your daily brew—no fancy equipment required, just a simple kitchen scale.
By Volume: A Simpler Approach
Of course, not everyone has a digital scale handy, especially when traveling or in a hurry. Measuring by volume—using scoops for coffee and measuring cups for water—is a more accessible method. The standard is often cited as two level tablespoons of ground coffee for every six ounces of water. This is a decent starting point for beginners who want to whip up something wonderful without fuss.
But be warned: this approach has its flaws. The volume of ground coffee can be inconsistent, and “a scoop” is a notoriously vague unit of measurement. It’s a workable solution, but if you’re chasing that perfect cup, the lack of precision will eventually become a frustrating variable.
Precision Tools for Perfect Proportions
To master your brew ratio, a digital scale is valuable. Look for one that measures in 0.1-gram increments for maximum accuracy. Many coffee-specific scales also include a built-in timer, which is incredibly helpful for pour-over methods like the V60 or Chemex. These tools take the ambiguity out of the process.
Another helpful tool is a gooseneck kettle, especially one with temperature control. While it doesn’t directly measure proportions, it allows you to control the flow rate of your water, ensuring an even and consistent extraction. This level of control is one of the key differences between an average cup and a memorable one.
Adjusting for Taste: Finding Your Sweet Spot
The golden ratio is a guide, not a gospel. The underrated factor here is your own palate. Do you prefer a bolder, more intense flavor? Try a tighter ratio like 1:15 or 1:16. If you enjoy a lighter, more delicate cup, you might lean towards 1:18. The type of bean, roast level, and even grind size all influence the final taste.
Don’t be afraid to experiment. This is where the real fun begins. Brew a cup at 1:15 and another at 1:18, tasting them side-by-side. Keep a small log of what you tried and what you liked. Eyeballing your measurements is one of the most common coffee brewing blunders, but actively adjusting a measured ratio is how you perfect your technique.
Ultimately, the perfect ratio is the one that tastes best to you. Use the established standards as your starting line, not the finish line.
Beyond the Brew: Cleaning and Maintenance for Lasting Flavor
You can perfect your grind size and nail the golden ratio, but if your coffee machine is dirty, your efforts are for nothing. What most people miss is that the biggest flavor killer isn’t the beans or the water temperature; it’s the invisible residue left behind from previous brews. Neglecting your equipment is one of the most frequent yet easily fixed common coffee brewing blunders an enthusiast can make.
Think of the inside of your coffee maker like a highway during rush hour. Over time, it gets clogged. This isn’t just from coffee oils, which can turn rancid and impart a bitter, stale taste, but also from mineral deposits.
The Hidden Culprit: Mineral Buildup and Residue
If you live in an area with hard water, your machine is constantly battling limescale. According to the U.S. Geological Survey, approximately 85% of homes in the country have some level of hard water, containing minerals like calcium and magnesium. These minerals build up inside the heating elements and tubing, forcing your machine to work harder and often failing to reach optimal brewing temperature. This is a recipe for under-extracted, sour coffee.
This buildup, known as scaling, not only affects flavor but can shorten your machine’s lifespan by 30% or more, according to appliance repair technicians. The old coffee residue is just as problematic, creating an oily film that taints every new batch with the ghost of yesterday’s brew. It’s a simple part of kitchen hygiene that has a huge impact, much like cleaning your tools is a key step in delicious home cooking.
Your Cleaning Checklist: Daily, Weekly, Monthly
Establishing a simple cleaning routine prevents these issues from ever taking hold. It doesn’t require a huge time commitment, just consistency. A little care goes a long way.
- Daily: After your last cup, discard the used grounds immediately. Rinse the filter basket and the carafe with warm water. Wiping these parts down prevents oil from building up and solidifying.
- Weekly: Wash the carafe, lid, and filter basket with warm, soapy water. Use a soft brush to scrub away any stubborn oils. Wipe down the exterior of the machine and the warming plate to remove any splashes or dust.
- Monthly: It’s time to descale. This process removes the internal mineral buildup. You can use a commercial descaling solution or a mixture of equal parts white vinegar and water. Run a full brew cycle with the cleaning solution, followed by two full cycles with fresh water to rinse it out completely.
When choosing a cleaning agent, many people debate the merits of vinegar versus specialized products, a classic case of separating culinary fact from fiction. Vinegar is inexpensive and effective, but it can leave a lingering odor if not thoroughly rinsed — and some manufacturers warn it can be too harsh on certain internal components. Commercial descalers are formulated specifically for coffee machines, often work faster, and rinse cleaner. Check your machine’s manual for recommendations.
Cultivating Your Palate: Tasting Notes and Experimentation
With your equipment sparkling clean, you are finally set up to taste your coffee. Developing your palate isn’t about being pretentious; it’s about paying attention and learning what you enjoy. The first step is simply to slow down and consider what you’re tasting beyond just “coffee.” Is it bitter, sweet, acidic, or earthy? Thinking about these basic profiles is the foundation of tasting like a pro.
Many people feel intimidated by the flavor notes listed on a bag of beans. But what most people miss is that these aren’t added flavors. According to the Specialty Coffee Association, a single coffee bean contains over 800 aromatic compounds. When a roaster lists “notes of blueberry,” they’re identifying a specific aroma you might recognize, a bit like debunking other food myths about how flavors work.
This is where experimentation comes in.
Try brewing the same beans with a slightly coarser grind and taste it next to your usual cup. You might be surprised how much the flavor changes. By adjusting just one variable at a time—water temperature, brew time, or grind size—you can methodically learn how each element affects the final taste. This controlled approach helps you avoid some of the most common coffee brewing blunders and gives you real control over your morning ritual, much like following a new recipe when you’re learning the basics of home cooking.
Your next cup of coffee isn’t just a drink; it’s an opportunity for a small, delicious discovery.
Beyond the Recipe: Your Daily Brew as a Dialogue
Mastering these fundamentals isn’t about achieving a single, static definition of a “perfect” cup. Instead, view this knowledge as a new vocabulary for having a conversation with your coffee. Each variable—the grind setting, the water temperature, the ratio—is a way to ask the beans a question. What happens if I make the grind a little finer? How does an extra 10 grams of water change the acidity? The goal is no longer to just follow a recipe, but to listen to the results and adjust. The brilliant brew isn’t one that adheres to an expert’s golden ratio, but the one that perfectly suits your palate on any given morning. What question will you ask your coffee tomorrow?
Frequently Asked Questions
How often should I clean my coffee grinder?
For optimal flavor, you should clean your coffee grinder at least once a month. Old coffee oils and fine particles can accumulate, turn rancid, and impart stale, bitter flavors onto your fresh beans. Use specialized grinder cleaning tablets or grind a small amount of uncooked white rice to absorb the oils, but always check your manufacturer’s guide first.
Does storing coffee in the fridge really ruin it?
Yes, storing coffee beans in the refrigerator is a common mistake that should be avoided. The cold, humid environment introduces moisture that damages the beans’ delicate oils. coffee is porous and will absorb unwanted aromas from other foods, tainting its flavor. Always store beans in an airtight container in a cool, dark pantry.
What’s the ideal water temperature for brewing coffee?
The ideal water temperature for brewing coffee is between 195°F and 205°F (90°C to 96°C). Using water straight from a boil (212°F or 100°C) will scorch the coffee grounds, leading to an overly bitter and astringent taste. Letting your kettle rest for about 30 to 60 seconds after boiling will typically bring it into the perfect range.
Can I reuse coffee grounds for a second brew?
It is not recommended to reuse coffee grounds. The first brew extracts the vast majority of the desirable flavor compounds, oils, and caffeine. A second brew will only result in a weak, watery, and bitter liquid, as you are primarily extracting the leftover astringent and unpleasant-tasting elements from the already spent grounds.
How do I know if my coffee beans are fresh?
The best indicator of freshness is a “roasted on” date printed on the bag; aim to use beans within a few weeks of this date. Visually, fresh beans may have a slight oily sheen (especially darker roasts) and will release a strong, pleasant aroma when you open the bag. If they smell dusty, flat, or generic, they are likely stale.