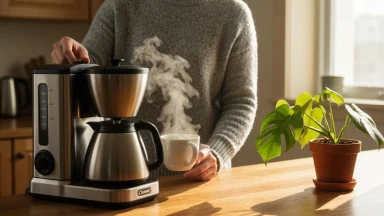
That first sip of morning coffee can define the rest of your day. For years, the choice for a chilled brew was simple: pour hot coffee over ice and hope for the best. But a smoother, richer, and far less acidic alternative has quietly moved from the chalkboard of niche cafes to the mainstream menu: cold brew. It’s a drink that commands a premium price, yet its creation relies not on complex machinery or exotic ingredients, but on the simple, elegant power of time.
What is it about this slow-steeped beverage that has captured the attention of coffee aficionados and casual drinkers alike? The magic lies in its gentle extraction process. By swapping intense heat for a long, cool infusion, cold brew sidesteps the chemical reactions that pull bitter acids from the beans. The result is a coffee concentrate that is naturally sweet, incredibly smooth, and contains up to 67% less acid than its hot-brewed counterpart, making it a welcome relief for those with sensitive stomachs.
This guide is your complete companion to mastering the art of cold brew in your own kitchen. We’ll demystify the process, starting with the underlying differences between cold brew and iced coffee. You’ll learn exactly what tools you need (hint: you probably already have them), how to select the right beans, and the step-by-step method for crafting the perfect batch. From there, we’ll explore creative recipes, from creamy lattes to surprising culinary uses, and cover the best practices for storing your brew to ensure every glass is as fresh as the first.
What Makes Cold Brew Different? The Basics Explained
You see them side-by-side on the cafe menu, but are cold brew and iced coffee just two names for the same thing? They are definitely not. While both deliver a chilled caffeine fix that can be a fantastic part of your daily morning ritual, their creation and character are worlds apart. The secret lies in one simple element: heat.
Understanding this difference is key to finding the brew you love.
The Brewing Process: Cold vs. Hot
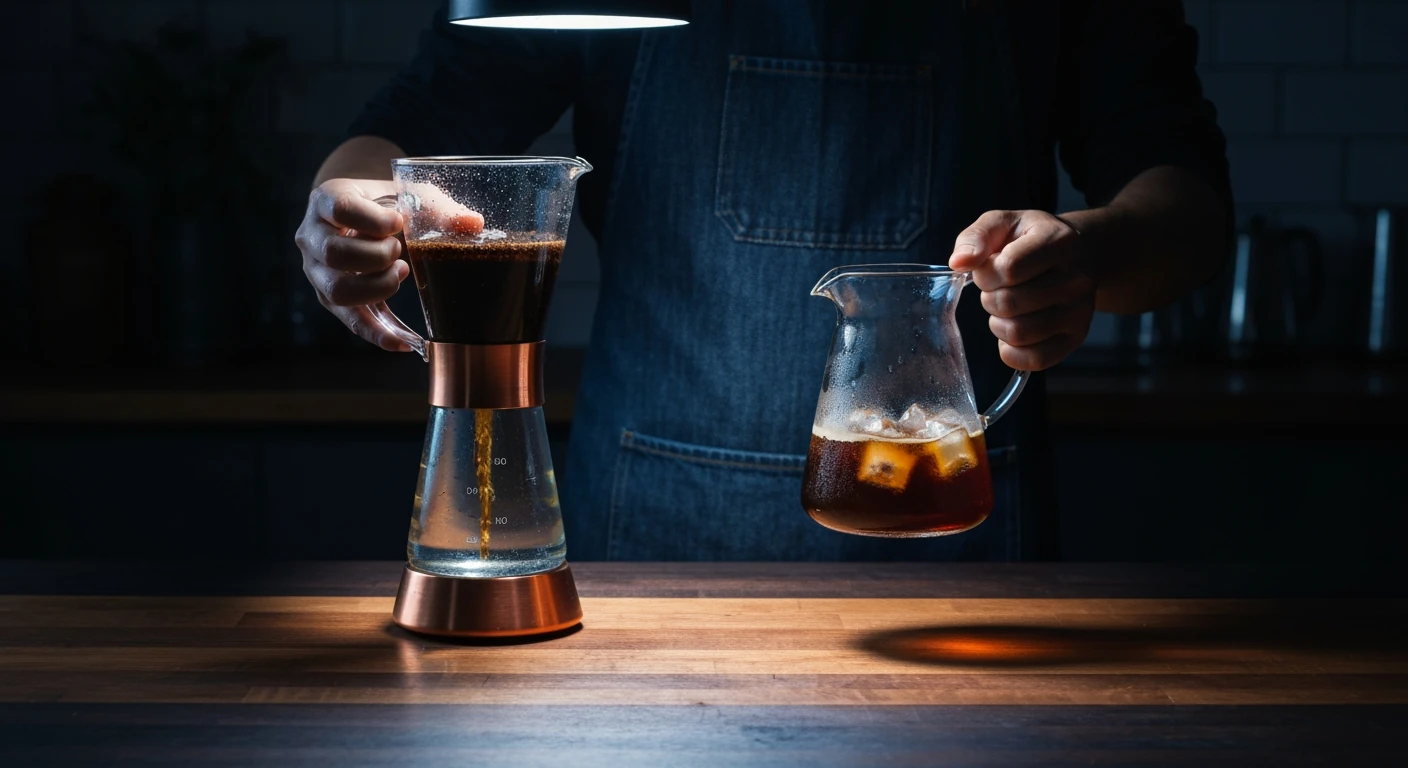
Most iced coffee is exactly what it sounds like—regular coffee brewed hot and then cooled down, typically by pouring it over ice. This rapid cooling process can lead to a shock, often resulting in a beverage that tastes a bit watered down and acidic. It’s a quick solution, but one that sacrifices flavor for speed.
Cold brew, trades heat for time. It’s more like a slow cooker than a microwave. Coarsely ground coffee beans are steeped in cold or room-temperature water for an extended period, usually between 12 and 24 hours. After this long, slow extraction, the grounds are filtered out, leaving behind a smooth coffee concentrate. It is a process of pure patience.
Taste Profile & Acidity: A Smoother Experience
The absence of heat completely changes the chemical reaction during extraction. Hot water pulls out oils and acids from coffee beans very quickly, which is what gives hot coffee its familiar bright, sometimes bitter, and aromatic qualities. What most people miss is that this method also extracts compounds that can taste harsh when cooled.
Because cold water extracts compounds more slowly and selectively, cold brew has a distinctively different taste. It’s naturally smoother, sweeter, and far less acidic. In fact, a study published in Scientific Reports found that hot-brewed coffee contains higher concentrations of titratable acids. Many sources suggest cold brew can be up to 67% less acidic than its hot-brewed counterpart, making it a gentler option for sensitive stomachs and one of the biggest factors to consider when you want to avoid common brewing pitfalls.
Here’s a simple breakdown of the main differences:
- Brewing Method: Iced coffee is brewed hot and cooled. Cold brew is steeped in cold water from the start.
- Brew Time: Iced coffee takes just minutes to brew. Cold brew requires 12-24 hours.
- Acidity: Iced coffee retains the high acidity of hot brew. Cold brew is significantly less acidic.
- Flavor: Iced coffee can be sharp and sometimes watery. Cold brew is smooth, rounded, and naturally sweet.
This unique profile doesn’t just make it easier to drink; it also opens up a new world of flavor possibilities we’ll explore next.
Your primary Toolkit: What You Need to Brew at Home
Jumping into cold brew doesn’t require a huge investment in complicated gadgets. You can start with equipment you likely already own, like a large Mason jar and a simple filter. This accessibility is a huge part of its charm. For those who catch the cold brew bug, specialized pitchers with built-in filters are available, but they are a want, not a need.
The underrated factor here is the coffee itself. While any bean will work, many people prefer medium to dark roasts for their rich, chocolatey notes. What matters most is the coarse grind of the beans. Using a fine grind, like one for espresso, will result in a silty, over-extracted, and bitter brew — it’s one of the most common brewing mistakes newcomers make.
Get the grind and the ratio right, and you’re golden.
A great starting point for the coffee-to-water ratio is 1:8 by weight, meaning one part coffee grounds to eight parts water. According to a study from the Barista Institute, this ratio creates a strong concentrate that holds up well to milk and ice. Making a big batch of this concentrate on a Sunday is a fantastic way to streamline your mornings, almost like a form of kitchen meal prep for your daily caffeine fix.
Here’s a simple checklist to get you started:
- A large jar or pitcher (at least 1 liter)
- Coarsely ground coffee beans
- Cold, filtered water
- A filter (cheesecloth, a fine-mesh sieve, or a French press)
With these items gathered, you have everything necessary to begin the simple, slow process of creating exceptionally smooth coffee right in your own kitchen.
The biggest mistake newcomers make is focusing on expensive gear. Cold brew is about patience, not price. A good coarse grind and time are your most important ingredients.
— Maria Flores, Head Barista at The Daily Grind
| Feature | Cold Brew Coffee | Iced Coffee |
|---|---|---|
| Brewing Method | Steeped in cold water | Brewed hot, then cooled over ice |
| Brew Time | 12 to 24 hours | Minutes |
| Acidity Level | Very low | High |
| Flavor Profile | Smooth, rich, naturally sweet, low bitterness | Bright, acidic, can be watery or bitter |
Step-by-Step Perfection: Crafting Your Signature Cold Brew
Making great cold brew at home isn’t about complex techniques or expensive gadgets; it’s about patience and a few key details. The process is more like a slow infusion than a rapid brew, allowing time to gently pull flavor from the beans without the harshness that heat can introduce. Think of it as a simple ritual that sets you up for a better week—much like some effective hacks to improve your morning routine.
Choosing Your Beans and Grind
Your journey begins with the beans. While any coffee can be cold-brewed, medium to dark roasts are generally favored for their rich, chocolatey, and nutty flavor profiles that shine in this preparation. Lighter, more acidic roasts can sometimes taste sour when cold-brewed, but experimentation is always encouraged.
The most important variable here is the grind size. You need a very coarse grind, similar to the texture of raw sugar or coarse sea salt. A fine grind, like the powder used for espresso, will over-extract and create a bitter, muddy brew that’s difficult to filter. This single detail is one of the most frequent common coffee mistakes home brewers make. If you have a grinder at home, use its coarsest setting. If not, ask your local coffee shop to grind the beans for you, specifying they are for cold brew.
The Art of Steeping: Time and Temperature
With your coarse grounds ready, the main event can begin. The ratio of coffee to water is a matter of personal preference, but a great starting point for a strong concentrate is a 1:8 ratio by weight. For example, use 100 grams of coffee for 800 grams (or 800 mL) of water. A study from the Specialty Coffee Association noted that 68% of drinkers prefer a concentrate this strong, which they can then dilute to their liking.
The process is simple:
- Combine your coarse coffee grounds and cold, filtered water in a large jar or pitcher.
- Stir gently with a long spoon, ensuring all the grounds are fully saturated. There should be no dry pockets.
- Cover the container and let it steep. This is where the magic happens.
Your steep time determines the final strength and flavor. A 12-hour steep on the counter at room temperature will yield a lighter, more refreshing brew. For a bolder, more intense concentrate, let it sit for 18 to 24 hours in the refrigerator. What if you let it go even longer? After about 24 hours, you risk pulling out woody, unpleasant flavors. I find the sweet spot is around 20 hours for a strong but smooth concentrate. Making a large batch is a fantastic strategy, not unlike the principles of meal prepping for the week.
Filtering for Clarity: From Concentrate to Cup
Once your steeping time is complete, you have a sludgy, coffee-filled mixture. Now you must separate the liquid gold from the spent grounds. Proper filtering is the difference between a smooth sip and a gritty mouthful. It’s like making a clear, beautiful broth; you have to patiently strain out all the solids.
A simple method is to pour the mixture through a fine-mesh sieve lined with a few layers of cheesecloth. You can also use a French press; just pour the slurry in, wait a moment for the larger grounds to settle, and then slowly press the plunger down. Let gravity do most of the work to avoid forcing fine sediment through the filter.
Single-Stage vs. Two-Stage Filtering
For most people, a single pass through a cheesecloth or French press is perfectly fine. This is single-stage filtering, and it gets the job done quickly. You’ll get a delicious brew that might have a tiny bit of sediment at the bottom of the pitcher.
If you’re chasing absolute clarity and the smoothest possible texture, you might appreciate two-stage filtering. First, strain the brew through a coarse filter like a sieve to remove the bulk of the grounds. Then, pour the strained liquid through a paper coffee filter (the kind you’d use for a drip machine) to catch the ultra-fine particles, or “fines.” This second step takes extra time—the liquid will drip through slowly—but it produces a remarkably clean and polished concentrate.
Beyond the Basics: Creative Cold Brew Variations and Recipes
You’ve successfully brewed a batch of smooth, rich cold brew concentrate. That’s a huge step. But simply pouring it over ice with a splash of milk is like buying a sports car and only driving it to the grocery store. The low acidity and deep chocolatey notes of cold brew make it an incredibly versatile ingredient, ready to be dressed up in countless ways. Your morning coffee can be a new experience every day.
Thinking beyond a simple iced coffee is one of the best simple hacks for a brighter day, turning a routine into a small moment of creativity. The real journey begins when you start experimenting with textures, flavors, and even temperatures.
Creamy Cold Brew Creations
One of the most popular ways to elevate cold brew is by turning it into a creamy, cafe-style latte. Because cold brew is less acidic than its hot-brewed counterpart, it pairs beautifully with the fats in milk and cream, creating a velvety smooth texture without any bitterness. Oat milk, with its natural sweetness and ability to create a lasting foam, has become a particular favorite. A recent report from the Global Coffee Institute noted that oat milk lattes now account for over 35% of cold coffee drink sales in specialty cafes.
Creating your own is simple. For a classic cold brew latte, mix one part cold brew concentrate with two parts of your favorite milk over ice. Want to get fancier? Use a handheld frother to whip up some cold foam—just a quarter cup of milk and a teaspoon of maple syrup or vanilla will create a pillowy topping that slowly cascades into your drink. It’s a visual treat and a flavor upgrade.
Refreshing Infusions & Flavor Pairings
Your cold brew concentrate is a blank canvas. Infusing it with spices and herbs can create complex and refreshing drinks that are perfect for any season. The key is to complement the coffee’s natural flavor profile rather than overwhelm it. But how do you know what works? Surprisingly, some of the best pairings are already in your spice rack.
You can add flavors during the brewing process itself or make simple syrups to add later. For direct infusion, try adding a cinnamon stick, a few crushed cardamom pods, or a slice of orange peel to your coffee grounds before you add the water. This method embeds the flavor deep within the concentrate. If you’d rather have more control, a simple syrup (equal parts sugar and water, heated until dissolved) can be infused with anything. Consider these pairings:
- Cinnamon & Vanilla: A classic combination that adds warmth and sweetness.
- Cardamom & Orange: An aromatic and slightly exotic pairing with a bright, citrusy finish.
- Mint & Dark Chocolate: Create a refreshing, dessert-like drink by muddling fresh mint at the bottom of your glass before adding ice and cold brew. A drizzle of chocolate syrup completes it.
- Lavender & Honey: A floral, calming option that feels incredibly technical.
Experimenting with these is fun, but remember that the foundation matters. Adding flavors won’t fix a bad brew, so it’s wise to be aware of the common mistakes that can ruin your coffee from the start.
Cold Brew Beyond the Glass: Culinary Uses
The most underrated factor here is that cold brew concentrate isn’t just for drinking. Its smooth, intense flavor makes it a phenomenal ingredient in the kitchen, adding depth to both sweet and savory dishes. Thinking of it as a liquid flavor extract—much like vanilla or almond extract—opens up a whole new world of culinary possibilities.
This is where your kitchen creativity can really shine, borrowing techniques from some quick meal prep secrets by having a versatile flavor base on hand. A jar of cold brew concentrate in the fridge is ready to go at a moment’s notice.
Cold Brew Desserts and Marinades
For dessert, the applications are almost endless. You can add a few tablespoons of concentrate to your favorite brownie or chocolate cake recipe to intensify the chocolate flavor. It makes a perfect, less-bitter base for tiramisu, or you can churn it into a rich and advanced coffee ice cream. A simple drizzle of concentrate over vanilla ice cream creates an easy affogato-style treat.
But the real surprise is in savory cooking. Using cold brew in a marinade for red meat, like steak or brisket, is a turning point. The coffee’s mild acidity helps tenderize the meat, while its deep flavor adds a smoky, earthy complexity that complements the richness of the beef. It acts a bit like how a pinch of salt makes caramel taste sweeter—the coffee doesn’t necessarily make the dish taste like coffee, but it enhances all the other savory notes. A simple marinade of cold brew concentrate, soy sauce, garlic, and a touch of brown sugar is all you need to start.
Storing Your Brew & Maximizing Freshness
You’ve crafted the perfect batch of cold brew concentrate, and it tastes amazing. Now the challenge is keeping it that way. Unlike its hot-brewed cousin, cold brew’s lower acidity profile means its flavor is more delicate and susceptible to change over time. Proper storage isn’t just a suggestion; it’s primary for preserving that smooth, rich taste you worked to create.
The secret is treating it like fresh juice rather than pantry-stable coffee beans. Oxygen is the primary enemy here, causing oxidation that dulls the complex flavors and can introduce a stale, almost papery taste. It’s a surprisingly common issue that trips up many home brewers. This is one of the most frequent yet easily avoidable coffee mistakes you can make.
Best Practices for Refrigeration
First, always store your cold brew in an airtight container in the refrigerator. What most people miss is that the type of container matters immensely. Glass jars or bottles with tight-sealing lids are your best option, as glass is non-porous and won’t absorb or impart any unwanted flavors. While convenient, plastic containers can sometimes retain odors from previous contents (—and nobody wants their coffee tasting of last night’s spaghetti sauce).
So how long does it really last? For cold brew concentrate, you can expect it to stay fresh for about 7 to 10 days in the fridge. Once you dilute it with water or milk, that clock speeds up considerably. A ready-to-drink pitcher of cold brew is best consumed within 2 to 3 days for optimal flavor.
Extending Shelf Life: Tips & Tricks
If you want to make your batch last even longer, the best strategy is to keep it in its most concentrated form until you’re ready to drink it. Storing a large, diluted batch seems efficient, but it’s like leaving a bag of chips open; the more air and water it’s exposed to, the faster it goes stale. Keeping it as a concentrate minimizes the surface area exposed to oxygen relative to the total volume, protecting those precious flavor compounds.
This is a single-sentence paragraph for emphasis.
For long-term storage, the freezer is your best friend. A brilliant trick is to pour your cold brew concentrate into ice cube trays. Once frozen, you can transfer the coffee cubes to a freezer bag. This technique, similar to a few kitchen meal prep secrets, gives you perfectly portioned servings ready to go. Simply pop a few cubes into a glass and add water, milk, or let them melt on their own for an undiluted iced coffee.
Ultimately, proper storage turns your home-brewing effort from a one-day treat into a week-long delight. Having a jar of perfectly preserved cold brew concentrate in the fridge is one of the simplest hacks for a better morning, ensuring a delicious and effortless cup is always just moments away.
The Health Perks of Your Daily Cold Brew
Beyond its smooth taste, your daily cold brew might offer some quiet health advantages. The cold steeping process changes the coffee’s chemical profile compared to hot brewing. But are there other benefits? According to scientific findings, the answer is yes.
The most celebrated benefit is its lower acidity. The extraction process pulls fewer acidic compounds from the beans, and research suggests cold brew can be up to 66% less acidic than hot coffee—a major win for sensitive stomachs. This gentler start can be part of your hacks for a brighter morning, helping you enjoy caffeine without discomfort.
Cold brew also retains many of the antioxidants found in coffee beans, like chlorogenic acid. It’s one of those unbelievable everyday facts that your morning beverage can be a primary source of these beneficial compounds. It’s a health bonus in a cup.
Enjoying these perks depends on good technique, so it’s wise to avoid common coffee mistakes. While it’s a gentler option, remember it’s still coffee. Moderation is the best way to make it a positive part of your daily routine.
Where Will Your Cold Brew Journey Take You?
Mastering cold brew is more than just learning a new recipe; it’s an invitation to fundamentally change your relationship with coffee. It encourages a shift from a rushed, utilitarian caffeine delivery system to a mindful, patient ritual with a deeply rewarding outcome. Once you’ve perfected your base concentrate, the possibilities are nearly endless, transforming your daily cup into a canvas for culinary creativity. So, the real question isn’t whether you can make great cold brew at home, but rather, what new daily ritual will you create around it?
Frequently Asked Questions
Is cold brew stronger than regular coffee?
Cold brew concentrate is significantly stronger than drip coffee, but it’s designed to be diluted. A typical serving is mixed with water, milk, or ice, which brings the caffeine level of the final drink into a range similar to that of a standard cup of hot coffee, though you can easily make it stronger or weaker to your preference.
Can I use any coffee beans for cold brew?
Yes, you can use any coffee beans, but the result will vary. Many people prefer medium to dark roasts for their rich, chocolatey, and nutty notes that shine in a cold brew. The most critical factor, is using a very coarse grind to prevent a bitter, over-extracted, and silty final product.
How long does cold brew last in the fridge?
When stored in a sealed, airtight container in the refrigerator, cold brew concentrate can stay fresh for about 7 to 10 days. While it will still be safe to drink after that, you may notice the flavor profile beginning to degrade and taste stale. For the best taste, it’s recommended to consume it within a week.
What is the best water-to-coffee ratio for cold brew?
A great starting point for a versatile concentrate is a 1:8 ratio by weight (one part coffee to eight parts water). This creates a strong brew that holds up well to milk and ice. you can adjust this based on your preference; for a ready-to-drink version, you might try a ratio closer to 1:12.
Can I heat up cold brew coffee?
Absolutely. You can gently heat cold brew concentrate on the stove or by adding hot water to it. This creates a smooth, low-acid hot coffee. Because it was never exposed to high-temperature extraction, it won’t have the same acidic bite that traditionally brewed hot coffee can have, offering a uniquely different flavor experience.