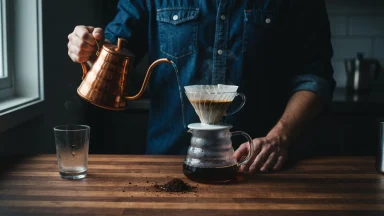
Is your morning coffee more of a functional necessity than a moment of genuine pleasure? For millions, the daily brew is a ritual performed on autopilot, resulting in a cup that’s often bitter, bland, or simply inconsistent. We accept this mediocrity because the alternative—that perfect, aromatic cup from a specialty café—seems like a complex art form reserved for trained baristas with intimidatingly expensive equipment. But what if the secret to a exceptional cup of coffee wasn’t locked behind a thousand-dollar espresso machine?
The truth is, the gap between a disappointing brew and a delightful one is built on a few basic principles, not a hefty price tag. It’s a craft based on understanding how simple variables interact: the origin and roast of the bean, the consistency of the grind, the temperature of the water, and the time they spend together. Mastering these elements gives you complete control over the final taste, transforming your kitchen counter into your own personal café.
This guide demystifies the entire process, empowering you to move beyond the pre-ground tub and the automatic drip machine. We will walk you through everything you need to know, from selecting the right beans and required gear to mastering the golden ratios of coffee-to-water. You’ll learn a step-by-step method for a flawless pour-over, ensuring you can craft a consistently delicious cup that starts your day on the right note, every single time.
The Foundation: Understanding Your Coffee Beans
Before you even think about grinders, water temperature, or brewing methods, the journey to a perfect cup begins with the coffee bean itself. Choosing the right bean is like picking the right ingredients for a meal; the final quality is directly tied to the starting material. Your daily brew is a core part of crafting a better morning ritual, so spending a moment to understand the source makes all the difference.
The single most important factor is freshness. Coffee beans begin to lose their aromatic compounds shortly after roasting. A bag of beans with a “roasted on” date from last week will produce a far more flavorful and complex cup than one with a generic “best by” date set months in the future. It’s a simple switch that pays huge dividends in taste.
Arabica vs. Robusta: A Flavor Showdown
Most of the coffee you’ll encounter falls into two main categories: Arabica and Robusta. While coffee shops and specialty roasters often champion Arabica, that doesn’t tell the whole story. According to the International Coffee Organization, Arabica beans account for over 60% of global coffee production, praised for their complex aromatic qualities and higher acidity, which translates to bright, fruity, and floral notes.
Robusta, is a hardier plant that contains nearly double the caffeine. Its flavor profile is often described as bold, strong, and chocolatey, with a rubbery or nutty aftertaste. What most people miss is that high-quality Robusta is necessary for a traditional Italian espresso, providing that rich, stable crema — and let’s be honest, some of us need that extra kick. The idea that one is universally “better” is one of those persistent culinary myths worth questioning.
- Arabica: Sweet, soft notes with hints of fruit and sugar. Higher acidity and more aromatic complexity. Typically lower in caffeine.
- Robusta: Strong, harsh flavor with a nutty or chocolatey finish. Lower acidity and a fuller body. Contains 2.5% or more caffeine content.
The Art of the Roast: From Light to Dark
Roasting is the process that transforms a green, grassy-smelling coffee cherry pit into the fragrant, brown bean we recognize. Think of it like toasting bread: the same slice can be lightly warmed or charred to a crisp, yielding completely different results. The underrated factor here is how the bean’s origin interacts with the roast, shaping popular flavors in today’s coffee culture.
A light roast retains more of the bean’s original characteristics, often resulting in higher acidity and delicate floral or fruity notes. Moving to a medium roast creates a more balanced flavor profile, with lower acidity and a fuller body. This is the most common roast level in the United States. A dark roast, finally, roasts the beans until the oils rise to the surface, producing a bold, smoky, and sometimes bitter flavor that mutes the bean’s origin notes in favor of the roast’s character.
Ultimately, your choice of bean and roast comes down to personal preference, but knowing these fundamentals gives you control over the final cup.
Necessary Gear for the Home Barista
Stepping up your coffee game doesn’t require a second mortgage for a massive espresso machine. Surprisingly, the most significant improvements come from a few key pieces of equipment that give you control over the brewing variables. It’s about precision, not price. Think of it less as buying appliances and more as assembling a toolkit for your perfect morning.
With the right tools, you can consistently replicate that amazing cup you had at a specialty cafe. This control transforms the daily ritual from a simple caffeine delivery system into a genuine craft. It’s the first step in crafting your dawn with intention.
Grinders: The Secret to Flavor Extraction
If you make only one upgrade, let it be a quality coffee grinder. Freshly ground beans are non-negotiable for flavor. The moment coffee is ground, it begins to lose its aromatic compounds—a process called degassing. What most people miss is the type of grinder is just as important. Your choice comes down to two main types: blade or burr.
A blade grinder uses a spinning blade to smash beans apart, much like a tiny blender. While inexpensive, the result is an inconsistent grind with a mix of fine dust and large chunks, leading to uneven extraction and a muddled taste. A burr grinder, uses two abrasive surfaces, or burrs, to crush beans into a uniform size. This consistency is the foundation of a clean, balanced, and flavorful cup. The data suggests that uniform grounds can increase flavor extraction efficiency by up to 30%, according to research from the Coffee Quality Institute.
It’s the difference between chopping an onion with a dull knife versus a sharp one—one gives you a mess, the other gives you precision.
Choosing Your Brew Method: A Methodical Match
The device you use to brew your coffee dramatically shapes its final character, from body and acidity to clarity. There’s no single “best” method; the ideal choice depends on your taste preferences and how involved you want to be in the process. Are you looking for a quick, automated pot or a hands-on, meditative experience? Answering that question will point you toward your perfect match.
Pour-Over Precision
The pour-over method, using devices like the Hario V60 or Chemex, gives you maximum control over the brew. You manually pour hot water over the coffee grounds in a slow, circular motion. This technique allows you to highlight the delicate, nuanced flavors of single-origin beans. The paper filter produces an exceptionally clean, tea-like cup with bright acidity. The downside? It requires attention, a steady hand, and a specific type of kettle to do it right. It’s a method for those who enjoy the process as much as the result, much like the satisfaction found in more advanced home cooking techniques.
French Press Fullness
For a rich, full-bodied cup with a velvety texture, the French press is a classic choice. This immersion method involves steeping the coffee grounds directly in hot water for several minutes before pressing a mesh filter down to separate the grounds. Because it doesn’t use a paper filter, more of the coffee’s natural oils and fine sediment remain in the final cup. This creates a solid and heavy mouthfeel. It’s incredibly straightforward, but can sometimes result in a slightly gritty or “muddy” cup if your grind isn’t coarse enough.
The Role of Water: Often Overlooked, Always notable
Your coffee is about 98% water, so its quality and temperature have a massive impact. Using filtered water is a simple step that removes chlorine and other impurities that can interfere with flavor. Temperature is also key. Water that is too hot will scorch the grounds, creating a bitter taste, while water that is too cool will result in a weak, under-extracted brew. The ideal temperature range is generally between 195°F and 205°F (90°C to 96°C).
For methods like pour-over, a gooseneck kettle is invaluable. Its long, slender spout provides precise control over the water flow, ensuring you can saturate the grounds evenly—a small detail that makes a big difference. It may seem like a fussy upgrade, but it’s one of those things you don’t realize you need until you use it. For other methods, any kettle that can bring water to the correct temperature will work perfectly well.
Here’s a simple checklist to get started:
- A quality burr grinder: For consistent grind size.
- A digital scale: To measure your coffee and water accurately.
- Your chosen brewer: French press, pour-over dripper, or even a reliable drip coffee maker.
- A kettle: A gooseneck model is best for pour-over, but any will do.
- Good water: Filtered is always preferred.
With these items in your kitchen, you have everything you need to move beyond just making coffee and start brewing it.
The best coffee is the coffee you like, brewed the way you like it. Our role is simply to give you the tools and knowledge to discover what that is.
— Jessica Easto, author of ‘Craft Coffee: A Manual’
| Brewing Method | Flavor Profile | Best For | Grind Size |
|---|---|---|---|
| Pour-Over | Clean, bright, highlights nuanced notes | Tasting single-origin beans, control freaks | Medium-Fine |
| French Press | Rich, full-bodied, robust, velvety texture | Bold flavor lovers, simple & repeatable process | Coarse |
| Drip Coffee Maker | Balanced, consistent, familiar | Brewing for multiple people, convenience | Medium |
| AeroPress | Clean, versatile (espresso-like to drip) | Experimentation, travel, speed | Fine to Medium |
The Golden Ratios: Achieving Balance in Your Cup
Think of brewing coffee less like a chore and more like simple baking. Just as you wouldn’t guess the amount of flour for a cake, your coffee needs a reliable ratio of coffee grounds to water. A great starting point for most methods is the 1:16 ratio — that’s one part coffee to 16 parts water. This isn’t a strict law, but rather the beginning of your journey into basic home-brewing techniques that yield consistent results.
Next, consider the grind size. The texture of your coffee grounds dictates how long water should be in contact with them. A coarse grind, like chunky sea salt, is perfect for a French press, while a fine grind resembling table salt works better for pour-overs. Using the wrong size is like trying to fill a bucket with a hole in it; the timing will always be off.
Finally, water temperature is surprisingly specific. The Specialty Coffee Association (SCA) suggests a range between 195°F and 205°F (90°C to 96°C). Using water that’s boiling (212°F) can actually scorch the grounds, creating a bitter taste. Why go through all this trouble just for a cup? Because getting these details right is what separates a decent coffee from a memorable one.
These three variables work together.
Changing just one of them—even slightly—can completely alter the final taste in your cup. The underrated factor here is personal preference, which is a big part of current coffee culture. Adjusting these ratios to find what you love is the ultimate goal, turning a simple task into a rewarding part of your daily routine.
Step-by-Step: Crafting Your Perfect Morning Brew
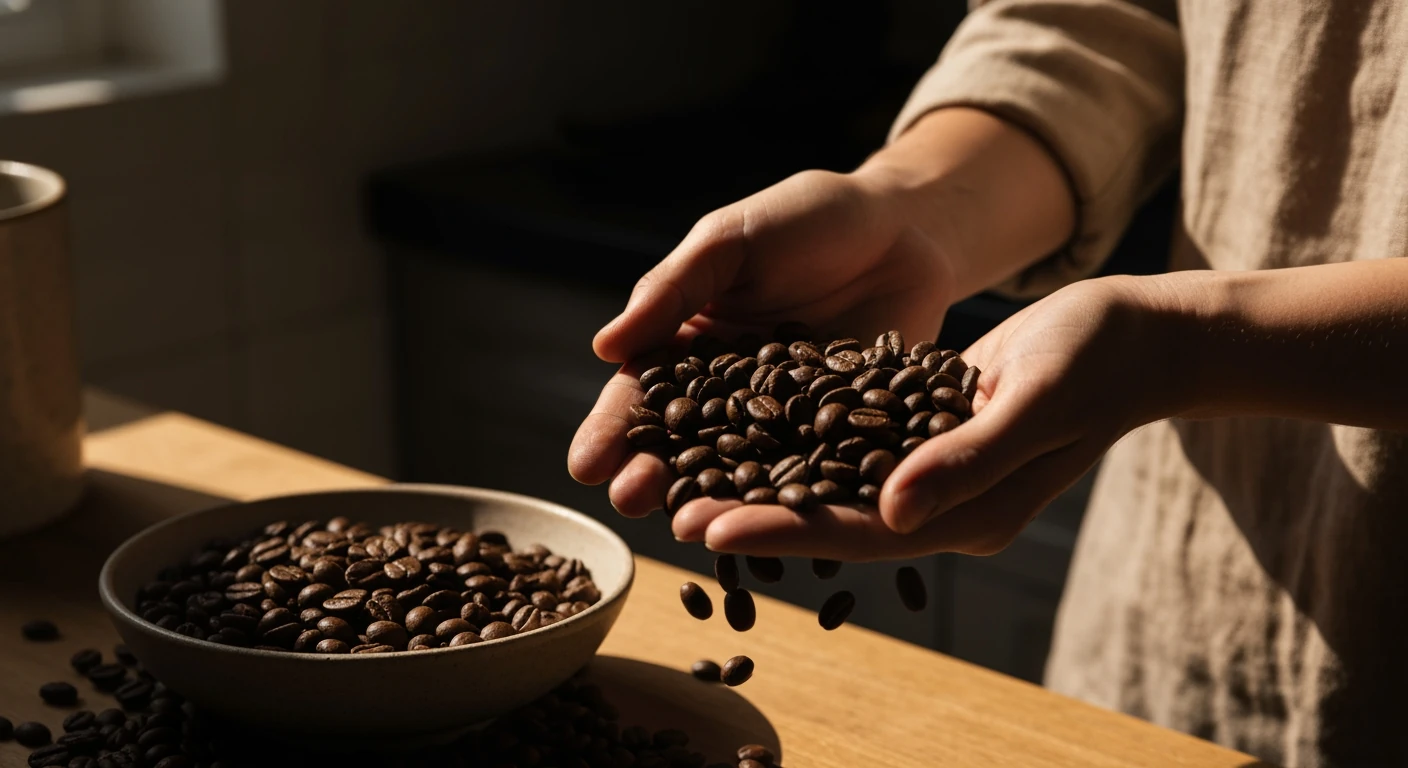
Moving from theory to practice is where the real magic happens. With the core principles of ratio, grind, and temperature in mind, we can walk through a popular brewing method: the pour-over. This technique gives you incredible control over the final cup, highlighting the unique notes of your chosen beans. It’s a favorite in many cafes and is surprisingly simple to adopt at home.
Think of it less as a rigid recipe and more like learning a simple dance. Once you know the steps, you can add your own flair. The goal is to build a repeatable process that consistently produces coffee you love, forming one of the best parts of mastering your morning habits.
Preparation is Key: Setting Up for Success
Before any water touches the coffee grounds, a few preparatory steps can dramatically improve your brew. First, bring your filtered water to the correct temperature. The Specialty Coffee Association suggests a range between 195°F and 205°F for optimal extraction. Boiling water is too hot and will scorch the coffee, resulting in a bitter taste. While the water heats, weigh and grind your beans to a consistency resembling sea salt.
Next, place your filter in the pour-over cone and set it atop your mug or carafe. Here’s a step many people skip: pre-wet the entire setup. Pour some of your hot water through the paper filter to rinse out any papery taste and, more importantly, to pre-heat your brewer and vessel. Why is this so key? Pouring hot coffee into a cold mug instantly drops its temperature, altering the flavor you just worked so hard to create. Dump the rinse water before you begin brewing.
The Brewing Process: Aromatic Steps to Enjoyment
With your setup warm and ready, it’s time for the main event. This process is a bit like a form of culinary alchemy, turning simple grounds and water into a complex beverage. For a single cup, a common starting point is using around 20 grams of coffee.
- The Bloom (0:00-0:45): Add your ground coffee to the wet filter, creating a level bed. Start a timer and pour just enough water (about twice the weight of the coffee) to saturate all the grounds. You’ll see them puff up and bubble as trapped CO2 escapes. This “bloom” is vital for an even extraction, and its fresh aroma is one of the simple joys of the morning.
- The Main Pour (0:45-2:30): After the bloom subsides, begin pouring the rest of your water in slow, steady, concentric circles. Start from the center and spiral your way out, avoiding pouring directly down the sides of the filter. Keep the water level consistent, never letting it drain completely until the end. Your goal is a gentle, controlled pour—not a flood.
- The Drawdown (2:30-3:00): Once you’ve added all your water, allow the brew to finish dripping through the coffee bed. This final phase is called the “drawdown.” If it finishes much faster than three minutes, your grind may be too coarse; if it takes much longer, it may be too fine.
Remove the brewer from your mug once the flow slows to an occasional drip. Give your freshly brewed coffee a gentle swirl to integrate all the flavors. This hands-on method is a key reason pour-over remains one of the most prominent current coffee trends.
The beauty of this method is its adaptability. Don’t be afraid to adjust the grind size or water ratio to find what works for you. Your palate is the ultimate judge.
Beyond the Basics: Elevating Your Coffee Experience
You have successfully brewed a decent cup of coffee. The caffeine is working, the warmth is comforting, but something is still missing. Moving from a good cup to a great one involves dialing in the details that many people overlook. This is where the true craft of coffee begins, transforming a simple morning habit into a delightful sensory ritual.
This isn’t about buying expensive, complicated gear. It’s about understanding the small factors that have a huge impact on the final taste in your mug. The journey to a perfect brew is a continuous one, full of small adjustments and happy discoveries.
Preserving Freshness: The Art of Coffee Storage
The single biggest mistake most home baristas make happens before a drop of water even touches the grounds. Improper storage can ruin expensive beans in a matter of days. Coffee’s main enemies are oxygen, light, heat, and moisture. Think of coffee beans like a loaf of fresh bread; leaving them exposed makes them go stale just as quickly. The goal is to protect their delicate aromatic oils, which are responsible for all that amazing flavor and aroma.
Your kitchen counter is a battlefield.
The best practice is to store whole beans in an opaque, airtight container kept in a cool, dark place like a pantry or cabinet. A common myth suggests the freezer is the ideal spot, but this is one of the more persistent pieces of misinformation you’ll find. The National Coffee Association warns against it because frequent temperature changes create condensation, which introduces moisture and degrades the oils. This is a classic case where it’s important to separate culinary fact from fiction for better results.
The Art of the Add-In: Milk, Sweeteners, and Spices
While coffee purists may advocate for drinking it black, the right additions can complement and enhance the flavor profile rather than mask it. The key is balance. Instead of a large pump of generic syrup, consider a small spoonful of maple syrup or a dash of cinnamon. These additions can draw out nutty or spicy notes already present in the beans.
The type of milk you use also makes a significant difference. Whole milk creates a richer, creamier texture in lattes, while oat milk adds a subtle sweetness and is often a favorite for its frothing capabilities. Experimenting with these variables is part of the fun in developing your signature drink, a core step in crafting a morning ritual you enjoy.
Mastering Milk Frothing
Creating that velvety microfoam for a latte at home is surprisingly accessible. You don’t need a fancy espresso machine to get started. A simple handheld frothing wand or even a French press can do the job quite well. Heat your milk of choice in a saucepan or microwave to about 150°F (65°C) — hot to the touch but not boiling. Scalding the milk will ruin its flavor.
For a wand, submerge the tip just below the surface and turn it on, slowly lowering it as the foam builds. For a French press, pour the warm milk in and pump the plunger vigorously for about 30 seconds until the volume has nearly doubled. The result is a creamy, smooth foam ready to pour over your coffee.
Tasting Notes: Discovering Your Palate
Have you ever seen a coffee bag with descriptions like “notes of chocolate, citrus, and brown sugar” and wondered what it all means? These aren’t artificial flavorings; they are the inherent tastes developed during the bean’s growth and roasting process. Learning to identify them is a skill that makes drinking coffee a much more engaging experience.
It’s a lot like wine tasting, but far more accessible for your daily routine. The first step is simply to slow down and pay attention. Before you take a sip, smell the coffee. What do you notice? Then, as you drink, let it sit on your tongue for a moment. Is it sweet, acidic, or bitter? This mindful approach is the foundation for developing a more refined palate.
Decoding Flavor Profiles
To help baristas and consumers alike, the Specialty Coffee Association (SCA) created the Flavor Wheel, a detailed chart that categorizes coffee tastes. You don’t need to memorize it (it’s quite complex!), but understanding the basic families is a great start. Most flavors fall into a few broad groups:
- Fruity: Often found in African coffees, with notes like blueberry, strawberry, or lemon.
- Nutty/Chocolatey: Common in Latin American beans, presenting as almond, hazelnut, or dark chocolate.
- Floral: Delicate notes like jasmine or rose, typical of high-altitude Ethiopian coffees.
- Spicy: Flavors such as clove, cinnamon, or cardamom.
A great way to practice is to buy single-origin beans from different regions and taste them side-by-side. This simple exercise can quickly teach you to distinguish the bright, acidic notes of a Kenyan coffee from the earthy, full-bodied profile of one from Sumatra. It’s a small step that can transform an everyday experience into something extraordinary.
Your Coffee Journey Has Just Begun
You now possess the foundational knowledge to brew a cup of coffee that rivals your favorite café. But the goal isn’t just to follow a recipe; it’s to embark on a personal journey of taste. The perfect ratio, grind size, and water temperature are merely starting points, not final destinations. What happens when you try a single-origin bean from Ethiopia instead of a blend from Colombia? How does a slightly coarser grind in your French press change the texture and flavor? The most rewarding part of this craft isn’t achieving a single, static version of perfection, but the ongoing process of exploration. The real question isn’t whether you can make a great cup of coffee, but rather, what will you discover about your own palate along the way?
Frequently Asked Questions
What’s the best way to store coffee beans for maximum freshness?
The best way to store coffee is in an opaque, airtight container kept in a cool, dark place like a pantry or cupboard. Avoid the refrigerator or freezer, as moisture and odors can degrade the beans. Oxygen, light, heat, and moisture are the enemies of fresh coffee, so proper storage is key to preserving flavor.
How does water quality affect the taste of my coffee?
Since coffee is over 98% water, its quality has a massive impact on the final taste. Tap water containing chlorine or high mineral content can create off-flavors and interfere with proper extraction. Using filtered or bottled spring water provides a neutral base, allowing the true, delicate notes of the coffee to shine through.
Can I use pre-ground coffee, or is grinding my own necessary?
While pre-ground coffee is convenient, grinding your own beans just before brewing is the single most significant upgrade you can make to your coffee game. Coffee begins to lose its aromatic compounds and flavor almost immediately after being ground. Freshly ground beans provide a much more vibrant, complex, and aromatic cup.
What’s the ideal temperature for brewing coffee?
The ideal water temperature for brewing coffee is between 195°F and 205°F (90°C to 96°C). Water that is too hot (boiling) will scorch the grounds, resulting in a bitter taste. Water that is too cool will lead to a flat, weak, and under-extracted brew that lacks complexity and sweetness.
How often should I clean my coffee maker?
You should rinse removable parts with water after every use to prevent coffee oil buildup. A deeper cleaning with a descaling solution or a vinegar-water mixture should be performed every 1-3 months, depending on usage and your water hardness. This prevents mineral buildup that can affect your machine’s performance and the coffee’s taste.