That first sip of morning coffee can be a moment of pure bliss or a jolt of bitter disappointment. We’ve all been there: you buy premium beans, follow the instructions on your new coffee maker, and still end up with a cup that tastes flat, sour, or just plain wrong. It’s a frustrating experience that can make you question whether great coffee is only achievable in a high-end café. What if the secret to a perfect brew isn’t a complex technique or an expensive machine, but simply avoiding a few common, overlooked errors?
The path to a better cup is paved with small details that have an outsized impact on flavor. From the moment the beans are roasted to the final pour, a series of important variables are at play. Many home brewers focus on one aspect, like the beans themselves, while unknowingly sabotaging their efforts with mistakes in other areas, such as water temperature or grind consistency. These aren’t expert-level missteps; they are basic slip-ups that are surprisingly easy to make and even easier to fix once you know what to look for.
This guide is designed to illuminate those hidden pitfalls and transform your daily coffee ritual from a game of chance into a reliable source of delight. We will walk through the four most critical stages of brewing—bean selection and storage, grinding, water preparation, and brewing technique—to pinpoint the exact mistakes that might be holding you back. By understanding the ‘why’ behind each step, you’ll be empowered to make simple adjustments that unlock the rich, complex flavors hidden within your coffee beans, ensuring every cup you make is one you can savor.
The Foundation of Flavor: Why Your Beans Matter
You can own the most expensive coffee maker on the market, but if you start with subpar beans, you’ll end up with a disappointing cup. It’s a simple truth. The journey to a delicious morning ritual begins long before the water starts heating; it starts with the coffee beans themselves. mastering the fundamentals of coffee means respecting the source of its flavor.
Think of it as cooking. A chef wouldn’t expect to create a magnificent dish using old, wilted vegetables. The same principle applies directly to your coffee.
Freshness First: The Enemy of Stale Coffee
Once coffee beans are roasted, they begin a rapid process of aging. They release carbon dioxide and aromatic oils, which is what gives coffee its incredible smell and taste. But this process also means they are oxidizing and losing flavor. The clock is always ticking. The Specialty Coffee Association reports that ground coffee can lose as much as 60% of its aroma within just 15 minutes.
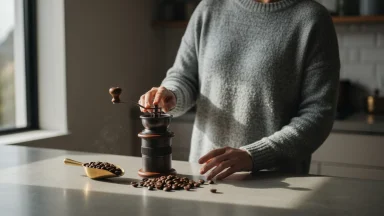
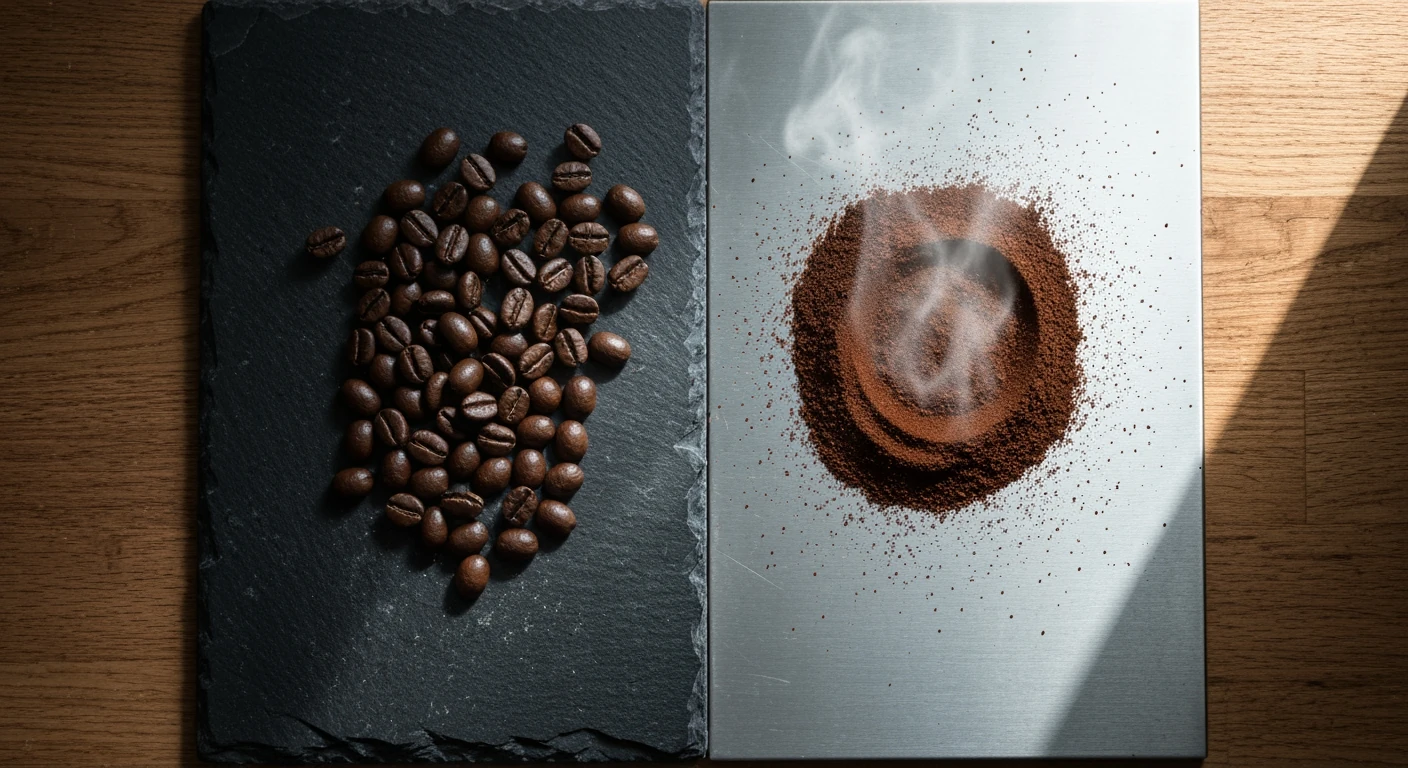
This is where the great debate of whole bean vs. pre-ground comes in. Buying pre-ground coffee is convenient, but you sacrifice a tremendous amount of flavor. Grinding beans dramatically increases their surface area, exposing more of the coffee to oxygen. It’s a bit like slicing an apple; it starts to brown and change almost immediately. So, what’s the takeaway? Buying whole beans and grinding them just before you brew is one of the single biggest upgrades you can make to your coffee game.
When shopping, always look for a “roasted on” date printed on the bag. This is far more useful than a “best by” date, giving you a clear picture of freshness. It helps in separating culinary fact from fiction when it comes to quality.
Optimal Storage: Keeping Beans at Their Best
So you’ve brought home a bag of freshly roasted beans. How do you protect them? The four primary enemies of coffee are air, light, heat, and moisture. Your goal is to minimize their exposure to all four. While many beans come in excellent packaging with one-way valves — allowing CO2 to escape without letting air in — not all bags are created equal.
For best results, store your beans in an airtight, opaque container at room temperature. A cool, dark pantry is a perfect spot. One of the most persistent myths is that you should store coffee in the freezer. This is actually one of the more common home cooking mistakes people make. The constant temperature changes can create condensation, introducing moisture that will ruin the beans. Plus, coffee is porous and can absorb unwanted odors from your freezer. Nobody wants a cup of coffee that tastes faintly of frozen fish sticks.
The underrated factor here is consistency. Keeping your beans in a stable environment protects those delicate oils that hold all the flavor. Protecting your beans is step one, but how you prepare them is just as critical for the final result.
Grind Control: The Unsung Hero of Coffee Extraction
Once you have great beans, the next step is often where things go sideways. The size of your coffee grounds directly controls how much flavor is pulled into your water, a process called extraction. Think of it like making a marinade; the smaller you chop your garlic and herbs, the more flavor they release into the oil. Coffee works on the same principle of surface area.
The entire goal is to achieve a balanced extraction, getting all the sweet, desirable flavors without the unpleasant ones. Grind size is your primary tool for this. It is the dial you turn to control taste. Many common brewing problems stem from a simple mismatch between the grind and the brewing time.
Matching Grind to Method: A Quick Reference
Different brewing methods require different amounts of time for water to be in contact with the coffee grounds. To compensate, we adjust the grind size. A faster brew needs a finer grind to allow for quick extraction, while a slower brew requires a coarser grind to prevent pulling out bitter compounds. It’s a surprisingly delicate balance.
While every coffee and grinder has its own quirks, here are some reliable starting points:
- Coarse Grind (like chunky sea salt): Ideal for methods with long contact time, such as a French Press or Cold Brew. The large particles prevent the coffee from turning to sludge and over-extracting during the multi-minute steep.
- Medium Grind (like coarse sand): This is the versatile middle ground for most automatic drip coffee makers and pour-over methods like the Chemex or V60.
- Fine Grind (like table salt): Necessary for very fast methods where water is forced through the coffee under pressure. Think Espresso machines and Moka Pots. Some AeroPress recipes also call for a fine grind paired with a very short brew time.
Consider these guidelines as a map, not a rigid set of instructions. Mastering the art of the brew involves tasting and tweaking until you find what works best for you.
Blade vs. Burr: Why Your Grinder Matters
What most people miss is that the consistency of the grind is just as important as the size itself. This is where your choice of grinder becomes a major factor. A blade grinder uses a spinning blade to chop beans, much like a spice grinder or a blender. The result is an inconsistent mix of fine dust and large chunks.
A burr grinder, crushes beans between two revolving abrasive surfaces, or burrs, set to a specific distance. This produces a much more uniform particle size. A study from the UC Davis Coffee Center suggests that burr grinders can produce up to 73% more particle-size uniformity than their blade counterparts. Why does this consistency matter so much? Because uneven grounds extract at different rates — the small bits become bitter before the large chunks have even released their sweetness, leading to a muddled cup.
It’s like trying to roast potatoes cut into giant wedges and tiny cubes in the same pan. You will always end up with some burnt and some raw. This principle of using the right tool for the job applies to all sorts of common home cooking mistakes, not just coffee.
Signs of Wrong Grind: Bitter vs. Weak
Your taste buds are the ultimate judge of your grind setting. If your coffee tastes “off,” it’s likely due to over- or under-extraction. Learning to spot the difference is key to fixing your brew.
If your coffee has a harsh, unpleasantly bitter, or astringent taste (a dry, chalky sensation), it’s likely over-extracted. This means your grind was too fine for your brew time, allowing the water to pull out too many soluble compounds, including the bitter ones. Try making your grind a step coarser.
Taste is your guide.
Conversely, if your coffee tastes sour, thin, or lacks sweetness and depth, it’s probably under-extracted. This happens when the grind is too coarse, and the water flows through too quickly to pick up the desirable flavors. It can taste disappointingly weak and acidic. The simple fix is to adjust your grinder to a finer setting for the next brew. People often blame the beans for these issues, but it’s a classic case of separating culinary fact from fiction — the grind is frequently the real culprit.
With your grind size dialed in, the next variable to consider is the water you use, which carries its own surprising complexities.
Coffee should be brewed with water between 195-205 degrees Fahrenheit for optimal extraction. Outside this range, you risk either a sour, underdeveloped cup or a bitter, harsh one.
— Specialty Coffee Association (SCA), Brewing Standards
| Common Mistake | Why It Matters | The Simple Fix |
|---|---|---|
| Using Stale or Pre-Ground Beans | Coffee loses up to 60% of its aroma within 15 minutes of grinding, resulting in a flat, lifeless taste. | Buy whole beans with a recent “roasted on” date and grind them just before brewing. |
| Incorrect Grind Size | A mismatched grind leads to poor extraction. Too coarse results in sour coffee; too fine results in bitter coffee. | Match your grind to your brew method (e.g., coarse for French Press, medium for drip) and use a burr grinder for consistency. |
| Wrong Water Temperature or Quality | Water that’s too hot scalds the coffee, while water that’s too cool under-extracts it. Tap water impurities can add off-flavors. | Use filtered water heated to between 195-205°F (90-96°C). Let boiled water rest for 45 seconds before pouring. |
| Using Dirty Equipment | Built-up rancid coffee oils and mineral scale impart a bitter, metallic taste to every new brew. | Wash carafes and filters after each use. Descale automatic machines with a vinegar solution every 1-3 months. |
Water Wisdom: The Overlooked Ingredient
After dialing in the perfect grind, many coffee lovers think the hard part is over. But what most people miss is that the single largest ingredient in your cup isn’t coffee at all—it’s water. Your brew is composed of about 98.7% water, so its quality and temperature can make or break the final taste. Using the wrong water is like a chef using subpar ingredients; the final dish will always fall short of its potential.
It’s a surprisingly common oversight.
The Perfect Pour: Ideal Water Temperature
Temperature is a critical variable that directly controls extraction. If your water is too hot, it will scald the coffee grounds, resulting in a bitter, harsh flavor. Conversely, water that isn’t hot enough will fail to extract the desirable flavor compounds, leaving you with a cup that tastes sour, weak, and underdeveloped. The data suggests an optimal window for brewing.
According to the Specialty Coffee Association (SCA), the ideal water temperature is between 195°F and 205°F (90°C to 96°C). A simple way to hit this target without a special kettle is to bring water to a boil and then let it rest for about 45 seconds before pouring. This slight cooling period is usually enough to bring it into the perfect zone. This precision is one of the pillars of mastering coffee fundamentals for a better morning.
Equally important is the coffee-to-water ratio. A great starting point is the “golden ratio,” which is typically 1 gram of coffee for every 15 to 18 grams of water. From there, you can adjust to your personal preference for strength.
Beyond the Tap: Why Filtered Water Wins
Using water straight from the faucet can introduce a host of unwanted variables into your coffee. Tap water often contains chlorine, sediment, and varying levels of minerals that can react poorly with the delicate compounds in coffee beans, creating off-flavors. But does it really make that much of a difference? You bet it does.
The argument that “any water is fine” is one of those persistent kitchen tales, much like many common culinary myths. In reality, impurities mask the coffee’s true notes. Think of it like trying to paint on a dirty canvas; the vibrant colors get muddled and muted. A study from the Water Quality Association found that tap water in 68% of U.S. cities contains chlorine levels high enough to produce a noticeably flat taste in brewed coffee. These issues are similar to many common home cooking mistakes where one small oversight affects the entire result.
The fix is surprisingly simple. Using a basic activated carbon filter—like the kind found in a pitcher or attached to your faucet—can remove most of the chlorine and other impurities. This small step ensures the water you use is a clean slate, allowing the unique flavors of your chosen beans to shine through without interference.
Brewing Basics: Common Process Slip-ups
You’ve sourced great beans and perfected your water temperature, but the process itself is where many a good cup of coffee goes wrong. These procedural errors are surprisingly common, yet they are also incredibly easy to fix once you know what to look for. Mastering these small steps is a huge part of understanding the art of the daily brew.
Timing is Everything: Avoiding Over and Under-Extraction
The amount of time your coffee grounds spend in contact with water directly controls the flavor. It’s a delicate balance. Under-extraction happens when the brew time is too short, resulting in a cup that tastes sour, thin, and underdeveloped. over-extraction occurs when the coffee steeps for too long, pulling out bitter and harsh compounds that overwhelm the desirable notes.
Think of it like toasting bread. A few seconds too little and it’s just warm bread; a few seconds too long and you have a piece of charcoal. That perfect golden-brown slice is your target. For coffee, the Specialty Coffee Association reports the ideal extraction yield—the amount of flavor pulled from the grounds—is between 18% and 22%. For a French press, this usually means a 4-minute steep, while a pour-over might only need 2.5 to 3 minutes. Start with these times and adjust based on your taste.
The Hidden Enemy: Dirty Equipment
What is the most underrated factor in a disappointing cup of coffee? It’s almost certainly a dirty machine. Over time, coffee makers accumulate a buildup of coffee oils, residue, and mineral scale from water. This buildup isn’t just unsightly; it actively ruins your coffee’s flavor.
Those old oils become rancid. They impart a bitter, sometimes metallic, taste that can make even the most expensive coffee beans seem cheap and stale. This is one of those simple home kitchen mistakes that has an outsized impact on the final product. Your equipment should be a clean canvas for every brew.
Gentle Care: Cleaning Your Coffee Gear
A consistent cleaning routine is your best defense against flavor contamination. It doesn’t require a huge amount of effort, but it does demand consistency. The method varies slightly depending on your brewer of choice, but the principle remains the same: remove the oils and scale.
Cleaning Drip Machines
For an automatic drip machine, the biggest concern is internal mineral buildup, especially if you use hard water. To descale it, run a cycle with a solution of equal parts white vinegar and water, followed by two cycles of plain water to rinse it thoroughly. Experts at the Good Housekeeping Institute suggest doing this every one to three months, depending on your usage and water hardness.
Of course, don’t forget the parts you handle daily. The carafe and the filter basket should be washed with soap and warm water after every single use to prevent that sticky film of coffee oil from forming.
Maintaining French Presses
The French press filter is the most common trouble spot. Its multi-layer mesh screen is designed to trap grounds, but it also traps oils effectively. After each use, completely disassemble the plunger and screen assembly and wash each part individually. This is a far cry from the myth that a simple rinse will suffice, a common misconception we often see in the kitchen, much like those discussed when we separate culinary fact from fiction.
A quick scrub with a soft brush and a little dish soap is usually all it takes to remove any lingering particles and oils. Allowing it to fully air dry before reassembly prevents any musty odors from developing. A clean press ensures that the only flavors in your cup are the ones you intended to be there.
Beyond the Brew: Serving and Enjoying Your Perfect Cup
You’ve navigated the tricky waters of grinding, measuring, and brewing. Now comes the final, often overlooked, step: serving. One of the most common missteps is pouring the coffee when it’s scalding hot. The National Coffee Association suggests an ideal holding temperature of 180°F to 185°F to best appreciate the flavor notes. Serving it much hotter than that can actually burn your taste buds, masking the complex flavors you worked so hard to extract. Let it cool for a minute.
Another major pitfall is overwhelming the coffee with additives. While a splash of cream or a spoonful of sugar can be delightful, drowning your brew in them is like covering a perfectly cooked steak in ketchup—it completely hides the main event. It’s one of those common home cooking mistakes that translates directly to your coffee cup. The goal is to complement the coffee’s flavor, not erase it entirely.
To appreciate your coffee, try tasting it with intention. Before adding anything, take a small sip and let it sit on your tongue. Try to identify specific notes. Is it nutty, fruity, or chocolaty? Professional tasters often slurp their coffee—a fancy trick to spray the liquid across the entire palate—which helps them detect more subtle flavors. This is a core part of mastering coffee fundamentals for daily enjoyment.
What you’re really doing is giving the beverage the attention it deserves.
Ultimately, the “perfect” cup is the one you enjoy most. But by avoiding these simple serving errors, you open up a much richer tasting experience. This small act can transform a simple drink into a more thoughtful part of a mindful morning routine, setting a better tone for your entire day.
Your Next Brew: An Invitation to Experiment
Now that you’re armed with the knowledge to sidestep the most common coffee brewing mistakes, the real journey begins. The goal isn’t just to follow a rigid set of rules to brew one ‘perfect’ cup, but to embrace the process as a form of culinary exploration. Instead of trying to change everything at once, what if you focused on just one variable this week? Perhaps you could experiment with a slightly finer grind each day, tasting the subtle shifts from sour to sweet to bitter. Or maybe you could test the difference between tap water and filtered water side-by-side. By turning your daily routine into a small, controlled experiment, you transform a simple task into a rewarding hobby, making your next brew not just better, but uniquely yours.
Frequently Asked Questions
How do I know if my coffee beans are fresh?
The most reliable indicator of freshness is a “roasted on” date printed on the bag. Ideally, you should use beans within a few weeks of this date. Fresh beans will also have a strong, pleasant aroma and may have a slightly oily sheen, depending on the roast level.
What’s the ideal water temperature for brewing coffee?
According to the Specialty Coffee Association, the ideal water temperature is between 195°F and 205°F (90°C to 96°C). This range ensures optimal extraction of desirable flavor compounds without scalding the grounds. A simple method is to boil water and let it sit for about 45 seconds before you pour.
How often should I clean my coffee maker?
You should clean the removable parts, like the carafe and filter basket, with soap and water after every use. For a deep clean to remove mineral buildup (descaling), run a cycle with a vinegar-water solution every one to three months, depending on your water hardness and how often you use the machine.
Can using pre-ground coffee really affect the taste that much?
Yes, it makes a significant difference. Grinding exposes more surface area to oxygen, causing the coffee to go stale very quickly and lose its aromatic compounds. Using pre-ground coffee often results in a flatter, less vibrant cup compared to the rich flavor you get from grinding beans just before brewing.
What’s the best way to store coffee beans to keep them fresh?
Store your coffee beans in an airtight, opaque container at room temperature, away from light, heat, and moisture. A cool, dark pantry is perfect. Avoid storing beans in the refrigerator or freezer, as condensation can introduce moisture and ruin their flavor.