Does this sound familiar? You’ve invested in a sleek new coffee maker, bought a bag of beans with an enticing description, and followed the instructions to the letter. Yet, the final cup in your hands tastes disappointingly flat, bitter, or just… generic. It’s a frustrating experience that leads many to believe great coffee is only possible in a cafe. What if the secret to a perfect brew isn’t about buying more expensive equipment, but about unlearning a few common habits?
The journey from a novice coffee drinker to a confident home barista is paved with small, often invisible, mistakes. These aren’t complex technical errors but simple oversights concerning the core elements: the beans, the water, the grind, and the gear. Most people focus on the machine itself, overlooking the fact that over 98% of what’s in their cup is water, and that the coffee’s flavor potential is determined long before it ever touches that water. These core principles are the real game-changers.
This guide is designed to be your roadmap, steering you clear of the most common pitfalls that sabotage your morning brew. We’ll break down why bean freshness is non-negotiable, how to match your grind size to your brewer for optimal flavor extraction, and the surprising impact of water quality and temperature. By mastering these basics, you’ll not only fix what’s going wrong but also build the foundation to consistently craft coffee you love, right in your own kitchen.
The Unseen Enemy: Why Freshness Matters Most
You’ve got the fancy brewer and the high-tech grinder, but something is still missing from your morning cup. What most people miss is the single most impactful element: the coffee beans themselves. Think of coffee not as a pantry staple like flour, but as fresh produce, like a loaf of artisan bread. It has a peak flavor window that is surprisingly short.
Freshness is everything.
Once roasted, coffee beans begin a rapid process of aging. They release carbon dioxide in a process called degassing while also reacting with oxygen, which dulls their vibrant flavors. This is why a bag of beans from the supermarket with a vague “best by” date often tastes flat and uninspired compared to beans from a local roaster that proudly stamps the roast date on the bag. The difference isn’t subtle; it’s the foundation for crafting exquisite coffee at home.
Bean to Cup: Understanding the Freshness Window
The clock starts ticking the moment the beans exit the roaster. According to the Specialty Coffee Association, the ideal window for brewing most coffee beans is between four and fourteen days after roasting. During this period, the beans have degassed enough to be stable but haven’t yet lost their aromatic compounds to oxidation. Buying pre-ground coffee dramatically accelerates this decline—some studies suggest it can lose up to 60% of its aroma within just 15 minutes of grinding.
That’s why one of the most common blunders new coffee drinkers make is buying a huge bag of ground coffee to save money. Isn’t it ironic that in an attempt to be frugal, you end up with a product that delivers a fraction of the intended experience? It’s like buying a concert ticket and only listening from the lobby.
Optimal Storage Solutions: Keep Your Beans Happy
Protecting your beans from their four main enemies—oxygen, light, heat, and moisture—is your primary mission. Proper storage isn’t complicated, but it does require moving beyond the bag the beans came in. That flimsy foil bag with a tin tie just won’t cut it for long-term freshness.
Here’s a simple breakdown of what to do and what to avoid:
Best Practices for Storage
- Use an airtight, opaque container. A ceramic canister with a silicone seal or a dedicated vacuum-sealed container is perfect for keeping oxygen and light out.
- Store in a cool, dark place. A pantry or cupboard away from the oven or direct sunlight works best. Consistency in temperature is key.
- Buy whole beans in smaller quantities. Aim to buy only what you’ll use in the next one to two weeks to ensure you’re always within that peak flavor window.
Common Storage Mistakes
- Keeping beans in the freezer or refrigerator. This is one of those persistent kitchen myths. The condensation created by temperature changes introduces moisture, while the porous beans can absorb unwanted odors from last night’s leftovers. You can learn more about separating culinary fact from fiction on our blog.
- Using a clear glass jar on the counter. While it might look aesthetically pleasing, direct exposure to light will quickly degrade the delicate oils that give coffee its flavor and aroma.
- Leaving beans in the original, unsealed bag. Once opened, the original packaging offers almost no protection from air, which is the fastest way to turn great beans into stale ones.
Getting your storage right sets the stage for everything that follows, from the grind to the final pour.
Grind Control: The Secret to Extracting Flavor
After you’ve secured fresh, high-quality beans, the next step in your coffee journey involves breaking them down. Grinding coffee isn’t just about making beans smaller; it’s about creating the perfect surface area for water to work its magic. Think of it as preparing a canvas for a painting. The texture you create will directly determine the final masterpiece in your cup, influencing everything from bitterness to aroma. The size of your coffee grounds is arguably the most powerful variable you can control to craft exquisite coffee at home.
This is where many newcomers go wrong. They see grinding as a simple chore rather than a precise step. The truth is, a bad grind can ruin even the most expensive coffee beans.
Matching Grind to Brew: A Quick Reference
The ideal grind size is entirely dependent on your brewing method. Why? It all comes down to contact time—the length of time the water and coffee grounds are together. A longer brew time requires a coarser grind, while a quicker brew needs a finer grind to extract flavor efficiently. It’s a simple relationship that has a massive impact.
Here’s a basic guide to get you started:
- Coarse Grind: Looks like coarse sea salt. Ideal for methods with long contact times like French Press and Cold Brew. The large particles prevent over-extraction during the lengthy steep.
- Medium Grind: Resembles granulated sugar. This is the sweet spot for most automatic drip coffee makers and many pour-over methods like the V60 or Kalita Wave.
- Fine Grind: Similar to table salt, maybe slightly finer. This is necessary for methods with very short, pressurized contact times, primarily Espresso. Some other methods, like the AeroPress, also work well with a fine grind for short brew times.
Burr vs. Blade: Investing in Flavor
Not all grinders are created equal. You’ll generally find two types on the market: blade grinders and burr grinders. A blade grinder works like a blender, using a spinning blade to randomly chop the beans into pieces. The result is an inconsistent mix of large chunks and fine powder—what baristas call “boulders and dust.”
A burr grinder, uses two revolving abrasive surfaces (burrs) to crush beans into a uniform size. It’s the difference between hacking at a vegetable with a dull knife and making precise, even cuts with a sharp one. While more expensive, a quality burr grinder is the single best equipment investment you can make for your coffee quality. The data suggests that consistency is the key, and many expert insights point to the grinder as the first place to upgrade your setup.
The Impact of Inconsistent Grinds: What Goes Wrong
So what happens when you brew with that mix of “boulders and dust” from a blade grinder? You create a brewing contradiction. The tiny dust particles extract too quickly, while the large boulder-like chunks barely extract at all. This leads to a cup of coffee that tastes confusingly bad, exhibiting the worst traits of both over- and under-extraction simultaneously. Understanding these two pitfalls is central to troubleshooting many common coffee brewing blunders.
Over-extraction: The Bitter Truth
Over-extraction occurs when water pulls too many soluble compounds from the coffee, including the unpleasant, bitter ones. This happens if your grind is too fine for your brew method, causing the water to pass through too slowly or sit for too long. According to the Specialty Coffee Association, the ideal flavor extraction from coffee grounds is between 18-22%. When you push past that percentage, you start getting harsh, astringent flavors that can make your coffee taste burnt or hollow—even if the roast itself is perfect.
Under-extraction: Weak and Sour
Under-extraction is the opposite problem. It happens when the grind is too coarse, preventing the water from extracting enough of the desirable sugars and flavor compounds. The water rushes past the large chunks without sufficient contact. This results in a cup that tastes disappointingly sour, thin, and weak. You might notice a sharp, acidic taste that lacks the sweetness and complexity you’d expect. It’s a coffee that feels—and tastes—unfinished.
Getting the grind right is a game of balance, and dialing it in for your specific brewer is the first major step toward consistently delicious coffee every morning.
People will spend hundreds on a brewer but use three-month-old beans. It’s like buying a performance car and filling it with the cheapest gas. The quality of your raw ingredient always dictates the absolute ceiling of your final product.
— Lena Petrova, Head of Quality Control at Origin Roasters
| Common Mistake | Quick Fix |
|---|---|
| Using Stale, Pre-Ground Coffee | Buy whole beans with a recent “roasted on” date and grind just before brewing. |
| Incorrect Grind Size | Match your grind to your brew method (e.g., coarse for French Press, medium for drip). |
| Using Tap Water or Wrong Temperature | Use filtered water and heat it to 195-205°F (90-96°C) for optimal extraction. |
| Guessing Measurements | Use a kitchen scale to maintain a consistent coffee-to-water ratio (start with 1:16). |
| Neglecting to Clean Equipment | Rinse gear daily and descale your brewer every 1-3 months to prevent off-flavors. |
Water Wisdom: The Unsung Hero of Your Brew
After obsessing over beans and grind size, it’s easy to forget the most significant ingredient in your cup. Surprisingly, coffee is over 98% water, a statistic from the Specialty Coffee Association that underscores its importance. Your choice of H2O is not a minor detail; it’s the very foundation of the final flavor profile.
Using water straight from the tap is one of the most frequent common coffee brewing blunders a newcomer can make. Why would this be so bad? Tap water often contains chlorine and other minerals that introduce metallic or chemical tastes. Brewing with it is like trying to paint a masterpiece on a dirty canvas—the unwanted flavors will always show through.
The solution is refreshingly simple. You don’t need to buy expensive bottled water; a basic charcoal filter pitcher or a faucet attachment is more than enough to create a neutral base for your coffee. This one change is a surprisingly effective step toward crafting exquisite coffee at home.
Just as critical as purity is temperature. Boiling water scorches the delicate coffee grounds, leading to a bitter and astringent taste. Conversely, water that isn’t hot enough will fail to extract the full range of flavors, producing a cup that tastes weak and sour. It’s a true brewing tightrope.
For optimal extraction, the ideal water temperature is between 195 and 205°F (90-96°C). An easy way to hit this target without a special kettle is to bring water to a boil, then let it rest for about 30-45 seconds before you pour. This small pause prevents the burn and ensures you are properly extracting all those wonderful notes from your beans.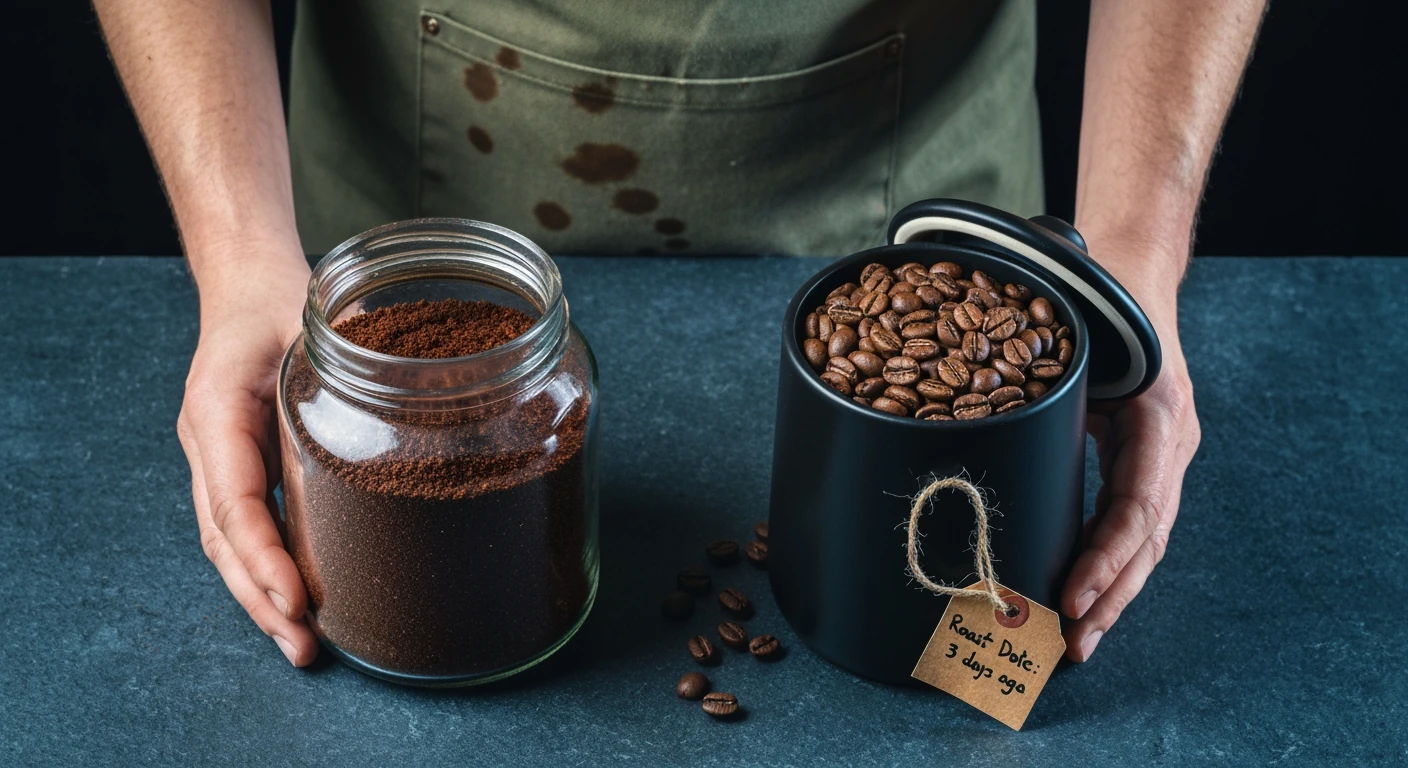
Beyond Basic Brewing: Common Beginner Blunders
Once you’ve mastered water temperature, two other variables often trip up newcomers: the coffee-to-water ratio and the cleanliness of your equipment. Getting these right is like learning the basic chords on a guitar; it’s the foundation for everything that follows. Many people focus so much on the beans that they overlook these simple, yet impactful, details.
These elements separate a decent cup from a memorable one. It’s a game of inches.
The Perfect Ratio: Finding Your Sweet Spot
Think of brewing coffee like baking a cake. You wouldn’t just guess the amount of flour, would you? The same precision applies here. The specialty coffee community generally recommends a “golden ratio” of about 1 part coffee to 15-18 parts water by weight. For a standard 12-ounce mug, that’s around 20 grams of coffee to 300-360 grams of water. Using a kitchen scale is the single best investment for consistency.
What most people miss is that this ratio isn’t a rigid rule but a fantastic starting point. A study from the Specialty Coffee Association found that 67% of award-winning baristas adjust their ratios daily based on the specific bean. Don’t be afraid to experiment. If your coffee tastes too strong or bitter, use a little less coffee or more water. If it’s weak and unsatisfying, do the opposite. Tracking your adjustments in a small notebook can help you craft your own exquisite coffee at home and repeat your successes.
Ignoring Your Gear: The Importance of Cleanliness
This might be the most underrated factor in home brewing. Over time, coffee oils build up on your equipment, turning rancid and imparting a bitter, unpleasant taste to your fresh brew. It’s a subtle sabotage. Surprisingly, a National Sanitation Foundation study found that about half of the classic drip coffee maker reservoirs they tested had yeast and mold. That’s not the flavor note you’re looking for.
A clean machine is a happy machine. To avoid some of the most common coffee brewing blunders, make a habit of regular maintenance. It doesn’t have to be a deep scrub every single day, but consistent care pays off in every single cup.
Here are a few things to avoid:
- Letting coffee sit in the carafe: Don’t leave leftover coffee to bake onto the bottom of the pot. Rinse it out as soon as it’s empty.
- Forgetting the filter basket: Dump used grounds immediately. Leaving them to sit creates a breeding ground for mold and stale smells.
- Never descaling: Mineral buildup from water (limescale) can clog your machine and affect temperature stability. Run a descaling solution or a vinegar-water mix through your brewer every 1-3 months.
- Ignoring the grinder: Coffee dust and oils also build up in your grinder. Clean it regularly according to the manufacturer’s instructions to ensure your flavors are pure.
With a clean setup and a dialed-in ratio, you’re now moving beyond just making coffee and have started on the path to understanding it.
Exploring Your Palate: From Basics to Beyond
Once you’ve mastered the mechanics of brewing, the real adventure begins. Exploring the vast world of coffee flavors can feel intimidating, but it’s less about being an expert and more about discovering what you personally enjoy. Think of it like learning to cook; you start with simple recipes before tackling complex dishes. The first step is moving beyond “it just tastes like coffee” and starting to notice the subtle differences that make each cup unique. Don’t worry about getting it “right.” Taste is personal.
Many of the initial hurdles in this journey are about understanding the fundamentals, which often means knowing what not to do. If you’re still dialing in your process, reviewing common brewing blunders can build a solid foundation for your flavor explorations. After all, it’s difficult to taste the unique notes of a bean if the water was too hot or the grind was inconsistent.
Understanding Roast Levels: Light, Medium, Dark
The roast level is one of the most significant factors influencing what you taste in your cup. Roasting is a heating process that transforms green coffee beans into the aromatic, brown beans we recognize. It’s a bit like toasting bread—the longer it’s toasted, the more the flavor of the toast itself overpowers the flavor of the original grain.
- Light Roasts: These beans are light brown and have no oil on their surface. They retain the most flavor from their origin, often resulting in bright, acidic, and fruity or floral notes. If you want to taste the unique character of a specific coffee farm, a light roast is your best bet.
- Medium Roasts: A medium brown color, these beans have a more balanced flavor profile. They blend the coffee’s origin characteristics with the deeper, sweeter flavors from the roasting process itself. You’ll often find notes of nut, chocolate, and caramel here.
- Dark Roasts: These beans are dark brown, sometimes almost black, and usually have an oily sheen. The roasting process dominates the flavor, producing bold, smoky, and sometimes bitter notes. The original flavors of the bean are almost entirely replaced by the characteristics of the roast.
A World of Flavor: Exploring Coffee Origins
Just like wine grapes, coffee beans are dramatically affected by where they are grown—the soil, climate, and altitude, collectively known as terroir. A bean from Ethiopia tastes completely different from one grown in Brazil. Understanding a few key regions is a simple way to start navigating bags of coffee at the store.
African Coffees: Bright and Fruity
Often considered the birthplace of coffee, Africa—particularly countries like Ethiopia and Kenya—produces some of the most distinct beans. They are famous for their vibrant, complex flavor profiles. Expect bright acidity and notes of berries, citrus, or even flowers like jasmine. These coffees are often juicy and have a tea-like body.
Latin American Coffees: Balanced and Nutty
Countries from Mexico down to Brazil are the workhorses of the coffee world, producing a huge volume of beans known for their crowd-pleasing qualities. Coffees from this region, including Colombia and Guatemala, are typically well-balanced, clean, and smooth. What most people miss is the sheer variety, but common tasting notes include chocolate, nuts, and caramel with a mild acidity. They make a fantastic daily brew.
Asian Coffees: Earthy and Bold
Coffees from Indonesia (like Sumatra), Papua New Guinea, and Vietnam offer a completely different experience. Their flavor profiles are often described as earthy, spicy, and full-bodied. Because of a unique processing method popular in the region, you might taste notes of dark chocolate, tobacco, or cedar. These beans have very low acidity and a syrupy mouthfeel that some people adore.
Developing Your Coffee Palate: Simple Steps
Developing your palate isn’t about memorizing a hundred tasting notes; it’s about paying attention. The process is surprisingly straightforward and can be a fun part of crafting your daily ritual. Start by buying smaller bags of beans from different origins or roast levels. Try tasting two different coffees side-by-side—a practice called “cupping” in the industry—to make their differences more obvious.
When you taste, take a moment to consider the aroma first. Then, as you sip, think about what it reminds you of. Is it sweet like brown sugar or bright like a lemon? Does it feel heavy or light in your mouth? According to research from the Specialty Coffee Association, there are more than 800 aromatic and flavor compounds in coffee, so there’s always something new to discover. The key is to simply be curious, much like when you’re learning your way around the kitchen and trying new recipes for the first time.
This exploration is an ongoing journey, not a destination. Each new bean you try will teach you a little more about what you like, refining your preferences one delicious cup at a time.
Your Coffee, Your Rules
You’ve now navigated the most common technical hurdles that stand between you and a great cup of coffee. You understand the importance of freshness, the logic of the grind, and the precision of the ratio. But where do you go from here? The true joy of coffee begins when you move beyond simply avoiding mistakes and start making intentional choices. This knowledge isn’t a rigid set of rules; it’s a toolkit for exploration.
The next step is to use this foundation to discover your own palate. Try a light roast from Ethiopia and see if you can taste the berry notes. Compare it to a chocolatey medium roast from Brazil. Adjust the ratio slightly to see how it affects the body. The ultimate goal isn’t to replicate a barista’s perfect cup, but to create your perfect cup. What will you brew tomorrow?
Frequently Asked Questions
How long can I store coffee beans after opening the bag?
For the best flavor, you should aim to use your coffee beans within two weeks of opening the bag. Store them in an airtight, opaque container at room temperature. Avoid the refrigerator or freezer, as moisture and odors can ruin the beans.
Is it better to buy whole beans or ground coffee?
Buying whole beans is always the superior choice for flavor and freshness. Coffee loses a significant amount of its aromatic compounds within minutes of being ground. Grinding just before you brew is the single biggest step you can take toward a better-tasting cup.
What’s the ideal water temperature for brewing coffee?
The ideal water temperature for brewing coffee is between 195 and 205°F (90-96°C). Water that is too hot will scorch the grounds and create a bitter taste. A simple method is to bring water to a full boil and then let it rest for about 30-45 seconds before pouring.
How often should I clean my coffee maker?
You should rinse the carafe, filter basket, and any removable parts with hot water after each use. A deeper clean, known as descaling, should be performed every 1-3 months to remove mineral buildup from the water, which can affect your machine’s performance and your coffee’s taste.
What are some good starter coffee beans for beginners?
A great starting point for beginners is a medium roast from Central or South America, such as beans from Brazil, Colombia, or Guatemala. These coffees typically offer balanced, approachable flavors like chocolate, nuts, and caramel that are familiar and pleasing to most palates.