The desire to create a delicious, home-cooked meal is universal. Yet, for many beginners, the kitchen feels like a foreign territory filled with confusing gadgets and intimidating techniques. The gap between watching a chef effortlessly prepare a dish on screen and standing in your own kitchen, unsure where to start, can feel immense. This often leads to a cycle of frustration and reliance on expensive takeout or repetitive, uninspired meals.
But what if the secret to home cooking wasn’t about mastering complex recipes or owning a battery of specialized tools? The journey to becoming a confident cook begins with a much simpler foundation: understanding a few key principles and starting with dishes that are designed to build success. A study from the Good Housekeeping Institute found that 71% of home cooks rely on fewer than ten primary tools for their daily meals, proving that simplicity is the true starting point. It’s about building comfort and intuition, one small victory at a time.
This guide is designed to be your trusted companion on that journey. We will demystify the kitchen by first identifying the absolute necessary tools you need to get started—no clutter required. From there, we’ll translate confusing recipe jargon into plain English, provide simple, foolproof recipes for breakfast, lunch, and dinner to build your confidence, and break down the basic techniques that will empower you to go beyond the recipe card and start creating on your own.
Your Kitchen Starter Kit: primary Tools for New Cooks
Stepping into the kitchen for the first time can feel like you need a warehouse of gadgets. The reality is much simpler. You don’t need every specialized tool advertised on late-night television; a handful of versatile essentials will handle the vast majority of recipes. Focus on quality and function over quantity.
In fact, what most people miss is that a cluttered kitchen can actually hinder your progress. A study from the Good Housekeeping Institute found that 71% of home cooks use fewer than ten primary tools for their daily meals. So, which items provide the most value? The key is to start with a minimal set that allows you to chop, mix, and cook on the stovetop effectively.
Here are the absolute must-haves for your starter toolkit:
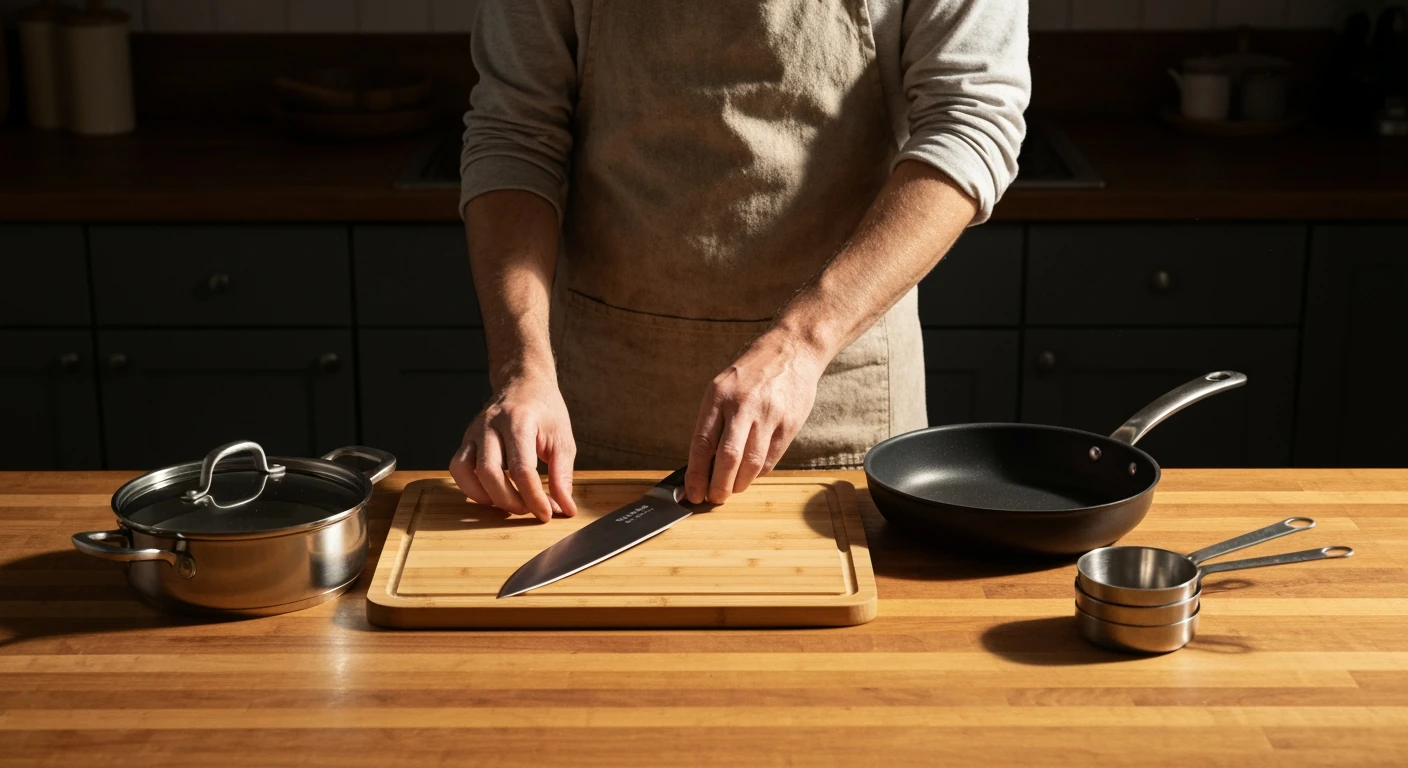
- A good 8-inch chef’s knife for most of your chopping needs.
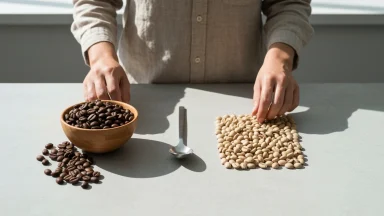
- One large cutting board (a plastic one for raw meat and a wood or bamboo one for everything else is ideal).
- A 10-inch non-stick skillet, perfect for eggs, pancakes, and sautés.
- A medium saucepan with a lid for making sauces, boiling pasta, or cooking grains.
- A set of measuring cups and spoons to ensure your ingredient ratios are correct.
Mastering these basics is one of the best secrets for happier home cooking and can even become one of those simple morning hacks for a brighter day when you feel prepared. Think of these tools like the basic chords of a guitar—you can play a surprising number of songs with just a few.
With this core group of items, you’ll be well-equipped to tackle your first culinary adventures without breaking the bank.
Decoding Recipes: Understanding Jargon and Measurements
With your primary tools at the ready, you might open your first recipe book only to feel like you’re trying to read a different language. Words like “sauté,” “julienne,” and “blanch” can seem intimidating. But they are just specific instructions designed to get you a delicious result. Think of it as learning the rules of the road before a drive; once you know what the signs mean, navigating is easy.
Understanding the vocabulary is the first step toward kitchen confidence. It’s a foundation that makes the entire cooking process smoother and more enjoyable.
Common Cooking Terms Explained
Many recipes rely on a handful of core techniques. Sautéing, for instance, simply means cooking food quickly in a hot pan with a small amount of fat. Simmering involves cooking liquid just below the boiling point—you should see tiny bubbles, not a rolling boil. It’s one of those unbelievable everyday facts that the subtle difference between a simmer and a boil can make or break a delicate sauce.
But what does it mean to blanch vegetables? This is a two-step process where you briefly boil an item and then plunge it into ice water to stop the cooking. This technique is great for locking in color and texture. Mastering these basics is a secret to quick meal prep for a happier home, as it turns confusing steps into a simple, repeatable process.
Measurement Conversion Chart for Success
While savory cooking can be forgiving, baking is much more of a science. According to the Institute of Culinary Education, roughly 70% of baking failures for beginners are due to improper measurements. Using a kitchen scale is always the most accurate method, but a good conversion chart is the next best thing. This is especially helpful when tackling recipes from different parts of the world that may use the metric system.
Here is a basic chart to help you get started.
| Measurement | Volume Equivalent (Approx.) | Weight Equivalent (Approx.) |
|---|---|---|
| 1 U.S. Cup | 240 ml / 16 Tbsp | Varies by ingredient (e.g., flour ≈ 120g) |
| 1 Tablespoon (Tbsp) | 15 ml / 3 Tsp | ≈ 14g (butter) |
| 1 Teaspoon (Tsp) | 5 ml | ≈ 4g (granulated sugar) |
| 1 Fluid Ounce (fl oz) | 30 ml | N/A (Volume measurement) |
| 1 Ounce (oz) | N/A (Weight measurement) | 28.35g |
What most people miss is how much ingredient density matters—a cup of packed brown sugar weighs significantly more than a cup of sifted flour. Pay attention to those details! Knowing your measurements is like having a reliable map, not unlike needing required USA travel tips when navigating a new country.
With this knowledge, you are no longer just following instructions. You are starting to understand the basic language of cooking itself.
A study from the Good Housekeeping Institute found that 71% of home cooks use fewer than ten primary tools for their daily meals.
— Good Housekeeping Institute
| Measurement | Volume Equivalent (Approx.) | Weight Equivalent (Approx.) |
|---|---|---|
| 1 U.S. Cup | 240 ml / 16 Tbsp | Varies by ingredient (e.g., flour ≈ 120g) |
| 1 Tablespoon (Tbsp) | 15 ml / 3 Tsp | ≈ 14g (butter) |
| 1 Teaspoon (Tsp) | 5 ml | ≈ 4g (granulated sugar) |
| 1 Fluid Ounce (fl oz) | 30 ml | N/A (Volume measurement) |
| 1 Ounce (oz) | N/A (Weight measurement) | 28.35g |
First Flavors: Simple Recipes to Build Confidence
Now that you can tell the difference between a simmer and a sauté, it’s time to get your hands dirty. The best way to build momentum in the kitchen is by starting with recipes that are nearly impossible to mess up but deliver big on flavor. A study from Cornell University suggests that successfully completing a small task, like cooking a simple meal, can significantly boost your self-confidence for more complex challenges. It all starts with one dish.
These recipes use minimal ingredients and straightforward steps. They prove that you don’t need a pantry full of exotic spices or a culinary degree to make delicious food. You just need a little guidance.
Breakfast Bliss: Fluffy Scrambled Eggs with a Twist
Scrambled eggs are a breakfast staple, but the difference between rubbery, dry eggs and creamy, fluffy ones is all in the technique. Mastering a quick, satisfying breakfast is one of those simple morning hacks for a brighter day. The secret here is low, slow heat and constant motion.
Ingredients:
- 2 large eggs
- 2 tablespoons milk or heavy cream
- 1 teaspoon butter
- Salt and pepper to taste
- The Twist: A pinch of smoked paprika or a tablespoon of chopped chives
Instructions:
- Crack the eggs into a bowl. Add the milk, salt, pepper, and paprika (if using), then whisk vigorously for about 30 seconds until the mixture is pale yellow and slightly frothy.
- Melt the butter in a non-stick skillet over medium-low heat. Do not let the butter brown.
- Pour the egg mixture into the pan. Let it sit for about 15-20 seconds until the edges just begin to set.
- Using a silicone spatula, gently push the eggs from the edge of the pan toward the center. Continue this slow scrambling motion until the eggs form soft curds and are mostly cooked but still look slightly wet. This should only take 2-3 minutes.
- Remove the pan from the heat immediately — they will continue to cook from the residual heat. Stir in the chives (if using) and serve right away.
Lunchtime Hero: The Ultimate Grilled Cheese Sandwich
Forget the flimsy bread and single slice of plastic cheese from childhood. A great grilled cheese is a lesson in texture and taste, using quality ingredients to create something special. What most people miss is that the bread is just as important as the cheese. A sturdy sourdough or multigrain will give you the perfect foundation.
Ingredients:
- 2 slices of good-quality bread (sourdough, brioche, or whole wheat)
- 2-3 slices of your favorite cheese (cheddar, provolone, and Monterey Jack all work well)
- 1 tablespoon of salted butter, softened
Instructions:
- Lay the bread slices on a cutting board. Place the cheese slices on one piece of bread, then top with the other slice.
- Spread half the softened butter on the top slice of the sandwich. (Here’s a pro tip: some people swear by using mayonnaise instead of butter for a perfectly even, golden-brown crust).
- Place the sandwich butter-side down in a cold, non-stick skillet. Spread the remaining butter on the new top slice.
- Cook over medium-low heat for 3-5 minutes, until the bottom is golden brown. Flip carefully and cook the other side for another 3-5 minutes, until the cheese is completely melted and gooey.
Building a great meal from simple parts is a core skill, and some of the best quick meal prep secrets for a happier home involve perfecting these basics.
Dinner Delight: One-Pan Lemon Herb Chicken and Veggies
The one-pan meal is a beginner’s best friend. It minimizes cleanup and teaches you about roasting, which is a very forgiving cooking method. This recipe is your template; once you master it, you can change the vegetables and seasonings endlessly.
Ingredients:
- 2 boneless, skinless chicken breasts
- 1 pound of vegetables (like broccoli florets, baby carrots, or chopped red bell pepper)
- 1 lemon, halved
- 2 tablespoons olive oil
- 1 teaspoon dried oregano
- Salt and pepper to taste
Instructions:
- Preheat your oven to 400°F (200°C).
- On a large, rimmed baking sheet, toss the vegetables with 1 tablespoon of olive oil, salt, and pepper. Spread them in an even layer.
- Pat the chicken breasts dry and coat them with the remaining olive oil, oregano, salt, and pepper. Place them on the baking sheet among the vegetables.
- Squeeze the juice from one lemon half over everything. Slice the other lemon half and tuck the slices around the chicken and veggies.
- Bake for 20-25 minutes, or until the chicken is cooked through (reaching an internal temperature of 165°F) and the vegetables are tender.
Ingredient Swaps for Variety
A recipe isn’t a strict command; it’s more like a friendly suggestion. Getting comfortable with substitutions is how you learn to cook. It’s one of those unbelievable everyday facts how a single change can create a brand new meal.
- For the chicken: Try boneless, skinless chicken thighs (they may need 5-7 extra minutes of cooking time), salmon fillets (they may need 5-8 fewer minutes), or a can of drained and rinsed chickpeas for a vegetarian option.
- For the vegetables: Swap broccoli for asparagus spears, green beans, or chunks of sweet potato. Just be mindful that denser vegetables like potatoes will need a longer cooking time.
- For the flavor: Instead of lemon and oregano, try lime juice and chili powder for a Tex-Mex feel, or use balsamic vinegar and dried rosemary for a more rustic flavor.
With these foundational recipes mastered, you’re no longer just following instructions—you’re starting to make choices and develop your own style in the kitchen.
Beyond the Recipe: necessary Cooking Techniques for Beginners
A great recipe is your map, but knowing basic techniques is like learning how to drive the car. Understanding a few core skills gives you the confidence to navigate any culinary road, turning a simple set of instructions into a delicious meal. These fundamentals are less about fancy maneuvers and more about building efficiency and safety in your kitchen.
Once you master these, you’ll find that cooking becomes less stressful and much more intuitive. Think of it as developing muscle memory for your hands and your senses. It’s a major shift.
Mastering the Basics: Chopping and Slicing
Before you turn on the stove, your most important tool is often your knife. Proper knife skills aren’t about chopping at lightning speed like a TV chef; they are about consistency and safety. Let’s start with a common task: chopping an onion. First, cut the onion in half from pole to pole, lay the flat side down for stability, and then make thin vertical slices, stopping just before you reach the root end. Finally, turn the onion and chop across those slices to create a uniform dice.
The key is to use the “claw grip” with your non-dominant hand, tucking your fingertips under to protect them while you guide the blade. It feels awkward at first, but this single habit will prevent the most common kitchen injuries. Developing this skill is one of the best ways to apply quick meal prep secrets, since efficient chopping drastically cuts down your time at the cutting board.
Heat It Up: Sautéing vs. Simmering
Understanding how to apply heat is what separates cooking from just assembling ingredients. Two of the most common methods you’ll see in recipes are sautéing and simmering. Sautéing involves cooking food quickly in a hot pan with a small amount of fat, like oil or butter. The goal is to brown the food, which develops deep, rich flavors—a process known as the Maillard reaction.
Simmering, is a gentler, slower process. After bringing a liquid to a boil, you reduce the heat until you see only small, infrequent bubbles breaking the surface. This is perfect for soups, stews, and sauces, allowing flavors to meld together without boiling away all the liquid. Think of sautéing as a quick, energetic jog and simmering as a long, leisurely walk; both get you somewhere, but the experience and result are completely different.
Keeping It Safe: primary Food Safety Practices
A delicious meal can be quickly ruined if it makes someone sick. Basic food safety is non-negotiable. The single most important concept to understand is cross-contamination. This happens when bacteria from one food item, typically raw meat, transfers to another, like fresh vegetables. To prevent this, always use separate cutting boards and utensils for raw proteins and produce, and wash your hands thoroughly with soap and water after handling raw meat.
According to the USDA, improper food handling is a leading cause of foodborne illness, with an estimated 1 in 6 Americans getting sick each year. It’s one of those everyday facts that can be quite surprising, but it highlights the importance of kitchen hygiene. The simple habit of washing your hands and surfaces frequently is one of the most effective ways to ensure your culinary creations are safe to eat, much like how simple morning hacks can set a positive tone for your entire day.
Temperature Guidelines
Using a food thermometer is the only reliable way to know if meat is cooked to a safe internal temperature. Color is not a trustworthy indicator. Here are the minimum internal temperatures recommended by FoodSafety.gov:
- Poultry (Chicken, Turkey): 165°F (74°C)
- Ground Meats (Beef, Pork): 160°F (71°C)
- Fresh Beef, Pork, Lamb (Steaks, Roasts): 145°F (63°C) with a 3-minute rest time
- Fish & Shellfish: 145°F (63°C) or until flesh is opaque
Committing these numbers to memory or simply posting them inside a cabinet door removes all the guesswork and ensures every meal is as safe as it is tasty.
Common Beginner Mistakes and How to Avoid Them
Every great chef has burned a piece of toast or forgotten the salt. Mistakes are not just common; they are an primary part of the learning curve. The key is to view each misstep as a lesson rather than a failure. What separates a frustrated cook from a confident one is simply understanding what went wrong and how to fix it next time. It’s a simple shift in perspective.
Mistake vs. Solution: Learning from Your Kitchen Adventures
Navigating a new recipe can feel like following a map in a foreign country. A few wrong turns are expected. The underrated factor here is preparation—or the lack thereof. A survey from the American Culinary Federation found that 82% of kitchen mishaps reported by beginners stem from poor prep and timing, not a lack of skill.
- Mistake: Not reading the recipe all the way through before starting. You get halfway in only to realize you need an ingredient that must marinate for two hours.
- Solution: Read the recipe twice. First, to get the general idea, and second, to make a mental checklist of ingredients and steps. This simple habit prevents most surprises.
- Mistake: Frantically chopping vegetables while your onions are already burning in the pan. This creates stress and leads to unevenly cooked food.
- Solution: Embrace ‘mise en place.’ This is a French term that simply means having all your ingredients prepped and ready before you turn on the heat. Learning some quick meal prep secrets transforms cooking from a chaotic race into a calm, enjoyable process.
- Mistake: Relying only on cooking times. Ovens vary, and the thickness of a chicken breast can change everything, often resulting in dry, tough meat.
- Solution: Use your senses and a thermometer. Is the chicken golden brown? Does it feel firm? A digital thermometer is a beginner’s best friend, ensuring perfectly cooked meat every time.
The Power of Tasting: Seasoning as You Go
Perhaps the single most common pitfall for new cooks is under-seasoning. Food without enough salt, acid, or herbs tastes flat and uninspired. But how do you know what “season to taste” actually means? It feels like a secret code. The truth is, it’s a skill you develop by doing.
Start by adding a little seasoning at each major stage of cooking. When you add onions to the pan, sprinkle them with a pinch of salt. When you add the tomatoes, do it again. This is called layering flavor, and it creates a much deeper, more complex taste than just adding a bunch of salt at the very end. Your palate is like a muscle; the more you use it, the stronger it gets.
What most people miss is that salt does more than just make things salty. It actually enhances sweetness and reduces bitterness, completely changing a dish’s profile. (It’s one of those everyday facts that will amaze you!) So, taste your food constantly. Ask yourself: does this need more brightness (a squeeze of lemon)? More savory depth (a pinch of salt)? Learning to trust your own tongue is the final step in making a recipe your own.
Your Next Culinary Adventure: Growing Your Skills
Once you’ve mastered the basics and learned to sidestep common kitchen mistakes, the real fun begins. Viewing cooking as a continuous journey rather than a destination is the key. Think of it like learning to play the guitar; first you learn the chords, then you start stringing together your own songs. Your kitchen is now ready for its own playlist.
Finding new inspiration is easier than ever. A recent survey from The Food Network revealed that 68% of home cooks try at least one new recipe a month, often inspired by cuisines they want to experience. Why not explore the rich flavors of American regional cooking, from New England clam chowder to Texas brisket? It’s like a delicious road trip without leaving home. Planning a trip can even inspire your menu, just as knowing the best seasons to travel America can shape an itinerary.
The underrated factor here is simple meal planning. This isn’t about creating complicated spreadsheets; it’s about deciding on a few meals for the week. Knowing you have the ingredients for Tuesday’s tacos or Thursday’s pasta reduces daily stress — and those last-minute takeout orders. Embracing a few quick meal prep secrets can completely change your weeknights.
It’s a major shift.
Each new dish you try and every technique you practice builds your confidence. Soon, you won’t just be following recipes; you’ll be creating your own, sharing food that brings joy to you and those around your table.
From Following Recipes to Creating Your Own
Cooking is not a destination with a finite end point, but a continuous journey of discovery. The skills and recipes in this guide are not just instructions; they are the first few words in a new language you are learning to speak. The real magic happens when you start to experiment. What happens if you add a pinch of chili flakes to those scrambled eggs, or swap the oregano for rosemary on the chicken? Each meal becomes a low-stakes experiment, an opportunity to learn what you love. The next time you feel a spark of culinary curiosity, don’t just look for a recipe—ask yourself, “What can I create with what I have?” That question is the true beginning of your life as a home cook.
Frequently Asked Questions About Home Cooking
What are the absolute minimum tools I need to start cooking?
You can start with just a few versatile items. An 8-inch chef’s knife, a large cutting board, a 10-inch non-stick skillet, a medium saucepan with a lid, and a set of measuring cups and spoons will cover most beginner recipes.
How do I know if my food is cooked thoroughly?
The most reliable way is to use an instant-read food thermometer. For example, chicken is safe to eat at 165°F (74°C). For other foods, look for visual cues like clear juices running from meat or fish that flakes easily with a fork.
What’s the best way to store leftover food?
Let food cool to room temperature before storing, but don’t leave it out for more than two hours. Use airtight containers to keep food fresh and prevent contamination in the refrigerator. Labeling containers with the date can also help you track freshness.
Can I substitute ingredients if I don’t have something?
Yes, especially in savory cooking! You can often swap vegetables, herbs, or proteins. For example, use chicken thighs instead of breasts or parsley instead of cilantro. Be more cautious with baking, as its chemistry requires more precise ingredient ratios.