That first sip of morning coffee is more than just a jolt of caffeine; it’s a ritual. For many, it’s a quiet moment of focus before the day’s chaos begins. Yet, how often does that homemade brew fall short of the rich, aromatic cup you get from your favorite café? You buy the expensive beans, you follow the instructions on the bag, but the result is often a flat, bitter, or disappointingly weak cup that feels more like a necessity than a delight.
What if the secret to a perfect cup wasn’t a complex, unattainable art form reserved for trained baristas? The truth is, mastering your morning coffee comes down to understanding a few core principles. The journey from a mediocre brew to a exceptional one is paved with small, intentional choices about the beans you select, the way you grind them, and even the water you use. These fundamentals are the building blocks that separate a forgettable cup from a memorable experience.
This guide demystifies the process, empowering you to take control of your daily brew. We’ll explore the required differences between coffee beans and how their origins shape their taste. You’ll learn why the size of your coffee grounds is important and how to match it perfectly to your chosen brewing method, from the slow, meditative pour-over to the bold and strong French press. By the end, you’ll have the knowledge to transform your kitchen counter into a source of daily delight, one perfectly crafted cup at a time.
Understanding Your Beans: A Guide to Coffee Varieties
Walking down the coffee aisle can feel like visiting a library where you don’t recognize any of the authors. Bags with words like “single-origin,” “Arabica,” and “dark roast” compete for your attention. It’s a lot to take in before you’ve even had your first cup. The secret to a delightful morning brew starts right here, with the beans themselves. Understanding the two main players on the shelf is your first step from confusion to confidence.
Think of it like choosing an apple for a pie; you wouldn’t use the same one you’d pick for a snack. Your coffee journey begins with a core choice between two species: Arabica and Robusta.
Arabica vs. Robusta: The Flavor Showdown
Most of the specialty coffee you find in cafes and on grocery store shelves is Arabica. These beans are the crowd-pleasers, known for their complex aromas and bright, nuanced flavors that can range from sweet and fruity to sharp and tangy. They thrive in high-altitude, subtropical climates, which makes them more delicate and expensive to cultivate. According to the International Coffee Organization, Arabica beans consistently account for over 60% of global coffee production.
Then there’s Robusta. This bean is exactly what it sounds like—hardy and resilient. It contains nearly double the caffeine of Arabica and boasts a bold, strong, and often bitter flavor profile, frequently described as rubbery or chocolatey. Because it’s easier to grow, Robusta is generally less expensive and is the backbone of many espresso blends and instant coffees. But does that mean Robusta is ‘bad’ coffee? Not at all. Its intense flavor and rich crema are prized in traditional Italian espresso, debunking some common coffee myths you might hear in discussions about culinary fact and fiction.
Here’s a simple breakdown:
- Flavor: Arabica is sweeter with high acidity and complex notes. Robusta is stronger, harsher, and more peanut-like.
- Caffeine: Robusta has significantly more caffeine, typically 2.5% or higher, compared to Arabica’s 1.5%.
- Cost: Arabica’s delicate growing needs make it more expensive.
- Bean Shape: Arabica beans are typically oval, while Robusta beans are more circular.
Journey Through Origins: How Terroir Shapes Taste
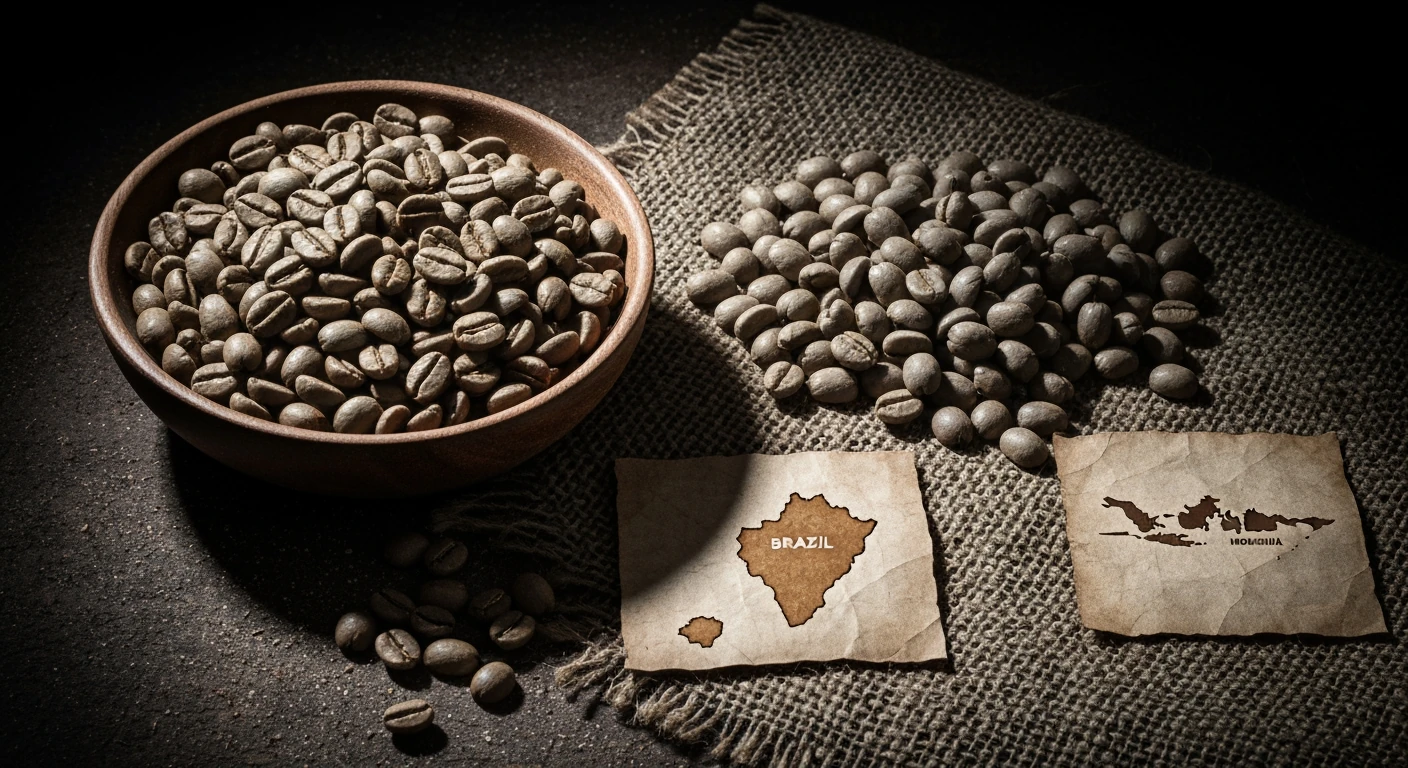
Just like wine, coffee is deeply influenced by its terroir—the specific combination of soil, climate, and altitude where it’s grown. This is why a coffee from Ethiopia tastes dramatically different from one grown in Brazil. The origin story of your beans is written in their flavor. It’s a fascinating element of what makes great home cooking and brewing so rewarding.
For instance, beans from East Africa, like Ethiopia, are often bright, floral, and citrusy. What most people miss is that the high elevations and unique native varietals contribute to this almost tea-like quality. Travel across the globe to Sumatra, Indonesia, and the profile shifts entirely. There, you’ll find beans with a heavy body and deep, earthy flavors of dark chocolate and cedar — a direct result of the region’s wet-hulling processing method and volcanic soil.
Even within a single country, the taste can vary. The volcanic slopes of Hawaii produce the famous Kona coffee, known for its mild, smooth, and nutty profile, a perfect example of how microclimates create unique flavors. This kind of regional diversity is something you see across all sorts of agricultural products when exploring the United States and its rich farmlands.
Choosing a bean isn’t about finding the “best” one, but about finding the one whose story and flavor profile best suits your personal palate. This choice is the first real decision you’ll make on the path to your perfect cup.
The Grind is Key: Matching Fineness to Brew Method
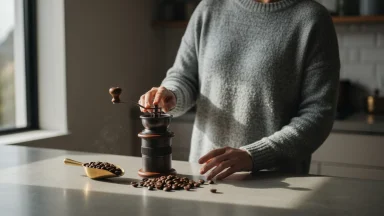
Once you’ve selected your favorite beans, the next step is often the most overlooked. Getting the grind size right directly controls extraction, which is just the technical term for how much flavor the water pulls from the coffee grounds. Think of it like steeping tea; a fine powder infuses quickly, while whole leaves need more time. It’s a simple concept that makes a world of difference.
The core principle is straightforward: the longer the water will touch the coffee, the coarser the grind should be. A grind for a French press, which steeps for about four minutes, should resemble coarse sea salt. This prevents over-extraction, which results in a bitter, harsh taste. On the other end of the spectrum, an espresso grind needs to be fine, almost like powdered sugar, because the water is forced through it in under 30 seconds. What most people miss is that the consistency of the grind matters just as much as the size itself.
This is where your equipment comes into play.
A burr grinder is often recommended by coffee enthusiasts because it mills the beans between two revolving surfaces, creating a much more uniform particle size compared to a blade grinder. While blade grinders are cheaper, they tend to shatter beans unevenly (creating a mix of dust and chunks), which can lead to unpredictable flavor. This is one of those culinary facts versus fiction moments where the tool impacts the final product, much like using the right knife for a specific vegetable in delicious home cooking.
Adjusting your grind is the fastest way to improve your brew at home. If your coffee tastes weak or sour, try a finer grind. If it’s too bitter, go coarser. This simple adjustment puts you in control of crafting that perfect morning cup.
The difference between a four-minute and a six-minute steep in a French press isn’t more flavor; it’s just more bitterness. The sweet spot is a discipline, not a suggestion.
— Dr. Elara Vance, Head of Sensory Science at the Global Coffee Research Institute
| Brewing Method | Grind Size | Flavor Profile | Best For |
|---|---|---|---|
| Pour-Over | Medium-Fine | Clean, crisp, bright, highlights nuanced floral and fruit notes. | Coffee purists who enjoy a meditative process and single-origin beans. |
| French Press | Coarse | Full-bodied, rich, robust, with a heavy texture and lingering finish. | Those who prefer a bold, simple brew and a straightforward, forgiving method. |
| Espresso | Very Fine | Intense, concentrated, complex, with a syrupy body and signature crema. | Dedicated hobbyists who enjoy craft and want a base for milk drinks like lattes. |
Brewing Brilliance: Popular Methods Explored
With the right grind size dialed in, you open the door to a world of different brewing styles. Each method interacts with the coffee grounds in a unique way, highlighting different facets of the bean’s flavor profile. Choosing a method isn’t about finding the single “best” one; it’s about finding the one that best suits your taste and morning routine.
Some techniques demand precision and patience, while others are more forgiving and straightforward. The underrated factor here is how much hands-on time you’re willing to commit before that first cup. Let’s look at three popular approaches for making exceptional coffee at home.
Pour-Over Perfection: A Gentle Extraction
The pour-over method is a favorite among coffee purists for its ability to produce an incredibly clean and nuanced cup. By manually pouring hot water over a bed of coffee in a filter-lined cone, you have complete control over the extraction process. This technique excels at bringing out the bright, acidic, and floral notes in single-origin beans. It’s a patient ritual.
The main drawback is its learning curve. Mastering the pour speed, pattern, and water temperature takes practice, and a gooseneck kettle is almost necessary for the required control. It’s a process that separates many common coffee myths from reality, proving that technique matters just as much as the beans themselves. For those who enjoy a meditative process, the results are well worth the effort.
- Prepare the water and filter: Heat your water to between 195-205°F (90-96°C). Place a paper filter in your dripper and rinse it thoroughly with hot water to remove any paper taste and preheat the cone.
- Add coffee and bloom: Discard the rinse water, add your medium-fine ground coffee, and gently shake to level the bed. Start a timer and pour just enough water (about twice the weight of the coffee) to saturate the grounds. Let it sit for 30-45 seconds. This “bloom” releases trapped carbon dioxide.
- Continue the pour: Pour the remaining water in slow, steady concentric circles, avoiding the very edge of the filter. Aim to finish your pour in about 2 minutes and 30 seconds for a standard-sized brew.
French Press Fundamentals: Full-Bodied Flavor
If pour-over is about delicate precision, the French press is about bold simplicity. This immersion method involves steeping coarse coffee grounds directly in hot water for several minutes before pressing a mesh filter down to separate the grounds. The result is a heavy, full-bodied coffee with a rich texture, as the oils and fine particles remain in the final cup.
Its simplicity is a huge plus, making it a great entry point for anyone looking to step up from a basic drip machine. the metal filter can allow fine sediment to pass through, creating a slightly silty texture at the bottom of the mug — and nobody enjoys that last gritty sip. Plunging too fast is like shaking a snow globe; it just kicks up all the particles you wanted to settle. Slow and steady is the key.
A study reported by the Specialty Coffee Association suggests that steeping for exactly four minutes provides an ideal balance. Extending the steep time to six minutes was found to increase bitterness by over 20% with minimal gains in desirable flavor.
- Combine coffee and water: Add coarse coffee grounds to the preheated French press carafe. Pour hot water over the grounds and give it a gentle stir to ensure all grounds are wet.
- Steep: Place the lid on top with the plunger pulled all the way up and let it steep for exactly four minutes.
- Plunge and serve: After four minutes, press the plunger down slowly and evenly. Serve the coffee immediately to prevent it from continuing to extract and becoming bitter. This simple process is a great way to elevate your morning, much like trying some easy recipes for delicious home cooking.
Espresso Essentials: Crafting Concentrated Joy
Espresso is a different category altogether. It’s a concentrated, 1-2 ounce shot of coffee made by forcing pressurized hot water through a tightly packed “puck” of very fine coffee grounds. What most people miss is that true espresso is defined by this pressure, which creates the signature crema—a reddish-brown foam—on top. It serves as the foundation for popular drinks like lattes, cappuccinos, and Americanos.
The flavor is intense and complex. The downside? It demands a significant investment in specialized equipment and a willingness to learn a precise, often finicky, workflow.
Equipment for Home Espresso
Achieving cafe-quality espresso at home requires more than just a machine with a pressure pump. Is the investment worth it for a daily latte? That depends entirely on your budget and dedication. The core components are non-negotiable for good results.
- Espresso Machine: The centerpiece of the setup, these can range from a few hundred to many thousands of dollars.
- Burr Grinder: A high-quality burr grinder capable of fine, consistent adjustments is arguably more important than the machine itself. A blade grinder simply will not work for espresso.
- Tamper: A weighted tool used to evenly compress the coffee grounds in the portafilter, which is necessary for an even extraction.
- Scale: A digital scale measuring to at least 0.1 grams is needed to weigh the coffee grounds (dose) and the liquid espresso (yield), ensuring consistency from shot to shot.
A starter setup, according to a recent analysis by consumer gear experts, costs around $650, while enthusiast-level gear can easily climb past $2,500. This initial cost is a major hurdle, but for those who love the craft, it can become a deeply rewarding hobby that transforms their kitchen into a personal cafe.
Water Wisdom: The Unsung Hero of Your Coffee
We obsess over the origin of our beans, the precision of our grind, and our brewing method, but what most people miss is the single biggest ingredient in their cup: water. Coffee is, after all, about 98% water. Using poor-quality water is like building a house with a faulty foundation; no matter how nice the furnishings are, the whole structure suffers. This is a basic principle you learn when taking on your first steps to delicious home cooking.
The mineral content of your water dramatically affects flavor extraction. Water that is too “hard,” or full of minerals like calcium and magnesium, can result in a dull, flat-tasting brew because it struggles to bond with the coffee compounds. Conversely, water that is too “soft,” like distilled water, lacks the necessary minerals to pull out the desirable flavors, often leading to a sour or metallic taste. The Specialty Coffee Association suggests an ideal mineral content of around 150 parts per million for optimal extraction.
Your tap water might be sabotaging your expensive beans.
Temperature is just as important. The ideal brewing range is between 195 and 205 degrees Fahrenheit. Water that is too hot—especially boiling water at 212°F—will scald the coffee grounds, releasing excess bitterness. Water that is too cool won’t extract enough flavor, leaving you with a weak and underdeveloped cup. Is it really necessary to be so precise? For a great cup, the data suggests it is. Getting this right is about separating culinary fact from fiction to achieve consistently good results.
Fortunately, you don’t need a chemistry set to get it right. A simple, inexpensive carbon filter pitcher can solve most common water issues by removing chlorine and balancing mineral content. This one small change can make a surprising improvement. The next time you brew, try using filtered water and notice the difference in clarity and taste for yourself.
Storage Secrets: Keeping Your Coffee Fresh
After dialing in your water, the final piece of the puzzle is preserving the quality of your coffee beans. You can have the best equipment and purest water, but if your beans are stale, the result will always be disappointing. Protecting your coffee is like protecting fresh bread; exposure is the enemy. It really is that simple.
The journey from roasted bean to your cup is a race against time. Surprisingly, what most people miss is that coffee begins to lose its peak flavor just days after roasting. A study published in the Journal of Food Science revealed that ground coffee can lose over 50% of its aromatic compounds within 20 minutes of exposure to air. This process, called oxidation, is the primary culprit behind a flat, lifeless brew.
The Enemies of Freshness: Light, Air, Moisture, Heat
Think of your coffee beans as tiny, fragile flavor capsules that have four sworn enemies. To keep your coffee tasting great, you must guard it against light, air, heat, and moisture. Each one systematically breaks down the delicate oils and compounds that create the aromas and tastes we love.
- Air: Oxygen is the main driver of oxidation, which makes the oils in coffee go rancid. This is the same reason a cut apple turns brown.
- Light: Direct sunlight, and even strong kitchen lighting, can accelerate the degradation of coffee’s flavor profile. An opaque container is non-negotiable.
- Moisture: Coffee is hygroscopic, meaning it absorbs moisture—and odors—from the air around it. Moisture will ruin the beans’ integrity long before you even grind them.
- Heat: Storing coffee near an oven or a sunny window is a common mistake. Heat speeds up all the chemical reactions, including oxidation, making your beans go stale much faster.
Many people believe the freezer is a safe haven for coffee beans, but this is one of those kitchen myths that needs busting. While it slows oxidation, the freezer introduces a bigger problem: condensation. Every time you take the beans out, moisture forms on their surface, damaging the oils. It’s a classic case of needing to separate culinary fact from fiction to get the best results.
Optimal Storage Solutions for Every Kitchen
So, where is the best place to store your precious beans? The ideal solution is an airtight coffee container that is also opaque. Ceramic or stainless steel canisters with a vacuum seal are excellent choices. They create a stable, dark, and oxygen-poor environment perfect for preserving freshness.
Your beautiful glass jar on the counter might look nice, but it’s actively harming your coffee by exposing it to light.
The best practice is to keep this container in a cool, dark place like a pantry or cupboard, away from heat sources. For day-to-day use, only take out what you need for the next few days. Just like other aspects of delicious home cooking, having the right storage setup makes all the difference. Think of it less as long-term storage and more as a short-term holding pen—you should aim to buy fresh beans often in smaller quantities.
The underrated factor here is consistency. Find a spot in your kitchen that meets these criteria and make it your coffee’s permanent home. This simple habit will have more impact on your daily brew than almost any other change you can make.
Your Personal Coffee Laboratory
You now have the schematic for a better cup of coffee, but the map is not the territory. The real journey begins not with knowing all the rules, but by choosing one to break or bend in your own kitchen. Instead of trying to change everything at once, what happens if you just change one variable? Brew your usual coffee tomorrow, but use filtered water instead of tap. The next day, adjust your grind one setting finer. The week after, buy a small bag of beans from Ethiopia instead of Brazil.
Treating your coffee routine as a small, daily experiment is the fastest way to develop your palate and discover what you enjoy. The goal is no longer just a caffeine delivery system; it’s a craft. Where will your curiosity take you first?
Frequently Asked Questions About Coffee
1. What is the ideal water temperature for brewing coffee?
The ideal water temperature for brewing coffee is between 195 and 205 degrees Fahrenheit (90-96°C). Using water in this range ensures optimal extraction of flavor compounds. Water that is too hot can scald the grounds and create a bitter taste, while water that is too cool will result in a weak, under-extracted cup.
2. How long do roasted coffee beans stay fresh?
Roasted coffee beans are at their peak flavor within the first one to two weeks after the roast date. They begin to lose their aromatic compounds quickly after that due to oxidation. For the best taste, buy beans in smaller quantities more frequently and look for a roast date printed on the bag.
3. Can I use regular table salt to improve my coffee’s taste?
Yes, a tiny pinch of salt can help reduce bitterness in coffee. The sodium ions interfere with the taste receptors that perceive bitterness, making the brew taste smoother. be very careful, as adding too much will make your coffee taste salty and unpleasant. It’s a trick best used to salvage an over-extracted brew.
4. What’s the difference between light, medium, and dark roasts?
The difference lies in how long the beans are roasted. Light roasts are roasted for the shortest time, preserving the bean’s original, acidic, and floral flavors. Medium roasts have a more balanced profile, while dark roasts are roasted the longest, creating a bold, smoky, and less acidic flavor with a heavier body.
5. Is it better to grind coffee beans just before brewing?
Absolutely. Grinding beans just before brewing is one of the most significant upgrades you can make to your coffee routine. Pre-ground coffee loses its aroma and flavor much faster due to increased surface area and exposure to oxygen. Whole beans protect the delicate oils and compounds inside until you’re ready to brew.