That first sip of morning coffee is more than just a jolt of caffeine; it’s a ritual. It’s the quiet moment before the day begins, a small luxury we grant ourselves. Yet, how often does that carefully anticipated cup fall flat, tasting bitter, sour, or just plain disappointing? You bought the expensive beans and the fancy machine, so what went wrong? The frustration of a mediocre home brew is a universal experience, leaving many to wonder why their coffee never tastes as good as the cup from their favorite café.
The truth is, brewing brilliant coffee isn’t about owning the most high-tech equipment or sourcing beans from a remote mountaintop. More often than not, the culprit is a series of small, almost invisible missteps that compound to sabotage the final result. These common blunders relate to core elements that are easily overlooked: the freshness of the beans, the size of the grind, the quality and temperature of the water, and even the cleanliness of the pot. Each variable plays a critical role in the delicate chemistry of extraction, where flavor is either perfected or ruined.
Fortunately, correcting these errors doesn’t require a barista certification. This guide will demystify the process by breaking down the most common coffee brewing mistakes and offering simple, actionable solutions. We’ll explore why starting with the right beans and grind is non-negotiable, how the unsung hero of water can make or break your cup, and the critical importance of getting your coffee-to-water ratio just right. By mastering these basics, you can transform your daily coffee from a gamble into a consistently delicious and rewarding experience, every single time.
The Foundation: Starting with the Right Beans and Grind
Before you even think about brewing temperatures or fancy techniques, the journey to a perfect cup of coffee begins with its most basic components. The beans you choose and how you grind them are the twin pillars of coffee quality. Get these wrong, and even the most expensive coffee maker will produce a disappointing brew. It all starts here.
Bean Selection: Quality Over Quantity
The biggest mistake many people make is using old, stale coffee beans. Coffee is a fresh product. Look for bags with a “roasted on” date and aim to use the beans within a few weeks of that date for peak flavor. Pre-ground coffee is convenient, but according to the Specialty Coffee Association, coffee can lose up to 60% of its aromatic compounds within just 15 minutes of being ground. That’s a massive flavor loss before the water even hits the grounds.
Choosing between a single-origin bean from Ethiopia or a balanced morning blend is a matter of personal preference. There is no single “best” coffee, only what’s best for you. The goal is to explore different flavor profiles—from fruity and acidic to nutty and chocolatey—to discover what you enjoy most. Just like how your personal taste dictates everything from your breakfast choices to finding your vibe in a new city, your coffee choice should reflect your own palate.
Once you bring those precious beans home, proper storage is significant. Keep them in an airtight, opaque container at room temperature. Oxygen, light, heat, and moisture are the enemies of freshness. And whatever you do, please don’t store your beans in the freezer—the moisture from condensation can ruin them.
Grind Size Matters: A Visual Guide
The size of your coffee grounds directly controls how your coffee tastes by dictating the extraction rate. Think of it like cooking pasta; thin angel hair cooks much faster than thick fettuccine. Similarly, finely ground coffee extracts flavor much more quickly than coarsely ground coffee. If your brew tastes sour, it’s likely under-extracted (coarse grind, short time). If it’s bitter and harsh, it’s over-extracted (fine grind, long time).
The secret is matching the grind size to your brewing method. Why does a French press, which steeps for several minutes, need a coarse grind while an espresso shot, which pulls in 30 seconds, requires a fine one? It all comes down to controlling the contact time between the water and the coffee. A fine grind creates more resistance, slowing down the water for methods like espresso, while a coarse grind allows water to flow and steep freely for methods like French press.
Here’s a simple guide to get you started:
- Coarse Grind (looks like coarse sea salt): Ideal for immersion methods where the coffee steeps for a long time, such as a French Press or for making Cold Brew.
- Medium Grind (looks like regular sand): This is the versatile middle ground, perfect for most automatic Drip Coffee Makers and many Pour-Over methods like the V60 or Kalita Wave.
- Fine Grind (looks like table salt, but a bit finer): required for methods that use pressure or short brew times. A fine grind is necessary for espresso machines, which use high pressure to produce a concentrated shot and that perfect layer of crema. It’s also used for Moka Pots.
- Extra-Fine Grind (like flour or powder): This is almost exclusively for Turkish Coffee, where the grounds are so fine they are consumed with the beverage.
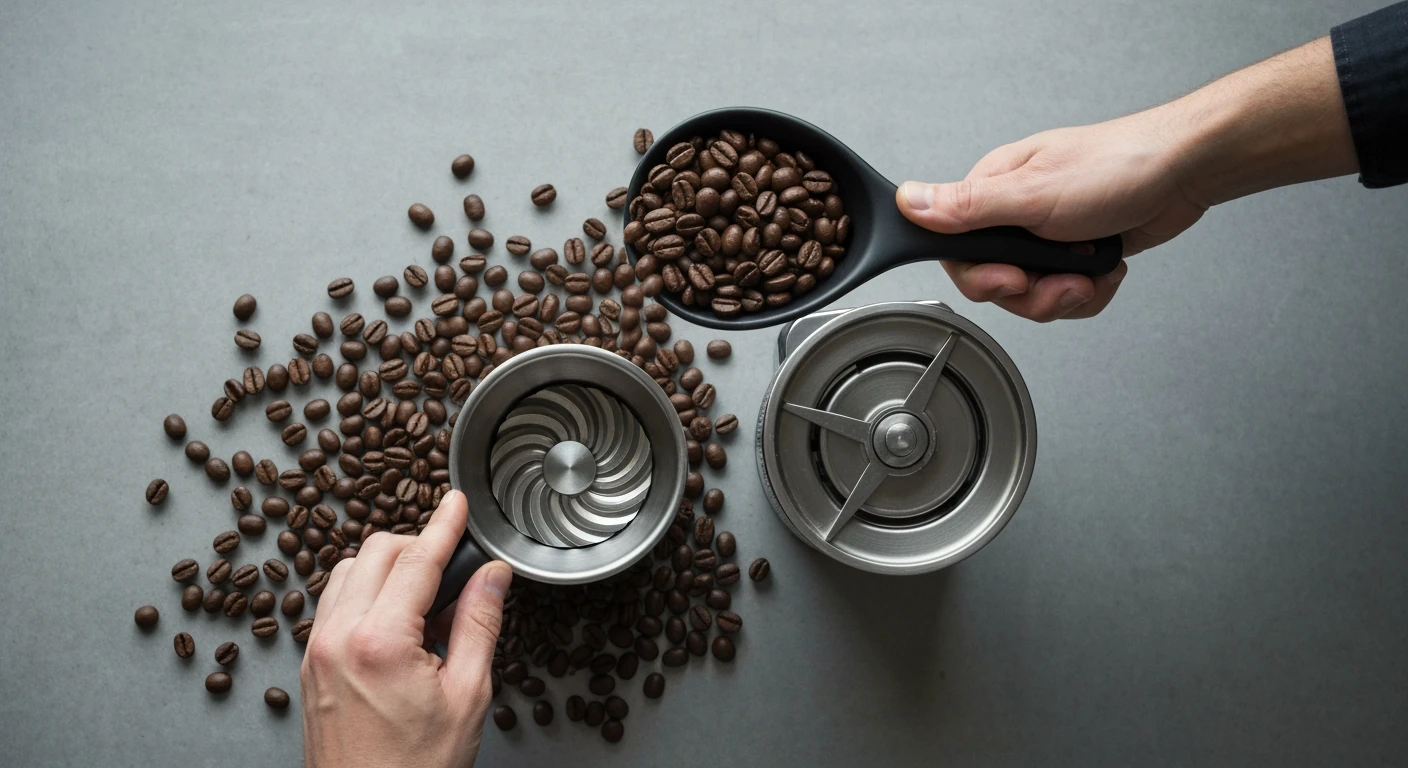
What most people miss is the importance of a consistent grind. A cheap blade grinder smashes beans into uneven chunks and dust, leading to both over and under-extraction in the same cup. Investing in a quality burr grinder—which mills the beans between two revolving abrasive surfaces—is arguably the single best upgrade you can make for your home coffee setup.
Water Wisdom: The Unsung Hero of Your Brew
After obsessing over beans and grind size, it’s easy to forget the most significant ingredient in your cup: water. Your finished coffee is composed of about 98.7% water, so its quality makes a huge difference. What most people miss is that the minerals and chemicals—especially chlorine—in unfiltered tap water can clash with the delicate flavor compounds in coffee, resulting in a flat or even metallic taste. Don’t let bad water ruin good beans.
Just as important as quality is the water’s temperature. The Specialty Coffee Association recommends a brewing temperature between 195°F and 205°F (90°C to 96°C). If the water is too hot, it will scorch the grounds and extract bitter, unpleasant flavors. Too cold, and you’ll get a sour, under-developed brew that tastes weak. Surprisingly, even some of the best cities for young adults to live in have tap water that requires a little help to taste great in coffee.
So, do you need to install a complex reverse osmosis system? Not at all. For most people, simply running tap water through an inexpensive carbon filter pitcher (the kind you keep in the fridge) is enough to remove chlorine and other off-flavors.
It’s a simple fix.
As for temperature, let your boiling kettle rest for about 30 to 60 seconds before you pour. This slight pause usually brings the water down into that ideal brewing window. Paying this level of attention to detail is what separates a decent cup from a memorable one, much like understanding the nuances is key to achieving that perfect golden halo on an espresso shot. While you’re sipping that carefully brewed coffee, you might even apply that same critical eye to your news sources by learning how to unmask media agendas. This focus on fundamentals is what separates good coffee from great coffee, and it doesn’t stop with water.
Coffee oil is notoriously sticky and oxidizes quickly, creating compounds that are actively unpleasant. Simple water rinsing isn’t enough to remove it over the long term.
— Dr. Alan Hirsch, food chemist at Cornell University
| Common Mistake | Why It’s a Problem | The Simple Fix |
|---|---|---|
| Using Stale or Pre-Ground Beans | Coffee loses most of its aromatic compounds within 15 minutes of grinding, leading to a flat, lifeless taste. | Buy fresh, whole beans with a recent roast date and grind them right before brewing. |
| Incorrect Grind Size | Grind size controls extraction. Too coarse leads to sour coffee (under-extracted); too fine leads to bitter coffee (over-extracted). | Match your grind size to your brew method (e.g., coarse for French Press, medium for drip, fine for espresso). |
| Using Bad Water or Wrong Temperature | Tap water chlorine can create off-flavors. Water that’s too hot (scorches) or too cold (under-develops) ruins the taste. | Use filtered water and heat it to 195-205°F (90-96°C). Let a boiling kettle sit for 30-60 seconds before pouring. |
| Eyeballing Measurements (Incorrect Ratio) | Inconsistent ratios of coffee to water lead to unpredictable strength and flavor, making a great cup a matter of luck. | Use a kitchen scale. Start with the “golden ratio” of 1:18 (1g coffee to 18g water) and adjust to your taste. |
| Dirty Brewing Equipment | Built-up rancid coffee oils and mineral scale impart a bitter, stale, and metallic taste to every new brew. | Rinse parts daily after use. Perform a monthly deep clean with a descaler and coffee-specific cleaner. |
Brewing Blunders: Common Missteps and How to Correct Them
Once you’ve mastered water quality, the next frontier is the brewing process itself. Many well-intentioned coffee lovers stumble here, ending up with a cup that’s just okay instead of spectacular. The truth is, a few small adjustments can radically improve your daily brew by avoiding common pitfalls. These aren’t complex techniques; they’re simple habits that separate the amateur from the home barista.
Getting the Ratio Right: The Golden Rule
The single most impactful change you can make to your coffee routine is measuring your ingredients. Eyeballing coffee grounds and water is like trying to bake a cake without measuring cups—you might get lucky, but consistency is impossible. The coffee world has a widely accepted starting point known as the “golden ratio.”
This standard, endorsed by groups like the Specialty Coffee Association (SCA), recommends a ratio of about 1:18. That translates to 1 gram of coffee for every 18 grams (or milliliters) of water. For a standard 12-ounce mug, that’s roughly 20 grams of coffee to 360 grams of water. A simple kitchen scale is your best friend here. It removes all the guesswork.
Does this mean a 1:18 ratio is the only way? not. It’s a starting point, not a rigid law. Some prefer a stronger 1:15 ratio, while others like a lighter 1:20. The key is to start with the golden ratio, taste the result, and then adjust future brews based on your preference. This methodical approach is the only way to achieve repeatable, delicious results every single morning.
Tasting the Difference: Over vs. Under-Extraction
Using the right ratio is the first step toward proper extraction, which is the process of dissolving coffee’s soluble flavors into water. When this goes wrong, you get either over-extraction or under-extraction. Think of it like toasting bread: under-do it and it’s flimsy and bland; over-do it and it’s burnt and bitter. The same principle applies to coffee.
Under-extracted coffee tastes sour, acidic, and sometimes salty. This happens when the water doesn’t have enough time or isn’t hot enough to pull out the deeper, sweeter flavors from the grounds. It’s a sign that your grind might be too coarse or your brew time too short. The coffee feels thin and unsatisfying in your mouth.
Conversely, over-extracted coffee is unpleasantly bitter, astringent, and hollow, leaving your mouth feeling dry. This is the result of the water pulling too much from the coffee grounds, including undesirable compounds that only emerge late in the brewing process. This is often caused by a grind that’s too fine or a brew time that’s excessively long. While some bitterness is desirable, especially in espresso, true over-extraction strips away all nuance. Mastering the rich foam on top is a different skill, almost an art form in itself, much like achieving the perfect espresso crema.
The Forgotten Step: Why Cleanliness Counts
You could have the best beans, perfect water, and a flawless ratio, but if your equipment is dirty, your coffee will suffer. This is perhaps the most overlooked aspect of home brewing. Old coffee grounds and oils build up inside your brewer, portafilter, and carafe. These leftover residues quickly turn rancid.
What most people miss is that these rancid oils impart a stale, bitter, and almost metallic taste to every new batch of coffee you brew. According to a survey by Home Appliance Digest, a staggering 43% of coffee maker owners admit to deep cleaning their machines less than twice a year. Is it any wonder so many people complain about their home coffee tasting “off”? The solution is simple but requires discipline. Maintaining your gear is as foundational as understanding the rules for other important life tasks, like grasping the core concepts for the U.S. citizenship exam.
Daily Rinse vs. Deep Clean
Cleaning your coffee gear doesn’t have to be a monumental chore if you break it down into two simple categories: daily maintenance and periodic deep cleans.
- Daily Rinse: This is non-negotiable. Immediately after brewing, rinse your French press, pour-over dripper, or filter basket with hot water. Dump the used grounds and wipe everything down. For auto-drip machines, wash the carafe and filter basket with soap and water. This five-minute task prevents the initial buildup of those flavor-destroying oils.
- Deep Clean: Every few weeks (or monthly, at a minimum), you need to descale and degrease your equipment. For auto-drip machines, this means running a cycle with a specialized coffee machine cleaning solution or a 50/50 vinegar-water mix to remove mineral deposits (scale). For all equipment, soaking components in a product like Cafiza effectively dissolves stubborn coffee oils. Dr. Alan Hirsch, a food chemist at Cornell University, explains, “Coffee oil is notoriously sticky and oxidizes quickly, creating compounds that are actively unpleasant. Simple water rinsing isn’t enough to remove it over the long term.”
Failing to clean your gear is like cooking a fresh meal in a dirty pan from last night. No matter how good your new ingredients are, the old, burnt flavors will always find a way to spoil the dish.
Storage Secrets: Keeping Your Coffee Fresh
You’ve just bought a beautiful bag of beans, and the aroma is intoxicating. But what happens after you open it? The truth is, how you store your coffee is just as critical as how you brew it. Many people unknowingly sabotage their morning cup before the water even heats up.
Proper storage is your first line of defense against a dull, lifeless brew. It is the difference between a rich, flavorful experience and a cup that tastes like, well, disappointment.
The Enemy Triad: Air, Light, and Heat
Think of your coffee beans as tiny, fragile flavor capsules. Three primary culprits are working tirelessly to rob them of their character: oxygen, UV light, and heat. Oxygen causes staling through a process called oxidation, which degrades the delicate oils and aromatics that give coffee its wonderful taste. It’s a surprisingly fast process. Research from the Specialty Coffee Association suggests that ground coffee can lose a significant portion of its aromatic compounds within minutes of being exposed to air.
Light and heat act as accelerators in this process. Leaving a bag of coffee on a sunny countertop is like putting a fast-forward button on flavor decay. The heat speeds up the chemical reactions of oxidation, while UV rays break down the coffee’s complex organic compounds. So, is that clear glass jar on your counter really the best idea? It might look nice, but it’s actively working against your quest for a perfect cup.
Best Containers and Locations
The ideal home for your coffee is an opaque, airtight container. This setup directly combats the enemies of freshness by blocking out both light and air. Materials like ceramic or non-reactive metal are excellent choices. Avoid keeping coffee in its original paper bag once opened unless you can place the entire bag within a larger airtight container — a simple trick that works wonders.
As for location, a cool, dark place like a pantry or cabinet is perfect. This brings us to a common debate: the refrigerator or freezer. While it seems logical, storing coffee in the fridge is a definite no. Coffee is porous and will absorb odors from surrounding foods (garlic-flavored coffee, anyone?). The freezer is slightly more nuanced. It can preserve beans for longer periods, but there’s a major catch. When you remove the beans, condensation forms instantly, introducing moisture that damages the oils and can ruin the flavor. Getting this right can feel as complex as sorting out state vs. federal tax obligations, but the basic rule is: keep it simple and dry.
If you do choose to freeze beans, do it in small, vacuum-sealed batches and only remove what you need for the week. Once a batch is thawed, never refreeze it. For most people, the best practice is simply to buy smaller quantities of fresh beans more frequently. That way, you’re always working with coffee at its peak, unlocking all the details that make the art of espresso crema so satisfying. Your morning self will thank you for it.
Beyond the Basics: Advanced Tips for a Superior Sip
Once you have perfectly fresh beans, the next frontier is refining your technique. Moving from eyeballing your measurements to using precise tools can feel like a big leap, but the results speak for themselves. The most underrated factor here is consistency, which is nearly impossible to achieve without a little help. It’s the difference between a good cup and a great one.
Let’s start with a step many home brewers skip: the bloom. This simple act of pre-infusion involves pouring a small amount of hot water over your coffee grounds—just enough to wet them—and waiting 30 to 45 seconds before starting the full pour. But why does this short step matter so much? Jessica Chen, a three-time U.S. Barista Championship finalist, states that “blooming allows trapped CO2 to escape the grounds, preventing sour, uneven extraction and unlocking the bean’s true aromatic potential.” Think of it like letting bread dough rise before baking; you’re giving the ingredients a moment to prepare for the main event (and it’s surprisingly fun to watch).
A digital coffee scale is your best friend in this process. It allows you to nail not only the amount of water for the bloom but also the total water-to-coffee ratio for every brew. A common starting point recommended by professionals is a 1:16 ratio, meaning 1 gram of coffee for every 16 grams of water. This precision removes the guesswork. You get the same strength every single time.
Ultimately, these guidelines are merely a starting point for your own experimentation. Perhaps you prefer a slightly stronger 1:15 ratio, or you find your dark roast tastes better with a shorter bloom. Just as you might explore different places before finding the U.S. city with your perfect vibe, the joy is in the journey of discovering what you love. Adjust one variable at a time—grind size, water temperature, or brew time—and taste the difference. This hands-on approach is how you master everything from a simple pour-over to achieving that perfect layer of silky espresso crema, turning your kitchen into a personal cafe.
Your Perfect Cup is a Journey, Not a Destination
Mastering these fundamentals isn’t about chasing a single, universally “perfect” cup of coffee defined by someone else. Instead, it’s about gaining the knowledge to create *your* perfect cup. Think of the golden ratio, water temperature, and grind size not as rigid rules, but as dials on a control panel. Now that you understand what each dial does, you have the power to adjust them, to experiment, and to tailor every brew to your personal taste. The goal is no longer to avoid mistakes, but to confidently explore the vast spectrum of flavors that coffee has to offer. So, with this new understanding in hand, what’s the first variable you’ll intentionally change tomorrow morning?
Frequently Asked Questions About Coffee Brewing
How long can I store coffee beans after opening the bag?
For optimal freshness, you should aim to use your coffee beans within two to three weeks of opening the bag. Store them in an opaque, airtight container at room temperature to protect them from their main enemies: air, light, heat, and moisture.
Does grinding coffee right before brewing really make a big difference?
Yes, it makes a massive difference. Coffee can lose up to 60% of its aromatic compounds within 15 minutes of being ground, which drastically dulls the flavor and aroma. Grinding just before you brew is one of the most impactful upgrades you can make to your routine.
What’s the ideal water temperature for brewing coffee?
The ideal water temperature is between 195°F and 205°F (90°C to 96°C). Water hotter than this will scorch the grounds, creating a bitter taste, while cooler water will result in a sour, under-extracted cup. A simple trick is to let a boiling kettle rest for about 30-60 seconds before pouring.
Can I use regular tap water for brewing, or do I need filtered water?
While you can use tap water, filtered water is highly recommended for a cleaner taste. Tap water often contains chlorine and other minerals that can react with the coffee’s delicate compounds, resulting in off-flavors. A simple carbon filter pitcher is usually sufficient to improve water quality.
How often should I clean my coffee maker?
You should perform two types of cleaning. A daily rinse of removable parts like the carafe and filter basket is required to prevent immediate oil buildup. you should perform a deep clean every month to descale mineral deposits and degrease rancid oils from the internal components.